If your app needs one shared set of data for everyone, CloudKit public records can be a simple backend.
This article starts with a practical question: what if you want to save values on the server and let the app fetch them later without building your own service first? Examples include product prices, a list of published articles, or a small app-managed catalog that should stay editable after release.
That is where CloudKit public database fits. Records stored there can be read by every user of the app, so
it works well for shared content. It does not replace every backend, but for small Apple-platform projects it can be a
very pragmatic place to start.
The tradeoff is simple: easy Apple-hosted storage for shared records, but only inside CloudKit-supported environments.
The article lists the main benefits clearly. CloudKit is an Apple-managed cloud service, it can persist data across app reinstalls, and it supports private, shared, and public databases. In the public case, any user of the app can fetch the same records.
The constraints are just as important. Users need to be online, CloudKit has quotas and size limits, and this stack is
aimed at Apple platforms plus CloudKit JS on the web rather than a fully cross-platform backend.
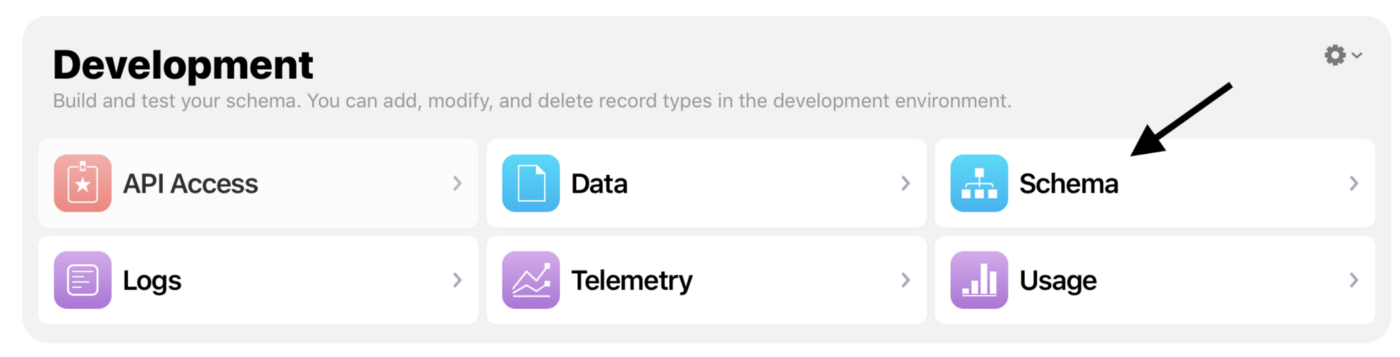
This article starts after capability setup: open CloudKit Dashboard, select the app, and begin in the schema editor.
This article points back to an earlier guide for the Xcode capability and container setup. From there, this tutorial
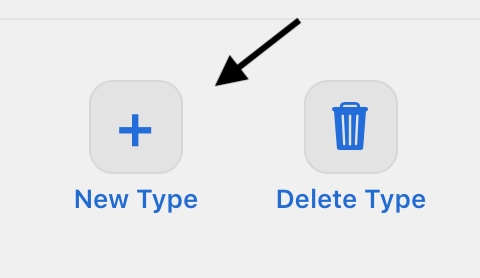
resumes inside CloudKit Dashboard: choose the app, open Schema, and use New Type to
start defining the public data structure.
The example schema is intentionally small: one record type for a price item, then fields for name and price.
The tutorial uses a straightforward catalog example. Create a new record type named Price, then add two
fields to it. The goal is not complexity. It is to show the complete end-to-end flow with something small enough to reason
about quickly.
Record Type: Price
- itemName: String
- itemPrice: Int64

Example:
- itemName = "Pet house"
- itemPrice = 3000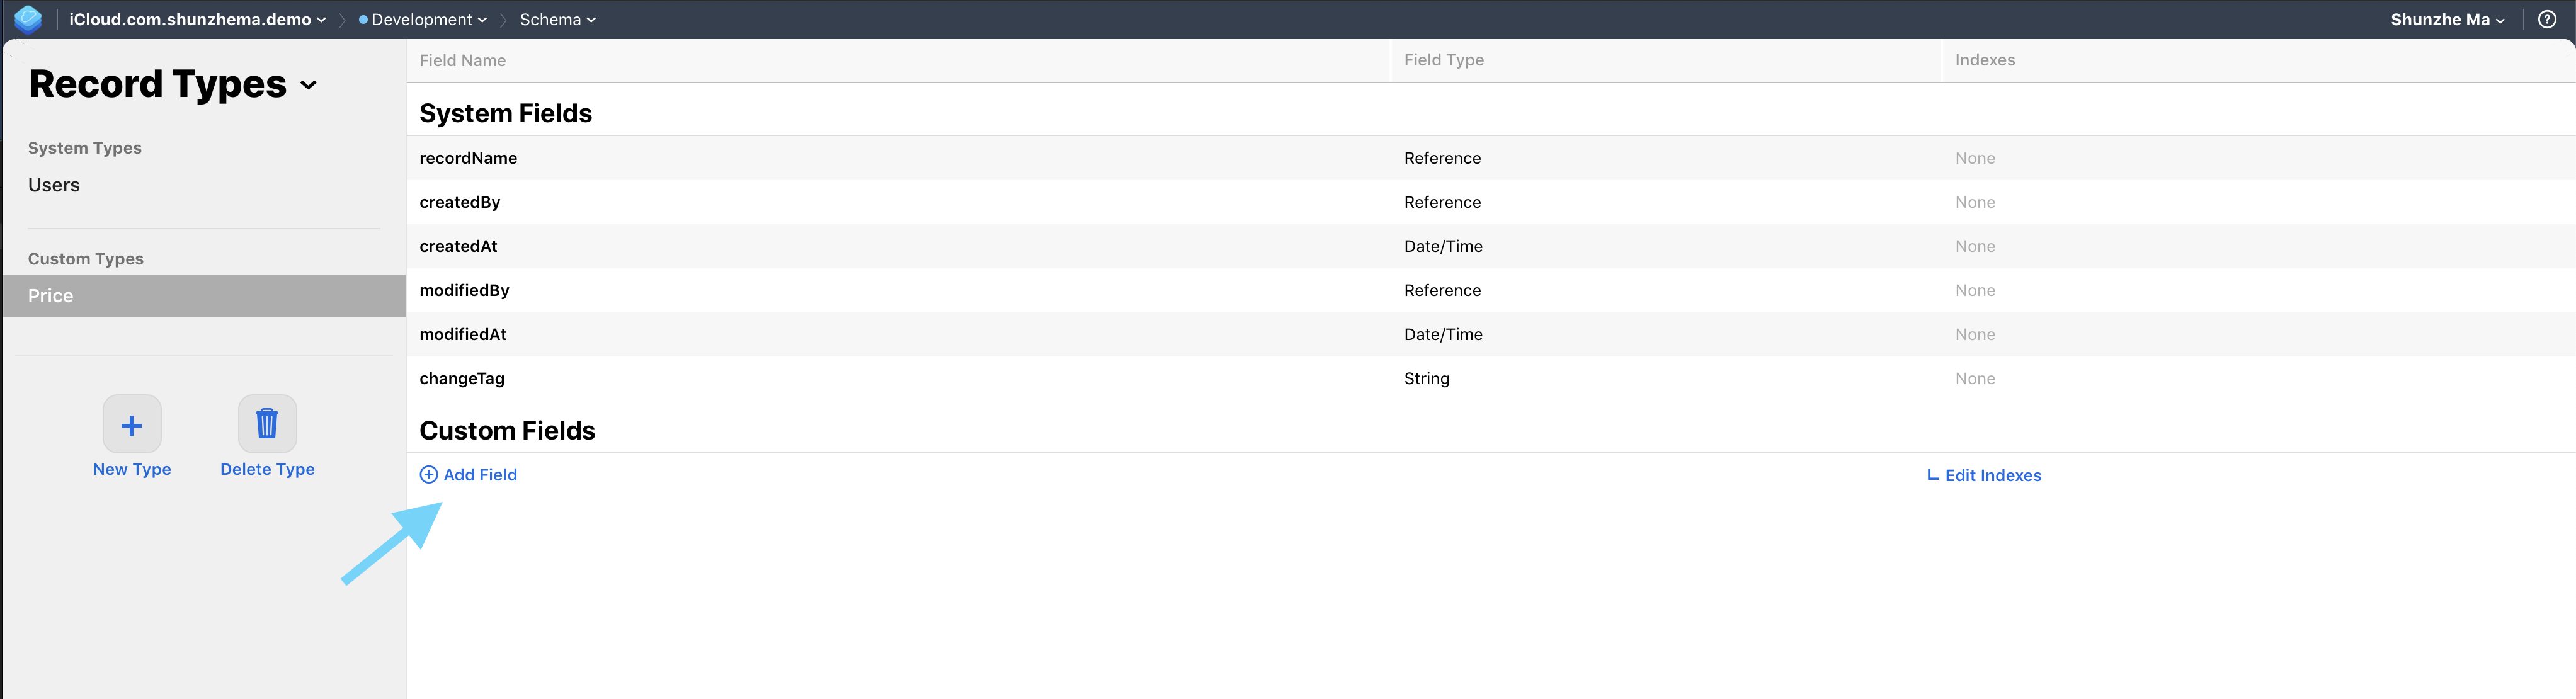
Price record type, then add the fields you want the app to read later.
After that, make the record type queryable in the dashboard. The article calls out one detail that matters a lot for public
browsing in the dashboard: add indexes, then save the schema changes. The interface often auto-selects
recordName as a query index, which is enough for this kind of inspection workflow.

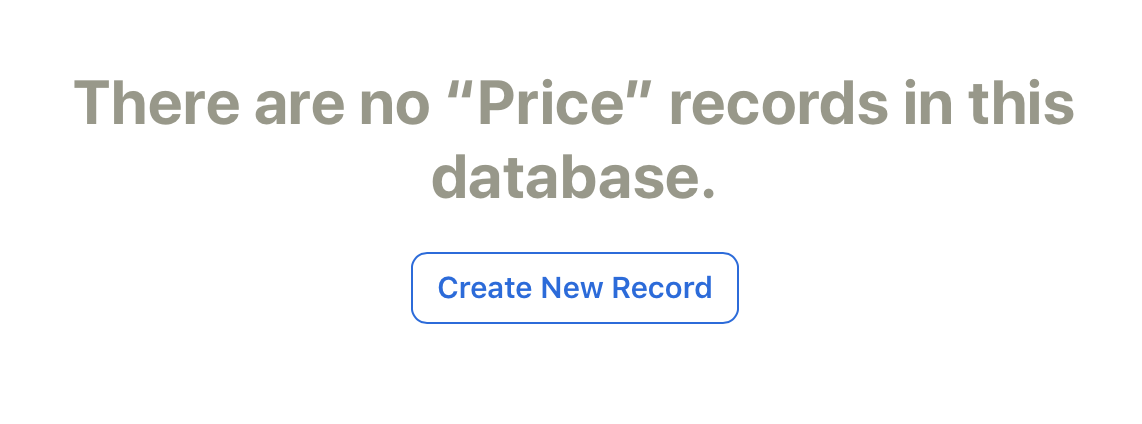
Once the schema exists, switch to the public database, create a sample record, save it, and keep its record ID.
The article's next step is hands-on: open the Data view, switch the left-side database selector to
Public Database, choose the Price type, and create a real sample record. The example uses values
like Pet house and 3000.

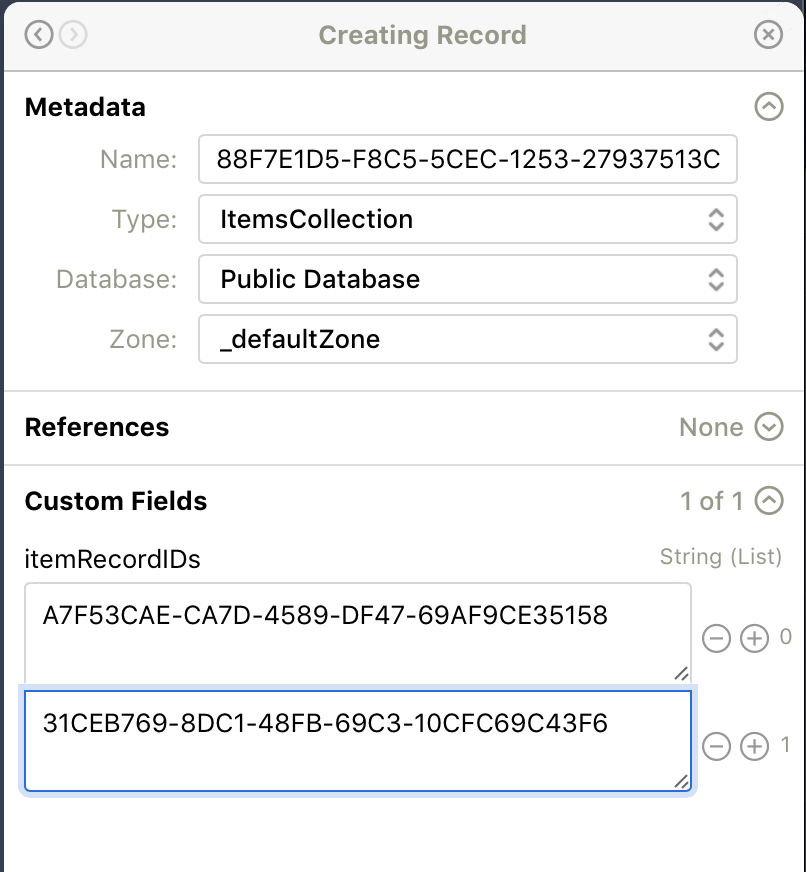
recordName because the app will fetch by that ID.A second record type can work as a lightweight app-owned index that points to multiple item record IDs.
The original tutorial adds one more pattern that is useful for small catalog apps: create another record type whose job is to store a list of item record IDs. That lets the app fetch one top-level collection record, decode the stored IDs, and then fetch each item record from there.
In the article's version, the collection record stores an array field named itemRecordIDs. It is a simple
indirection layer, but it gives you one app-level handle that can be updated later without hard-coding every public item ID
in the client.

The app-side fetch flow is just public database plus a record ID, then field extraction from the fetched record.
The first function fetches one item record directly by its recordName. This is the same shape shown in the
article, with only the sample strings translated to English.
import CloudKit

func fetchItem(itemID: String) {
    let db = CKContainer(identifier: "iCloud.com.[your-app-container-name]").publicCloudDatabase
    let recordID = CKRecord.ID(recordName: itemID)

    db.fetch(withRecordID: recordID) { obtainedRecord, error in
        if let itemName = obtainedRecord?.value(forKey: "itemName") as? String,
           let itemPrice = obtainedRecord?.value(forKey: "itemPrice") as? Int64 {
            print("Item Name \(itemName) with price \(itemPrice)")
        }
    }
}
In the tutorial, calling the function with the saved record ID prints the single item immediately:
fetchItem(itemID: "31CEB769-8DC1-48FB-69C3-10CFC69C43F6")

// Item Name Pet house with price 3000
The second function fetches the collection record, reads its itemRecordIDs array, and then loops over those
values to fetch each item one by one.
func fetchCollections() {
    let appCollectionID = "88F7E1D5-F8C5-5CEC-1253-27937513CB46"
    let db = CKContainer(identifier: "iCloud.com.[your-app-container-name]").publicCloudDatabase
    let recordID = CKRecord.ID(recordName: appCollectionID)

    db.fetch(withRecordID: recordID) { fetchedCollection, error in
        if let itemIDs = fetchedCollection?.value(forKey: "itemRecordIDs") as? [String] {
            for itemID in itemIDs {
                fetchItem(itemID: itemID)
            }
        }
    }
}
// Example output
Item Name Plush toy with price 3500
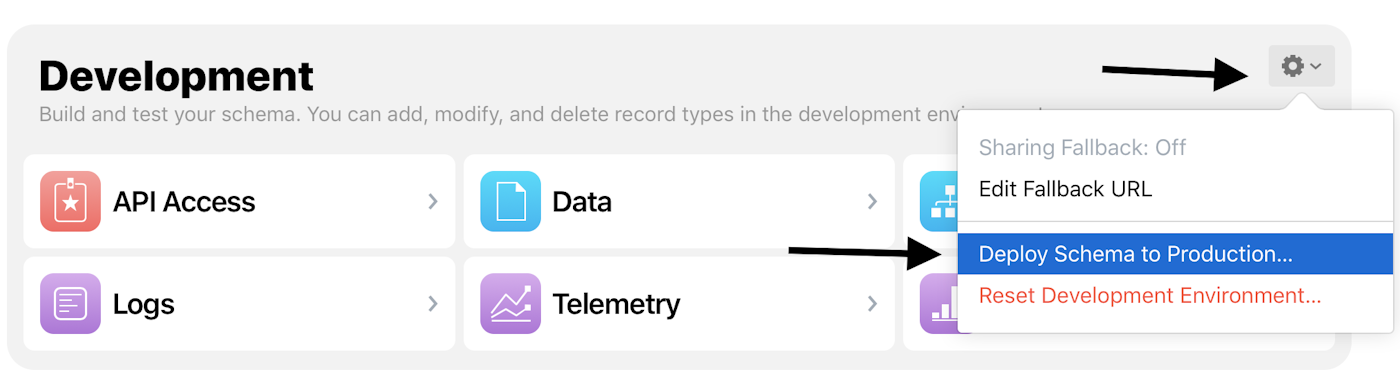
Item Name Pet house with price 3000Before release, deploy the schema from development to production and remember that production needs its own records too.
This is the operational step people skip most often. The article explicitly reminds readers that the iCloud development database is not the same as the production environment used by App Store builds. Schema changes need to be deployed, and production still needs real records of its own.
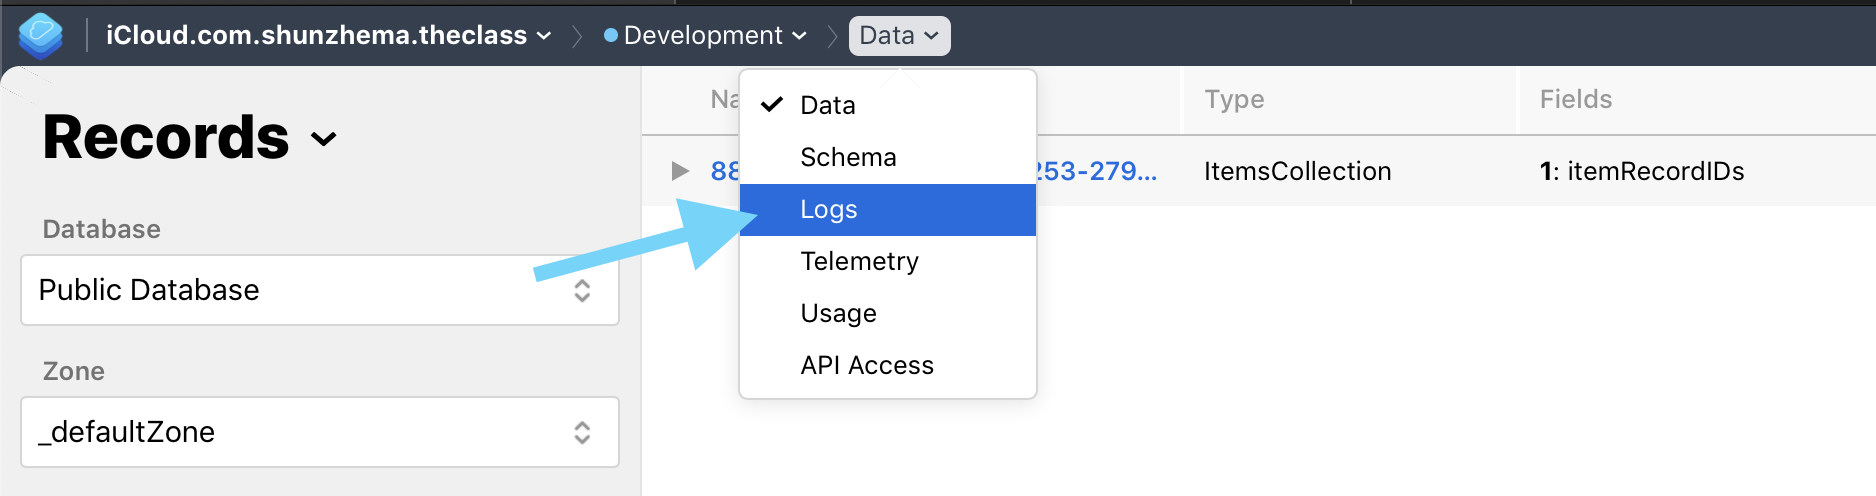
CloudKit Dashboard logs and explicit environment switching give you the fastest signal when records are not where you expect.
The post closes with two practical debugging paths. First, use the dashboard's top menu to open Log and watch
what CloudKit is doing. Second, when you absolutely need to test against production, add the environment key to the
app's entitlement file.
<key>com.apple.developer.icloud-container-environment</key>
<string>Production</string>
This article adds one caution here: if the app also uses Core Data plus CloudKit mirroring, forcing
the environment this way may not be the right long-term setup because it can complicate how the local database schema stays
aligned with CloudKit.
CloudKit public database works best when you treat it as a small shared data layer, not as a magical black box.
The durable lesson from this tutorial is straightforward: define a clear schema, add query indexes, create real public records, save the record IDs you intend to fetch, optionally group them behind one collection record, and never forget that development and production are separate environments.
If your app only needs a compact shared catalog for Apple platforms, that is often enough to avoid building a custom backend much earlier than you need one.