This article is useful because it is not a general CloudKit theory article. It is a migration checklist for an app that already exists.
If your app already stores data in Core Data, you do not need to rebuild the persistence
layer from scratch to add device-to-device sync. The article shows the minimum project and model changes
needed to move from a local NSPersistentContainer setup toward a
CloudKit-backed one.
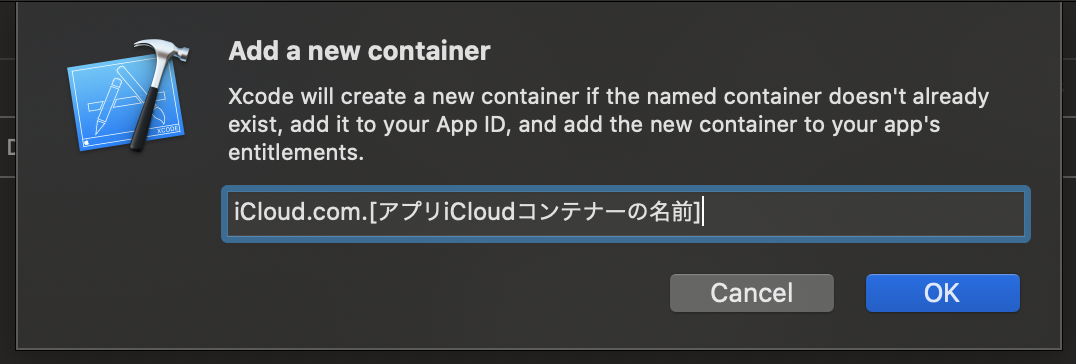
Start in the Xcode target settings: enable the iCloud capability, turn on CloudKit, and make sure the app has a container to sync against.
The first part of this article stays entirely inside the target's
Signing & Capabilities area. Turn on the iCloud capability, enable
CloudKit, then either choose an existing container or create a new one if the app does not
have one yet.
iCloud capability on the target first.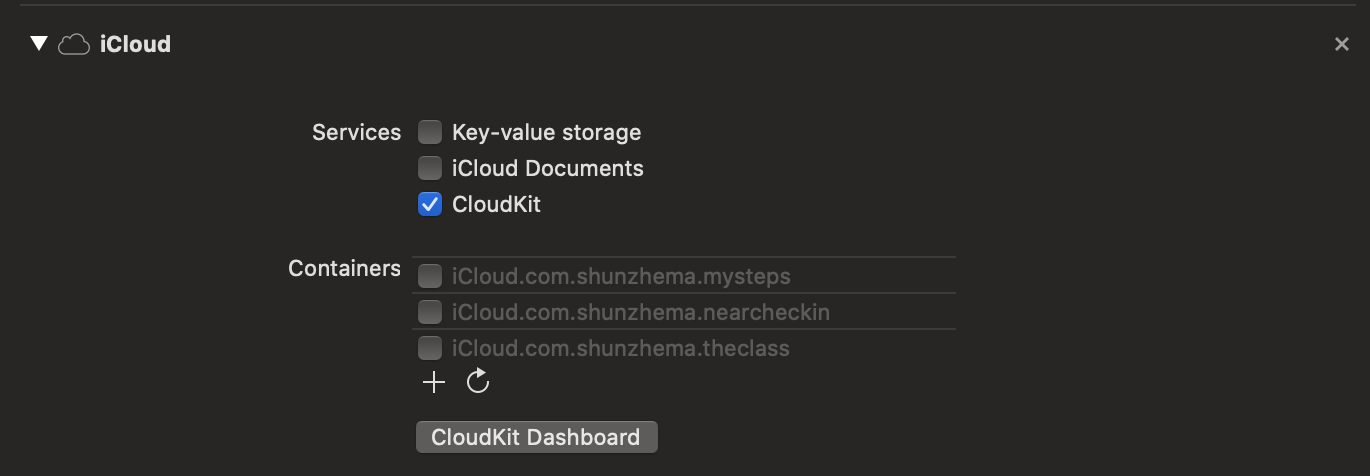
CloudKit checkbox inside the iCloud capability.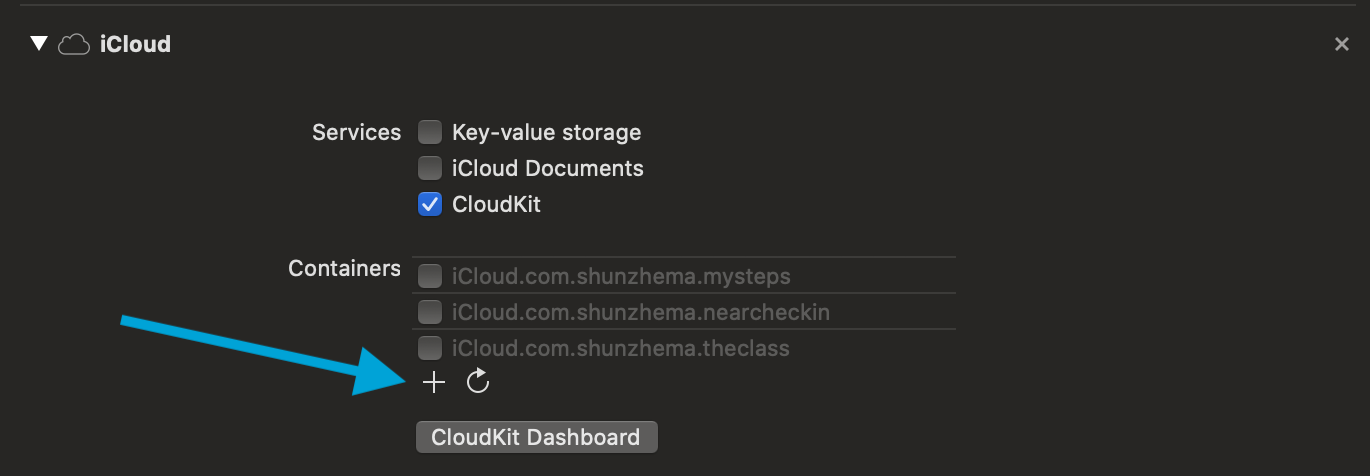
The Core Data model itself also has to opt into CloudKit, otherwise the persistence stack change alone is not enough.
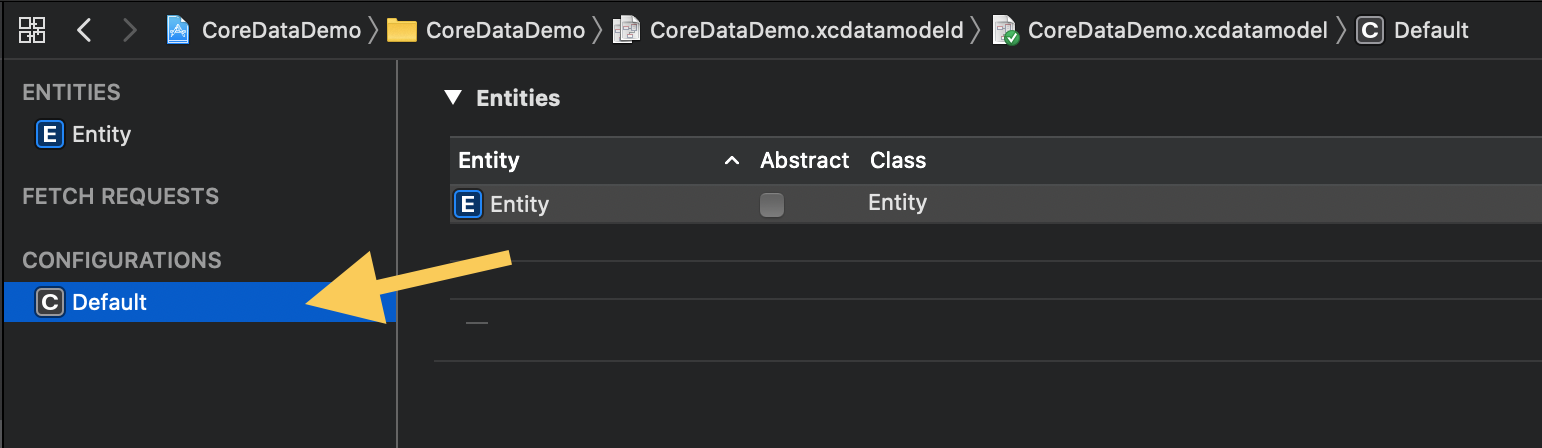
After the target capability is ready, the article moves into the
.xcdatamodeld file. Open the model, select the right configuration, and mark it as
Used with CloudKit. This step is easy to miss because it is not in the same place as the
target capability switches, but it is part of the same migration.
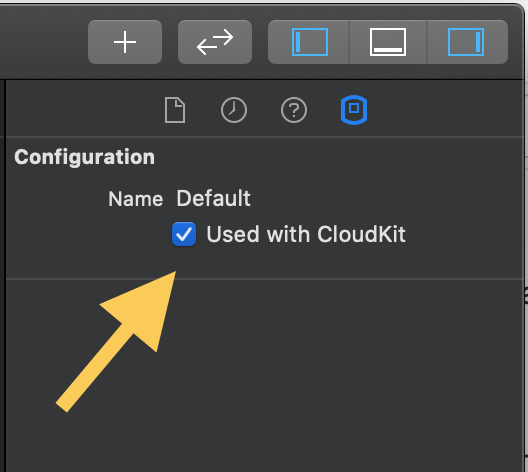
Used with CloudKit for that configuration.In code, the migration is intentionally small: replace the local persistent container type with the CloudKit-backed one.
The article calls out a practical rule: anywhere the app constructs an
NSPersistentContainer, switch that to NSPersistentCloudKitContainer instead.
In many apps that means a single persistence bootstrap in AppDelegate.swift or a dedicated
persistence controller file.
let container = NSPersistentContainer(name: "CoreDataDemo")let container = NSPersistentCloudKitContainer(name: "CoreDataDemo")Testing is not the end. The part people forget is deploying the CloudKit development schema to production.
This article makes this warning very explicit. During development, CloudKit can infer and populate the development schema automatically while you run the app and create data. That does not mean production users are ready. You still need to open the CloudKit dashboard, find the app's container, and deploy the development database schema to production.
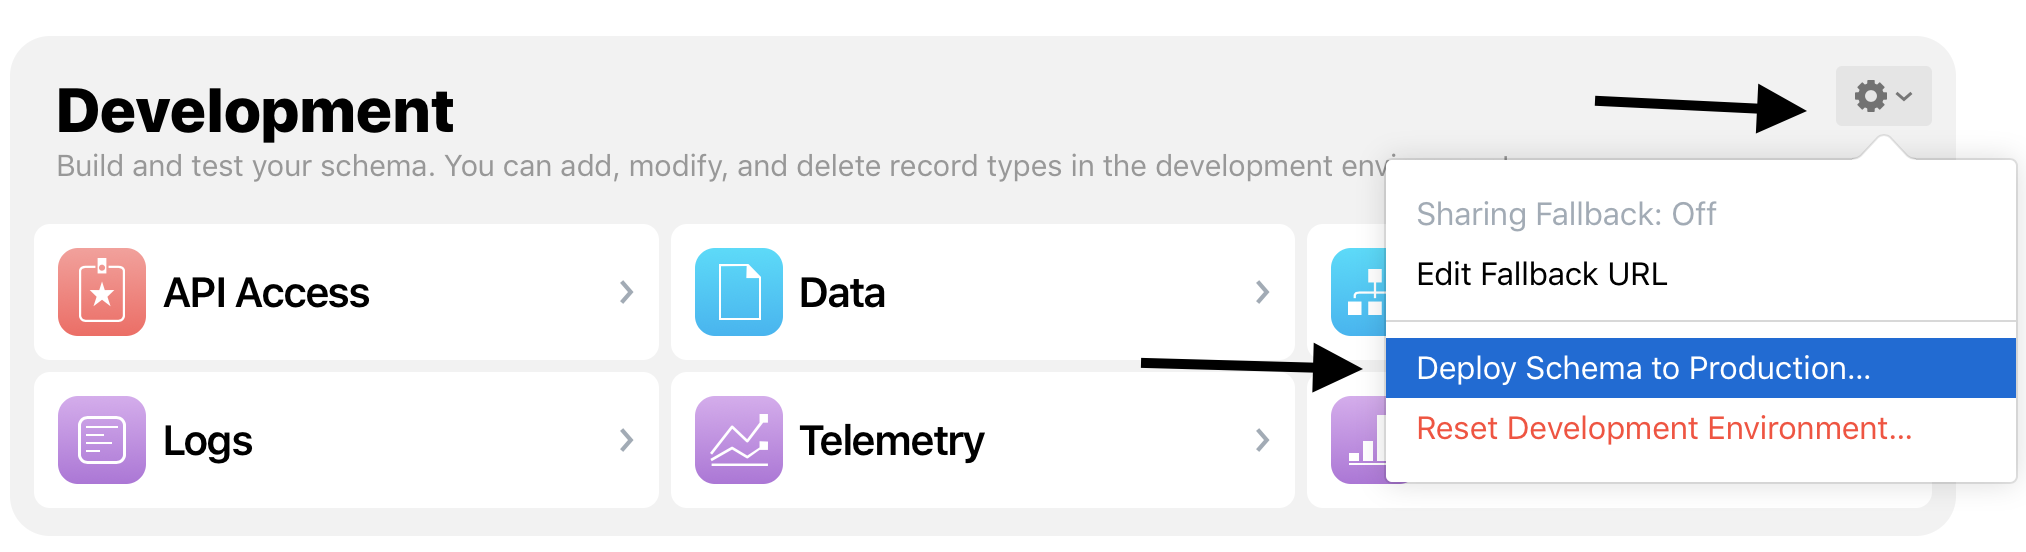
That final step is the real operational boundary between "it works on my device" and "it works for shipped users." This article treats it as the most important warning in the whole tutorial, and that is the right emphasis.
The article still holds up because it reduces Core Data plus CloudKit adoption to a short, concrete checklist.
Enable the capability. Pick or create the container. Mark the model as CloudKit-backed. Switch to
NSPersistentCloudKitContainer. Generate some development data. Then deploy the schema to
production. If you already have a Core Data app, that sequence is the durable takeaway from the original
post.