This article is really about understanding what Xcode localizes automatically, what it stores in files, and where the workflow still needs manual cleanup.
Newer Xcode releases automate more of this than older ones did, but the older workflow still teaches the
moving parts clearly. Once you understand the base language, Base internationalization,
storyboard-generated strings, and Localizable.strings, localization bugs become much easier
to diagnose.
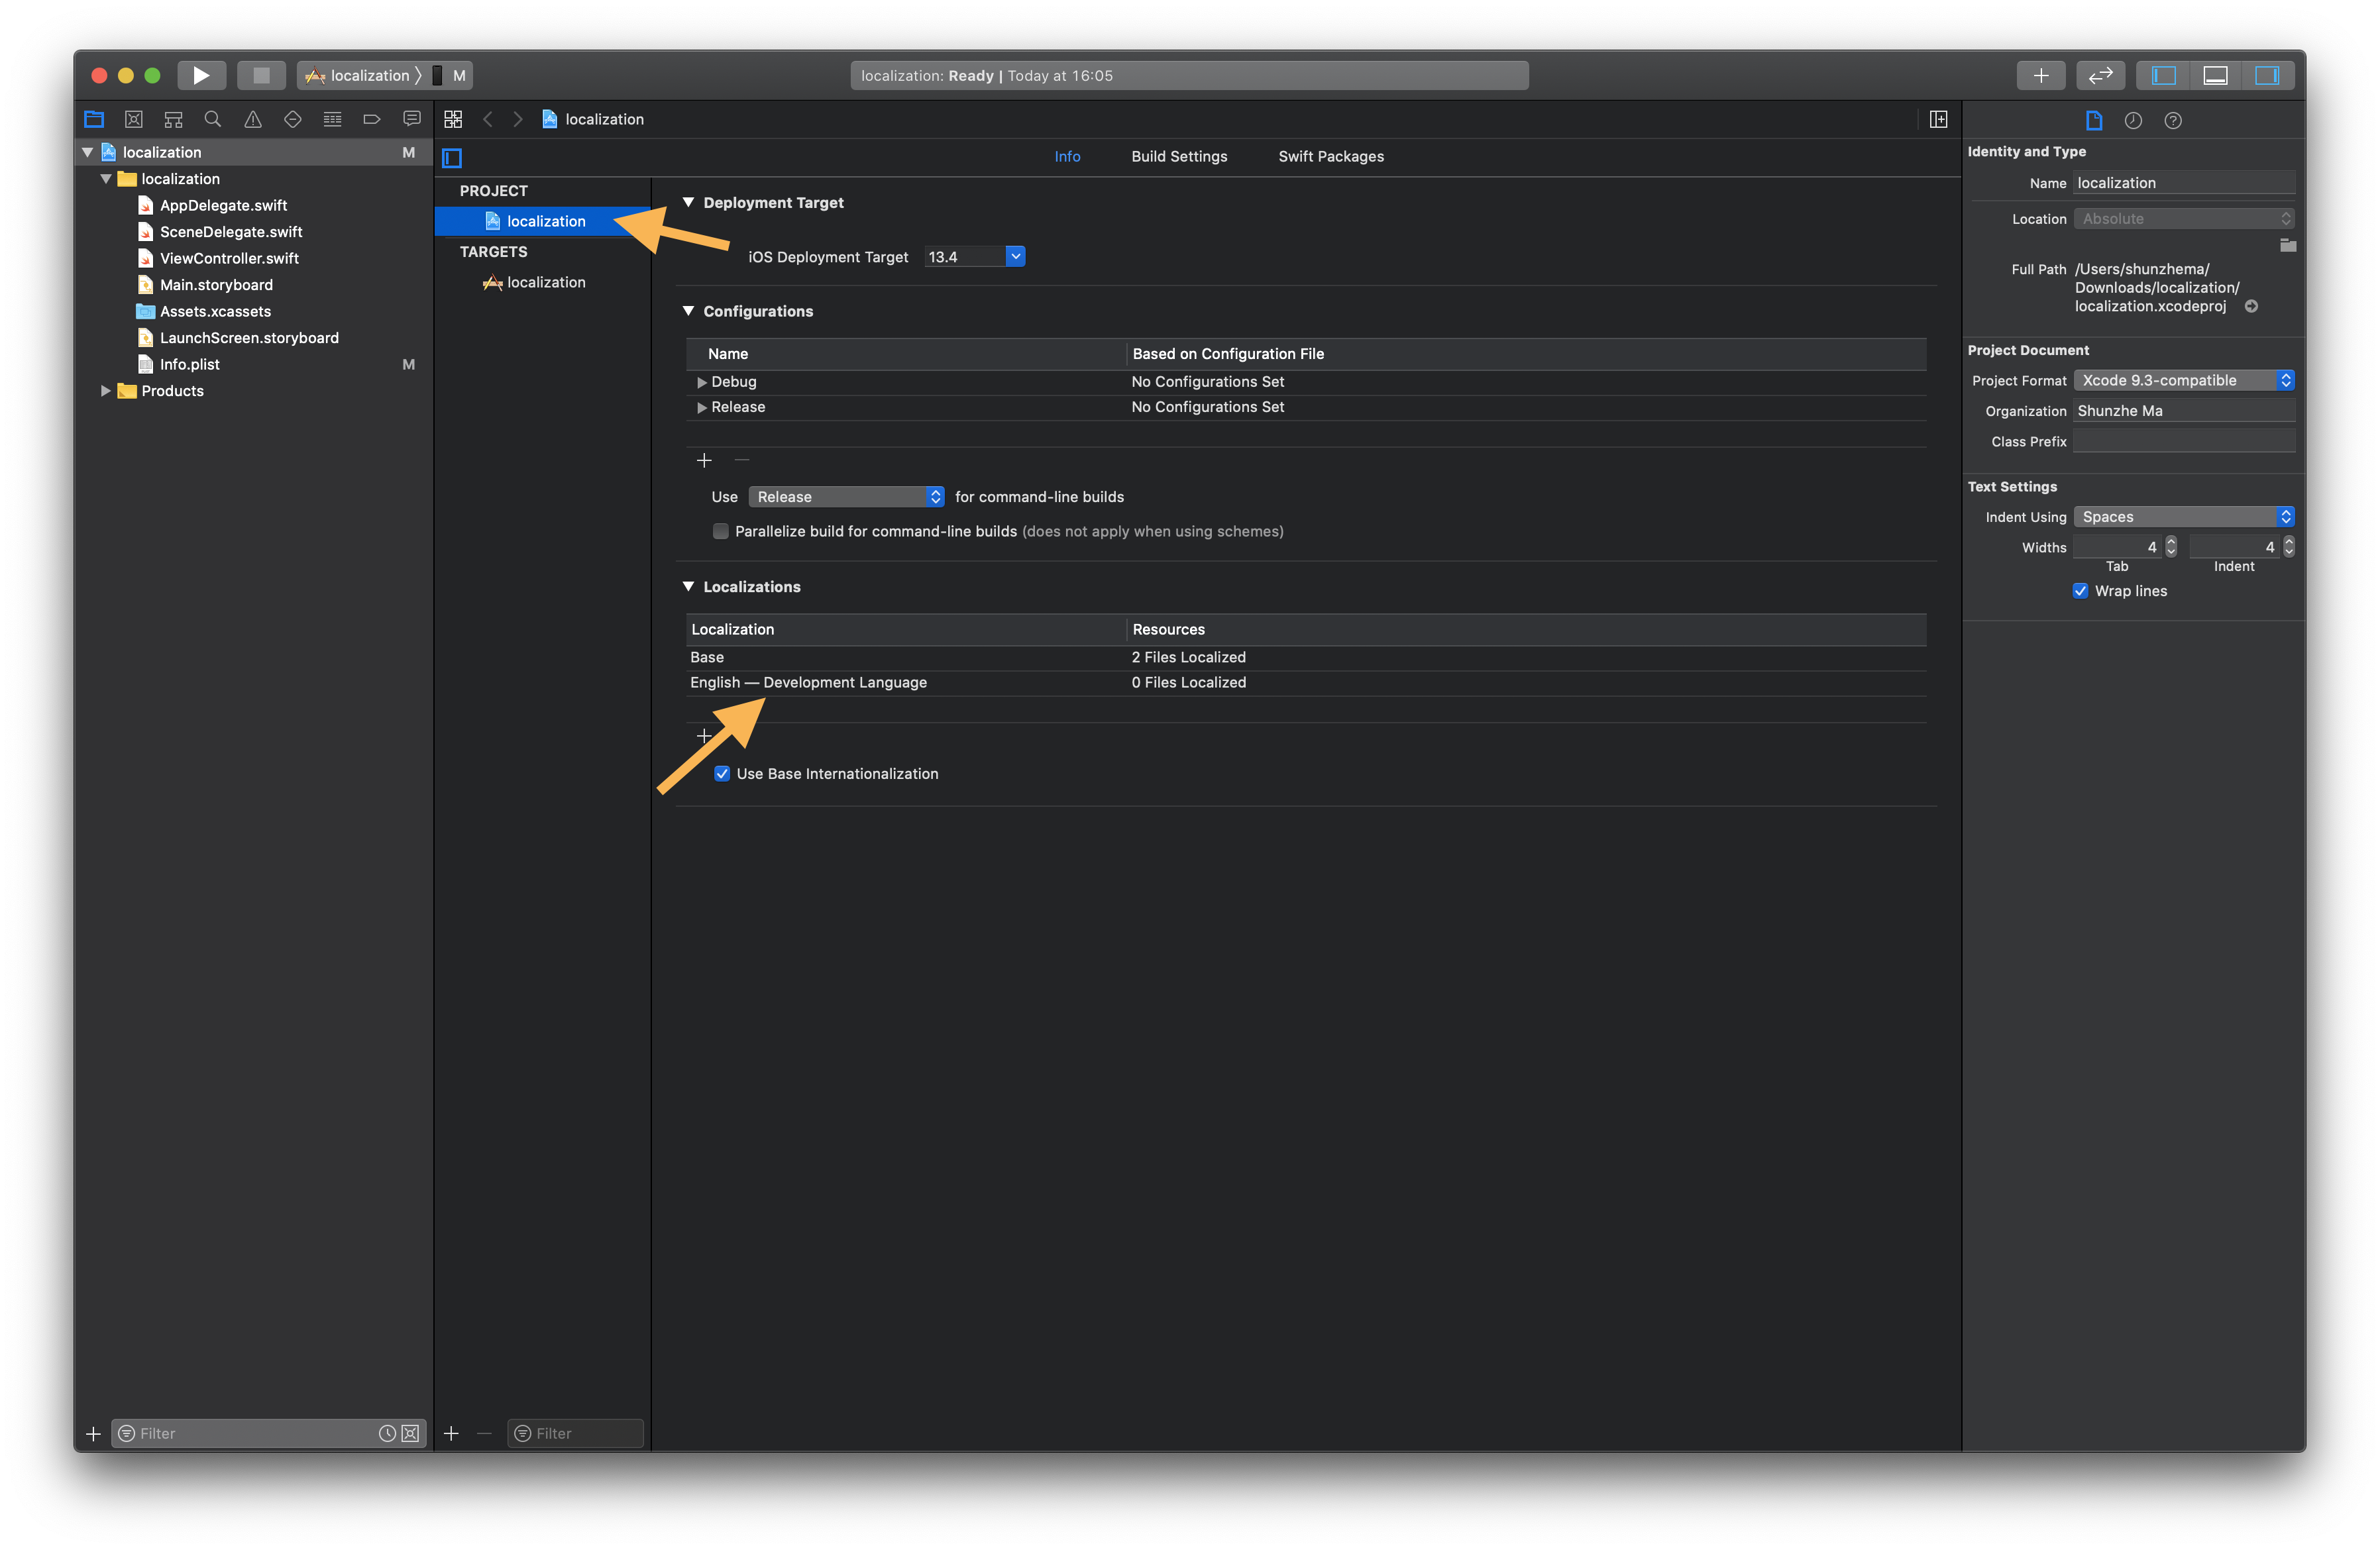
Start by checking the project's development language, because every later localization file inherits that assumption.
In Xcode, the project-level localization section tells you whether the app is currently treated as
Japanese, English, or something else. If an older project has the wrong base language, this article
shows a manual fallback: close Xcode, open project.pbxproj, and update the language metadata.
developmentRegion = en;

knownRegions = (
    en,
    Base,
);
The article's fix is simply to change those values to match the real source language, for example:
developmentRegion = ja;

knownRegions = (
    ja,
    en,
    Base,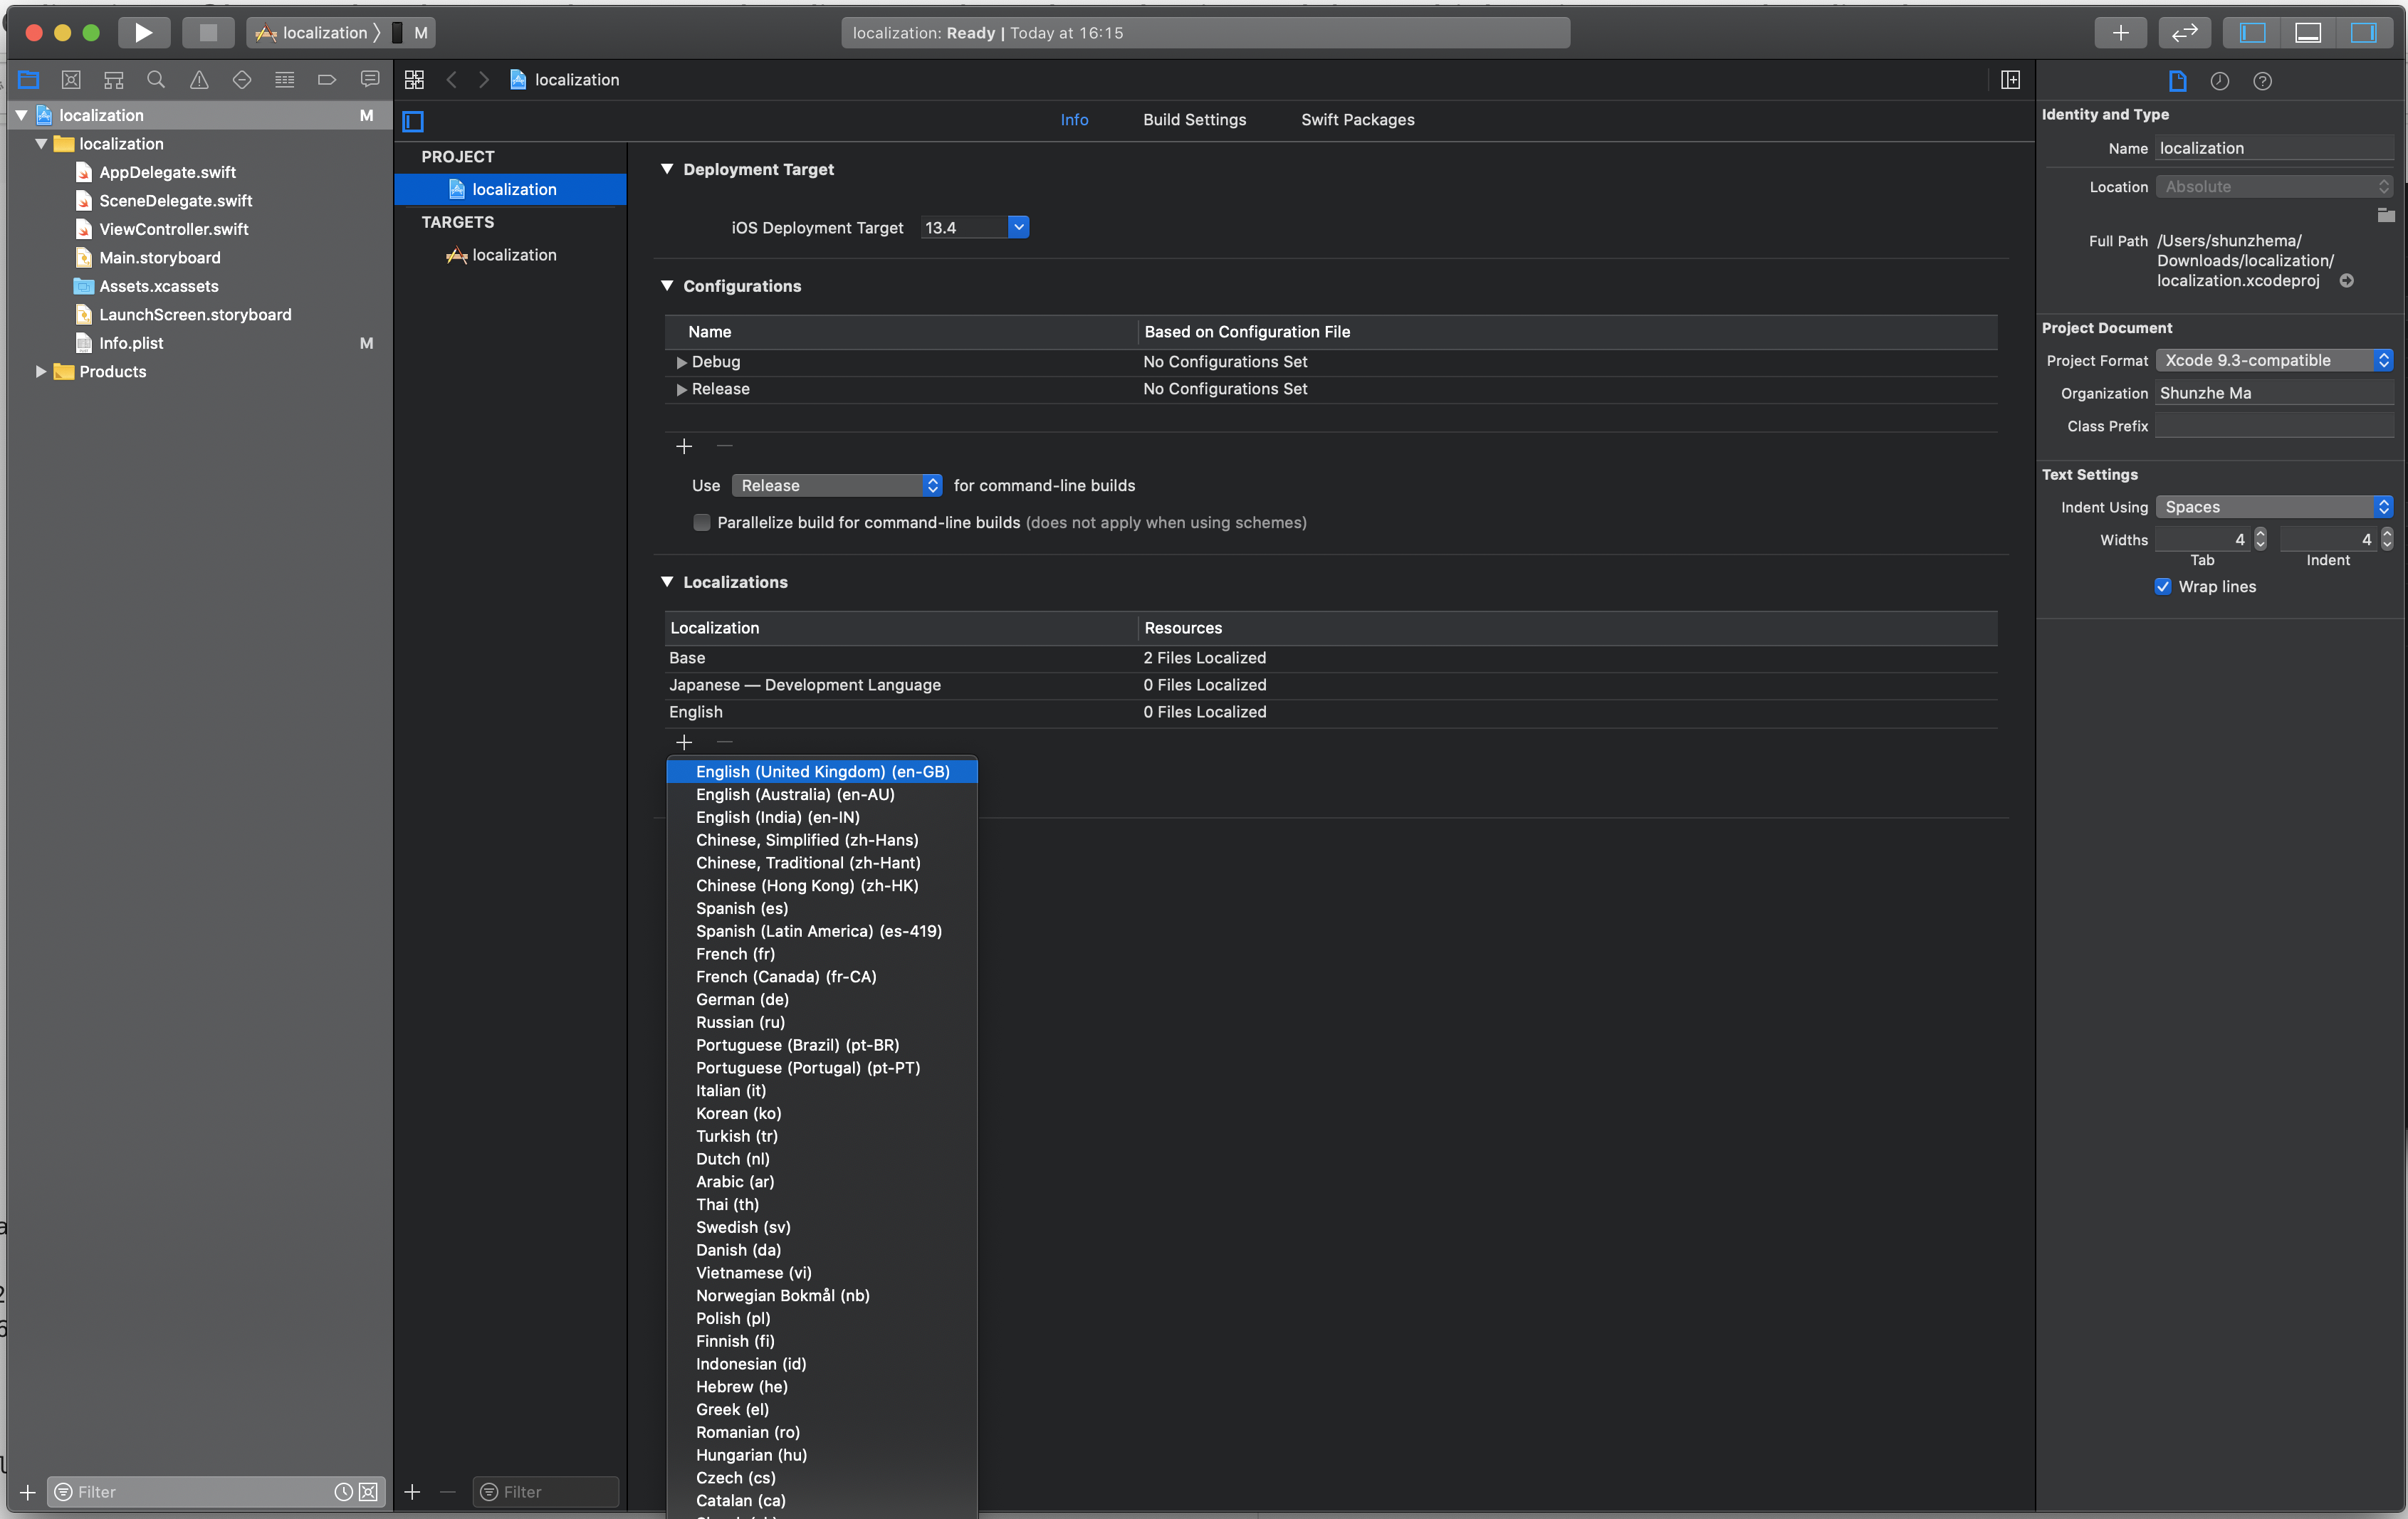
);After the base language is correct, add target languages from the project localization panel and keep Use Base Internationalization enabled.
This is the normal Xcode path: choose the project, open the Info area, and add another
language from the Localizations list. The key setting is Use Base
Internationalization, because it lets Xcode treat one storyboard as the structural source while the
localized text lives in companion files.

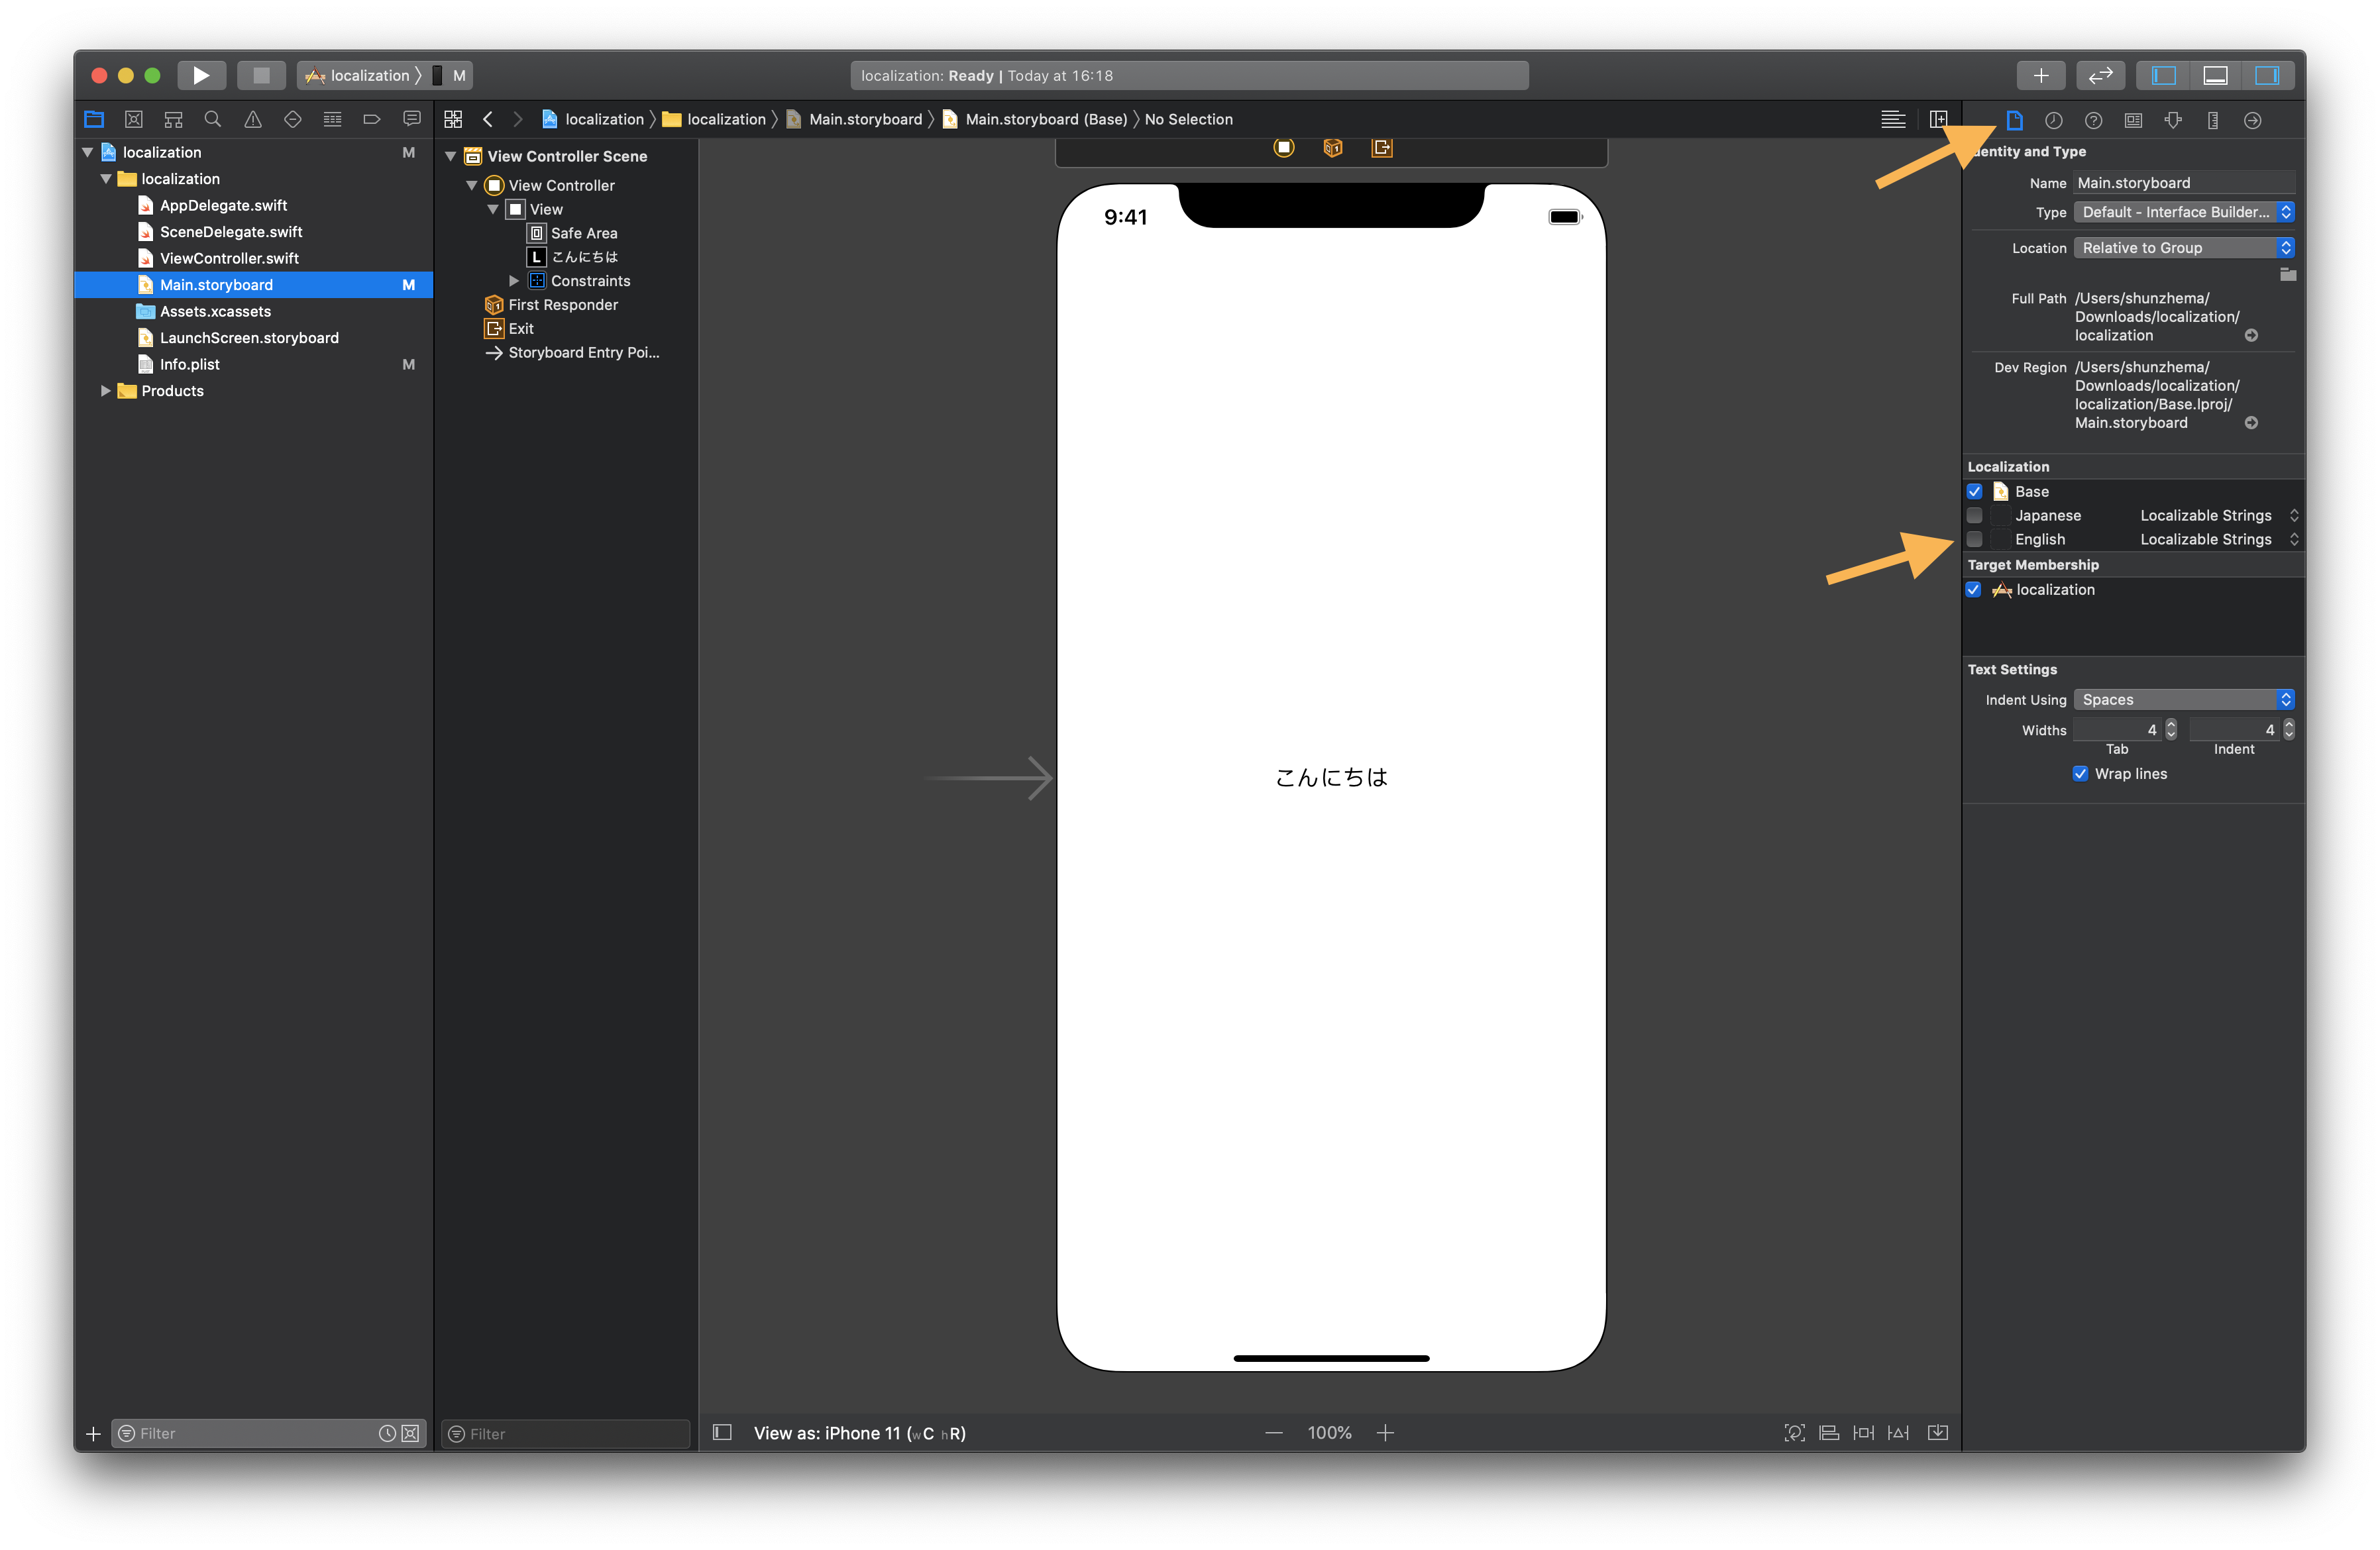
Storyboard localization works by extracting text into generated strings files that point back to interface object IDs.
Select the storyboard, enable the target languages in the right-side localization area, and Xcode
generates files such as Main.strings. Those files map interface object IDs to translated
values, which is why the article spends time showing how a label in Interface Builder corresponds to one
entry in the strings file.
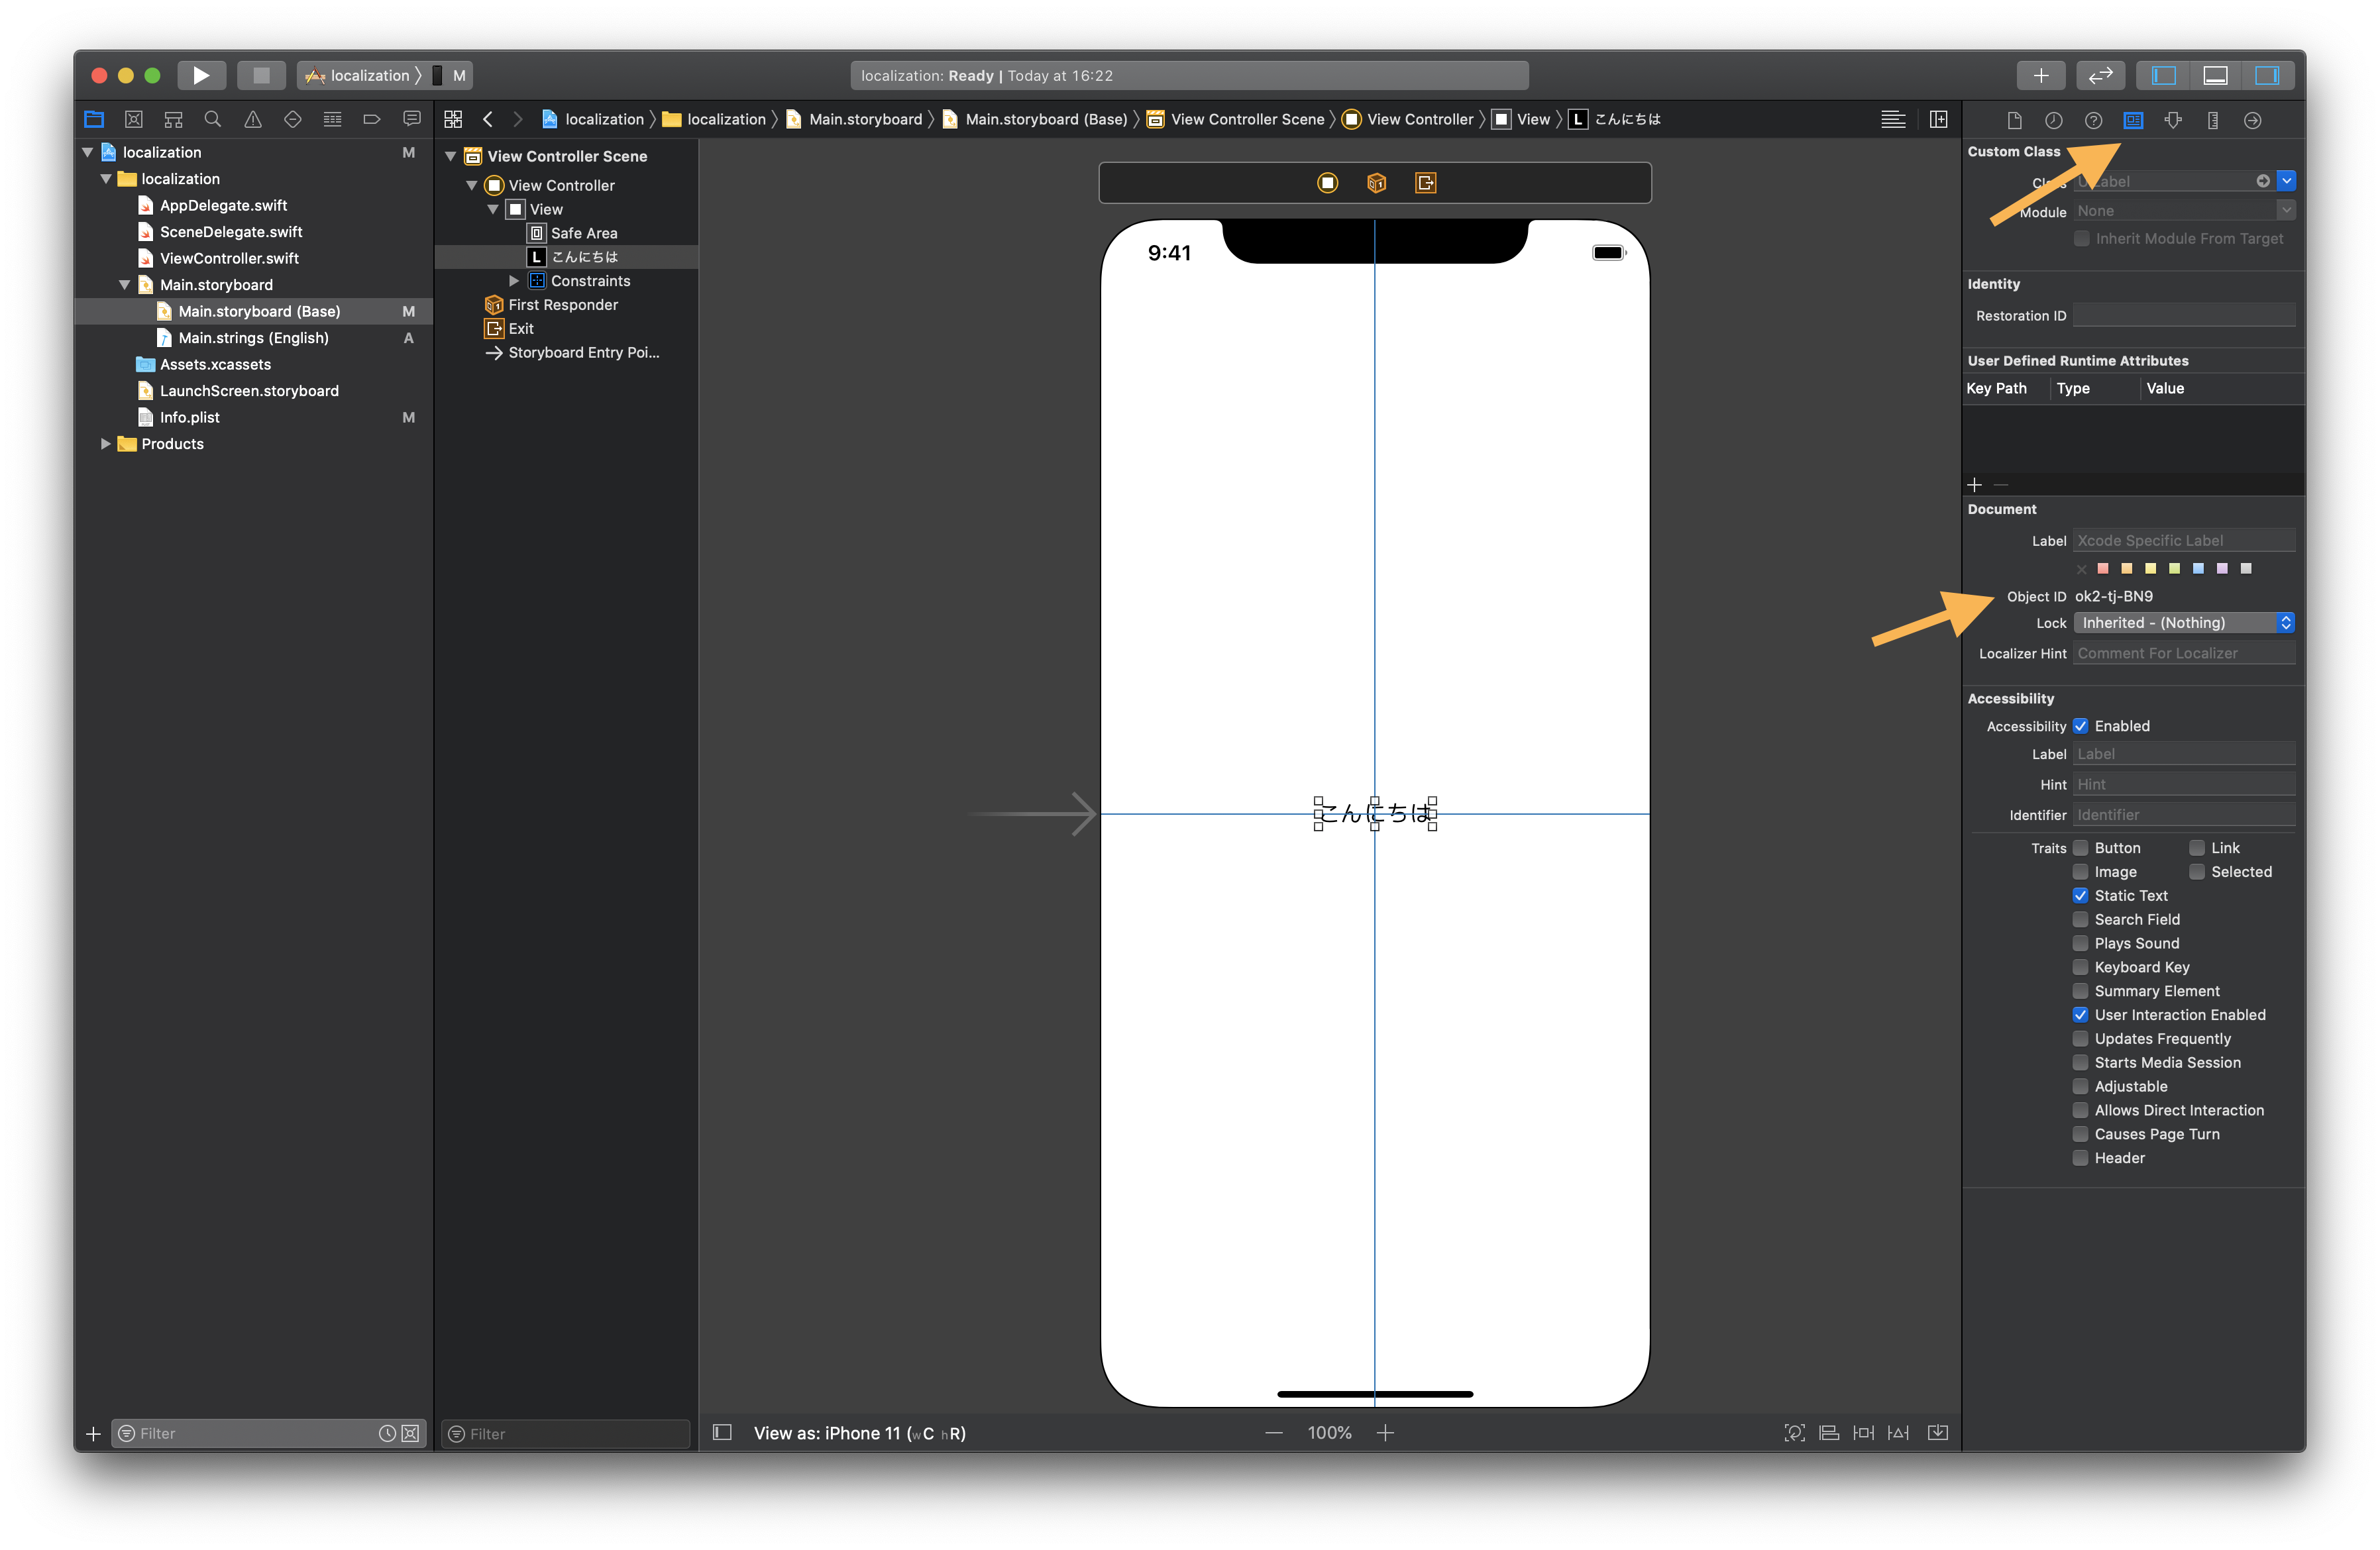
/* Class = "UILabel"; text = "Greeting"; ObjectID = "ok2-tj-BN9"; */
"ok2-tj-BN9.text" = "Hello";
The same pattern applies to other controls too. A text field uses .placeholder, a button can
use .normalTitle, and a view controller can expose .title.
Strings created in Swift code belong in Localizable.strings, and the article uses NSLocalizedString plus genstrings to manage them.
The workflow is straightforward: create a strings file, localize it for every language, wrap visible
text in NSLocalizedString, then extract keys from Swift files when you need help generating
the initial entries.
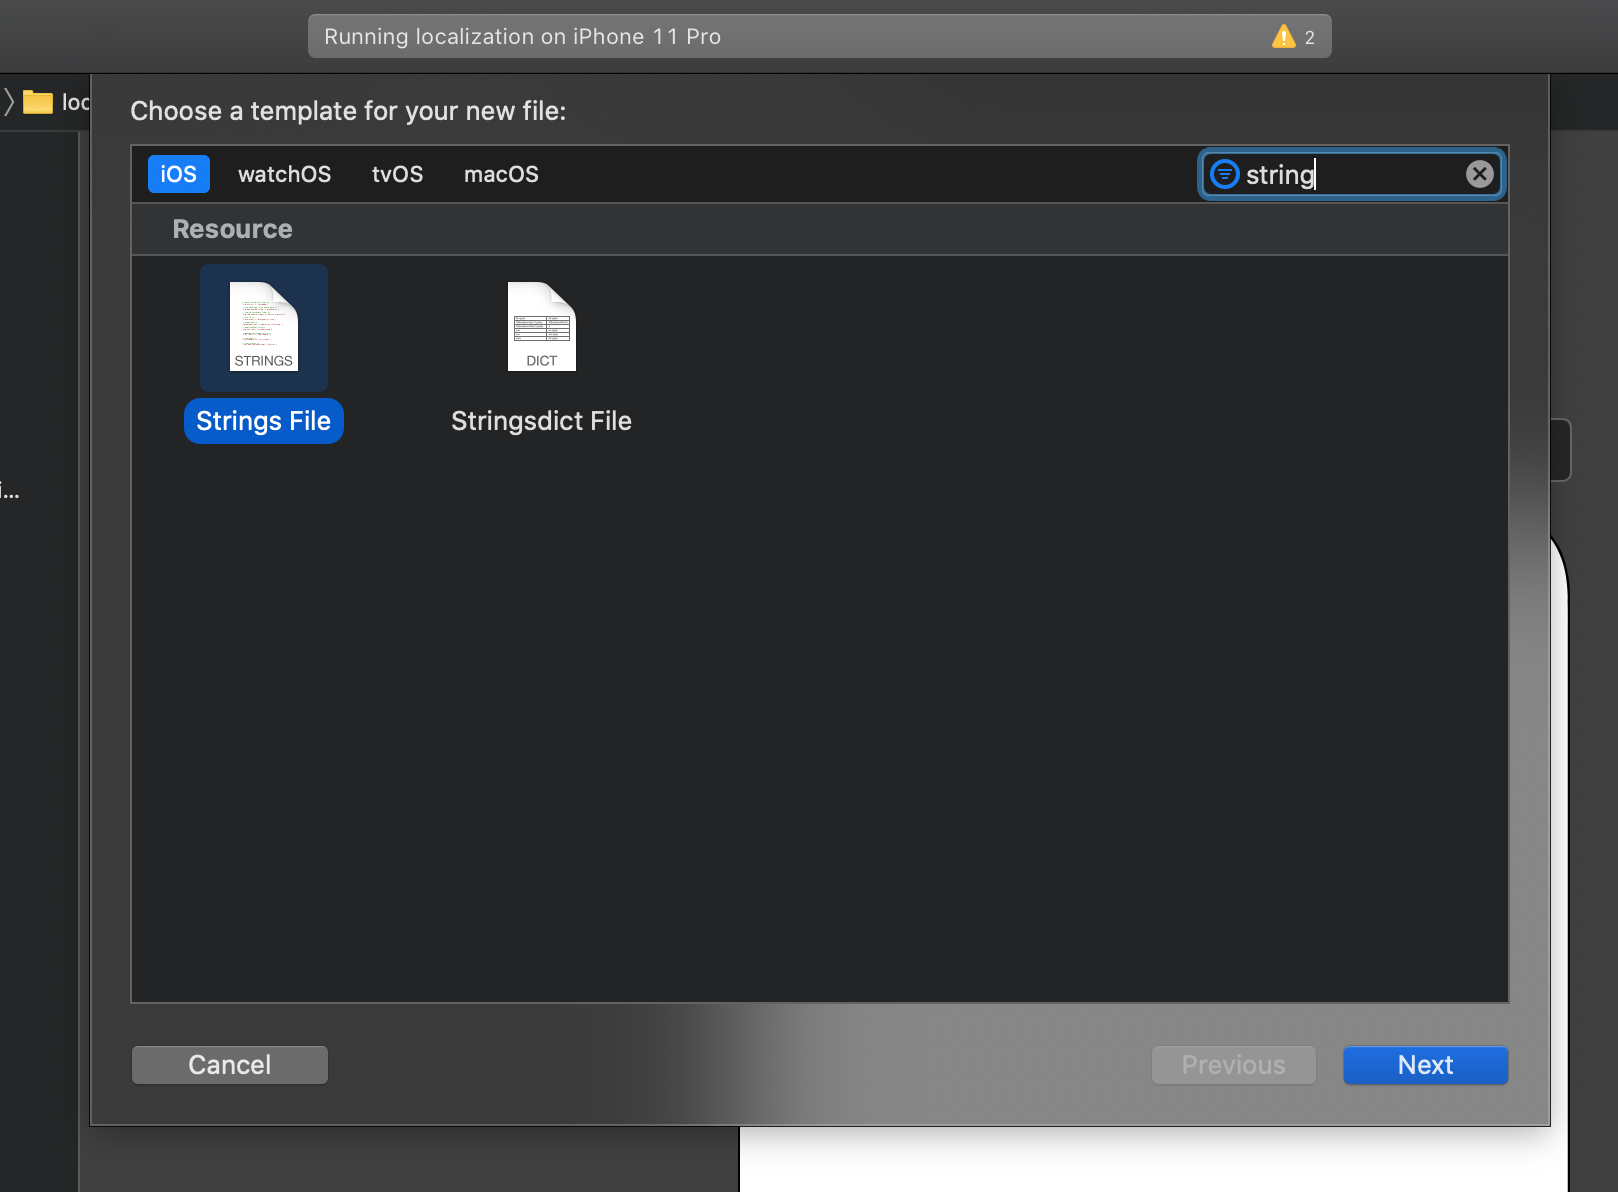
Localizable.strings file for code-driven text.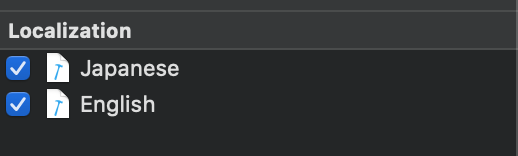
@IBAction func actionPress() {
    let alert = UIAlertController(
        title: NSLocalizedString("alert_title", comment: ""),
        message: nil,
        preferredStyle: .alert
    )

    let actionClose = UIAlertAction(
        title: NSLocalizedString("confirm_button", comment: ""),
        style: .cancel,
        handler: nil
    )

    alert.addAction(actionClose)
    present(alert, animated: true, completion: nil)
}
The article also shows the classic extraction command:
find . -name \*.swift | xargs genstrings -o en.lproj
find . -name \*.swift | xargs genstrings -o ja.lproj
That produces entries you can edit into real translations instead of typing every key by hand from scratch.
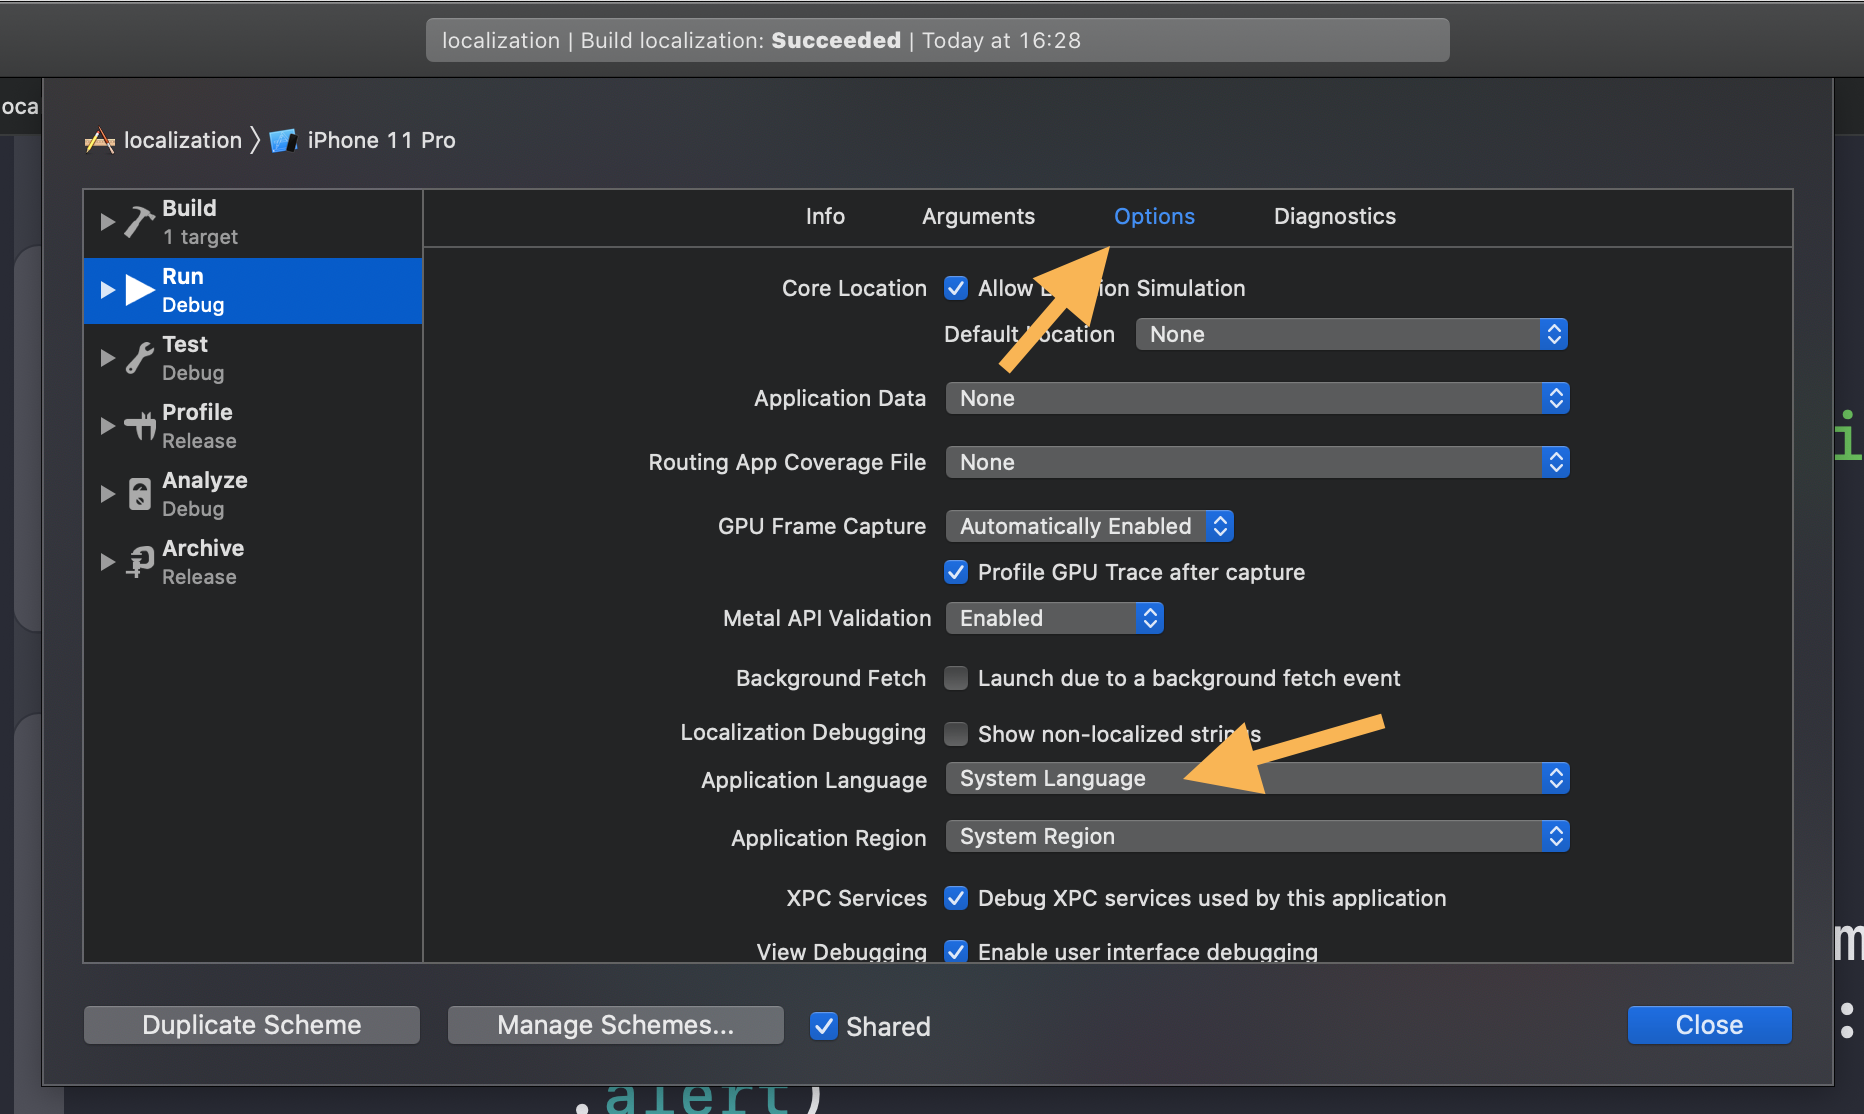
The practical debugging loop is to force the app into another language from the run scheme, then ask Xcode to flag strings you forgot to localize.
In Edit Scheme, the Options tab lets you choose an
Application Language for simulator launches. That is the fastest way to test another
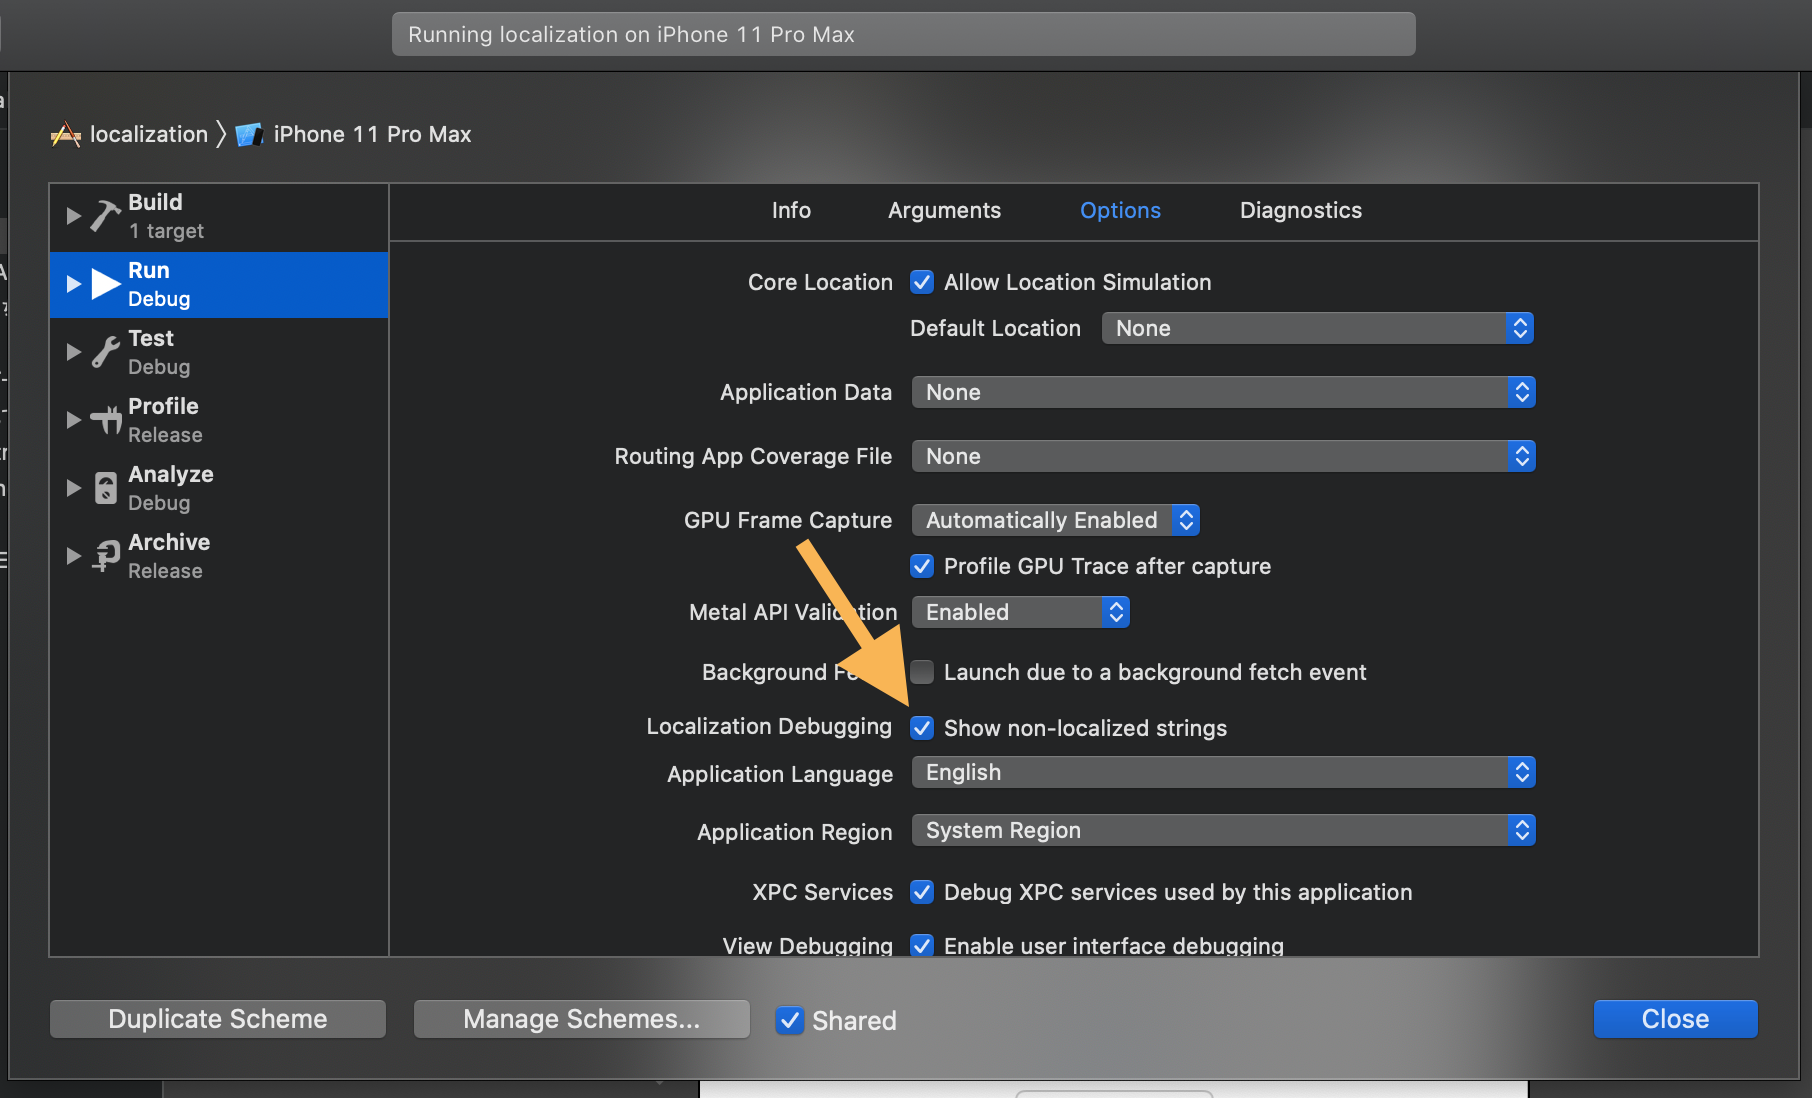
language without constantly changing the whole simulator or device environment. The article then turns on
Show non-localized strings so missing values show up in the console.
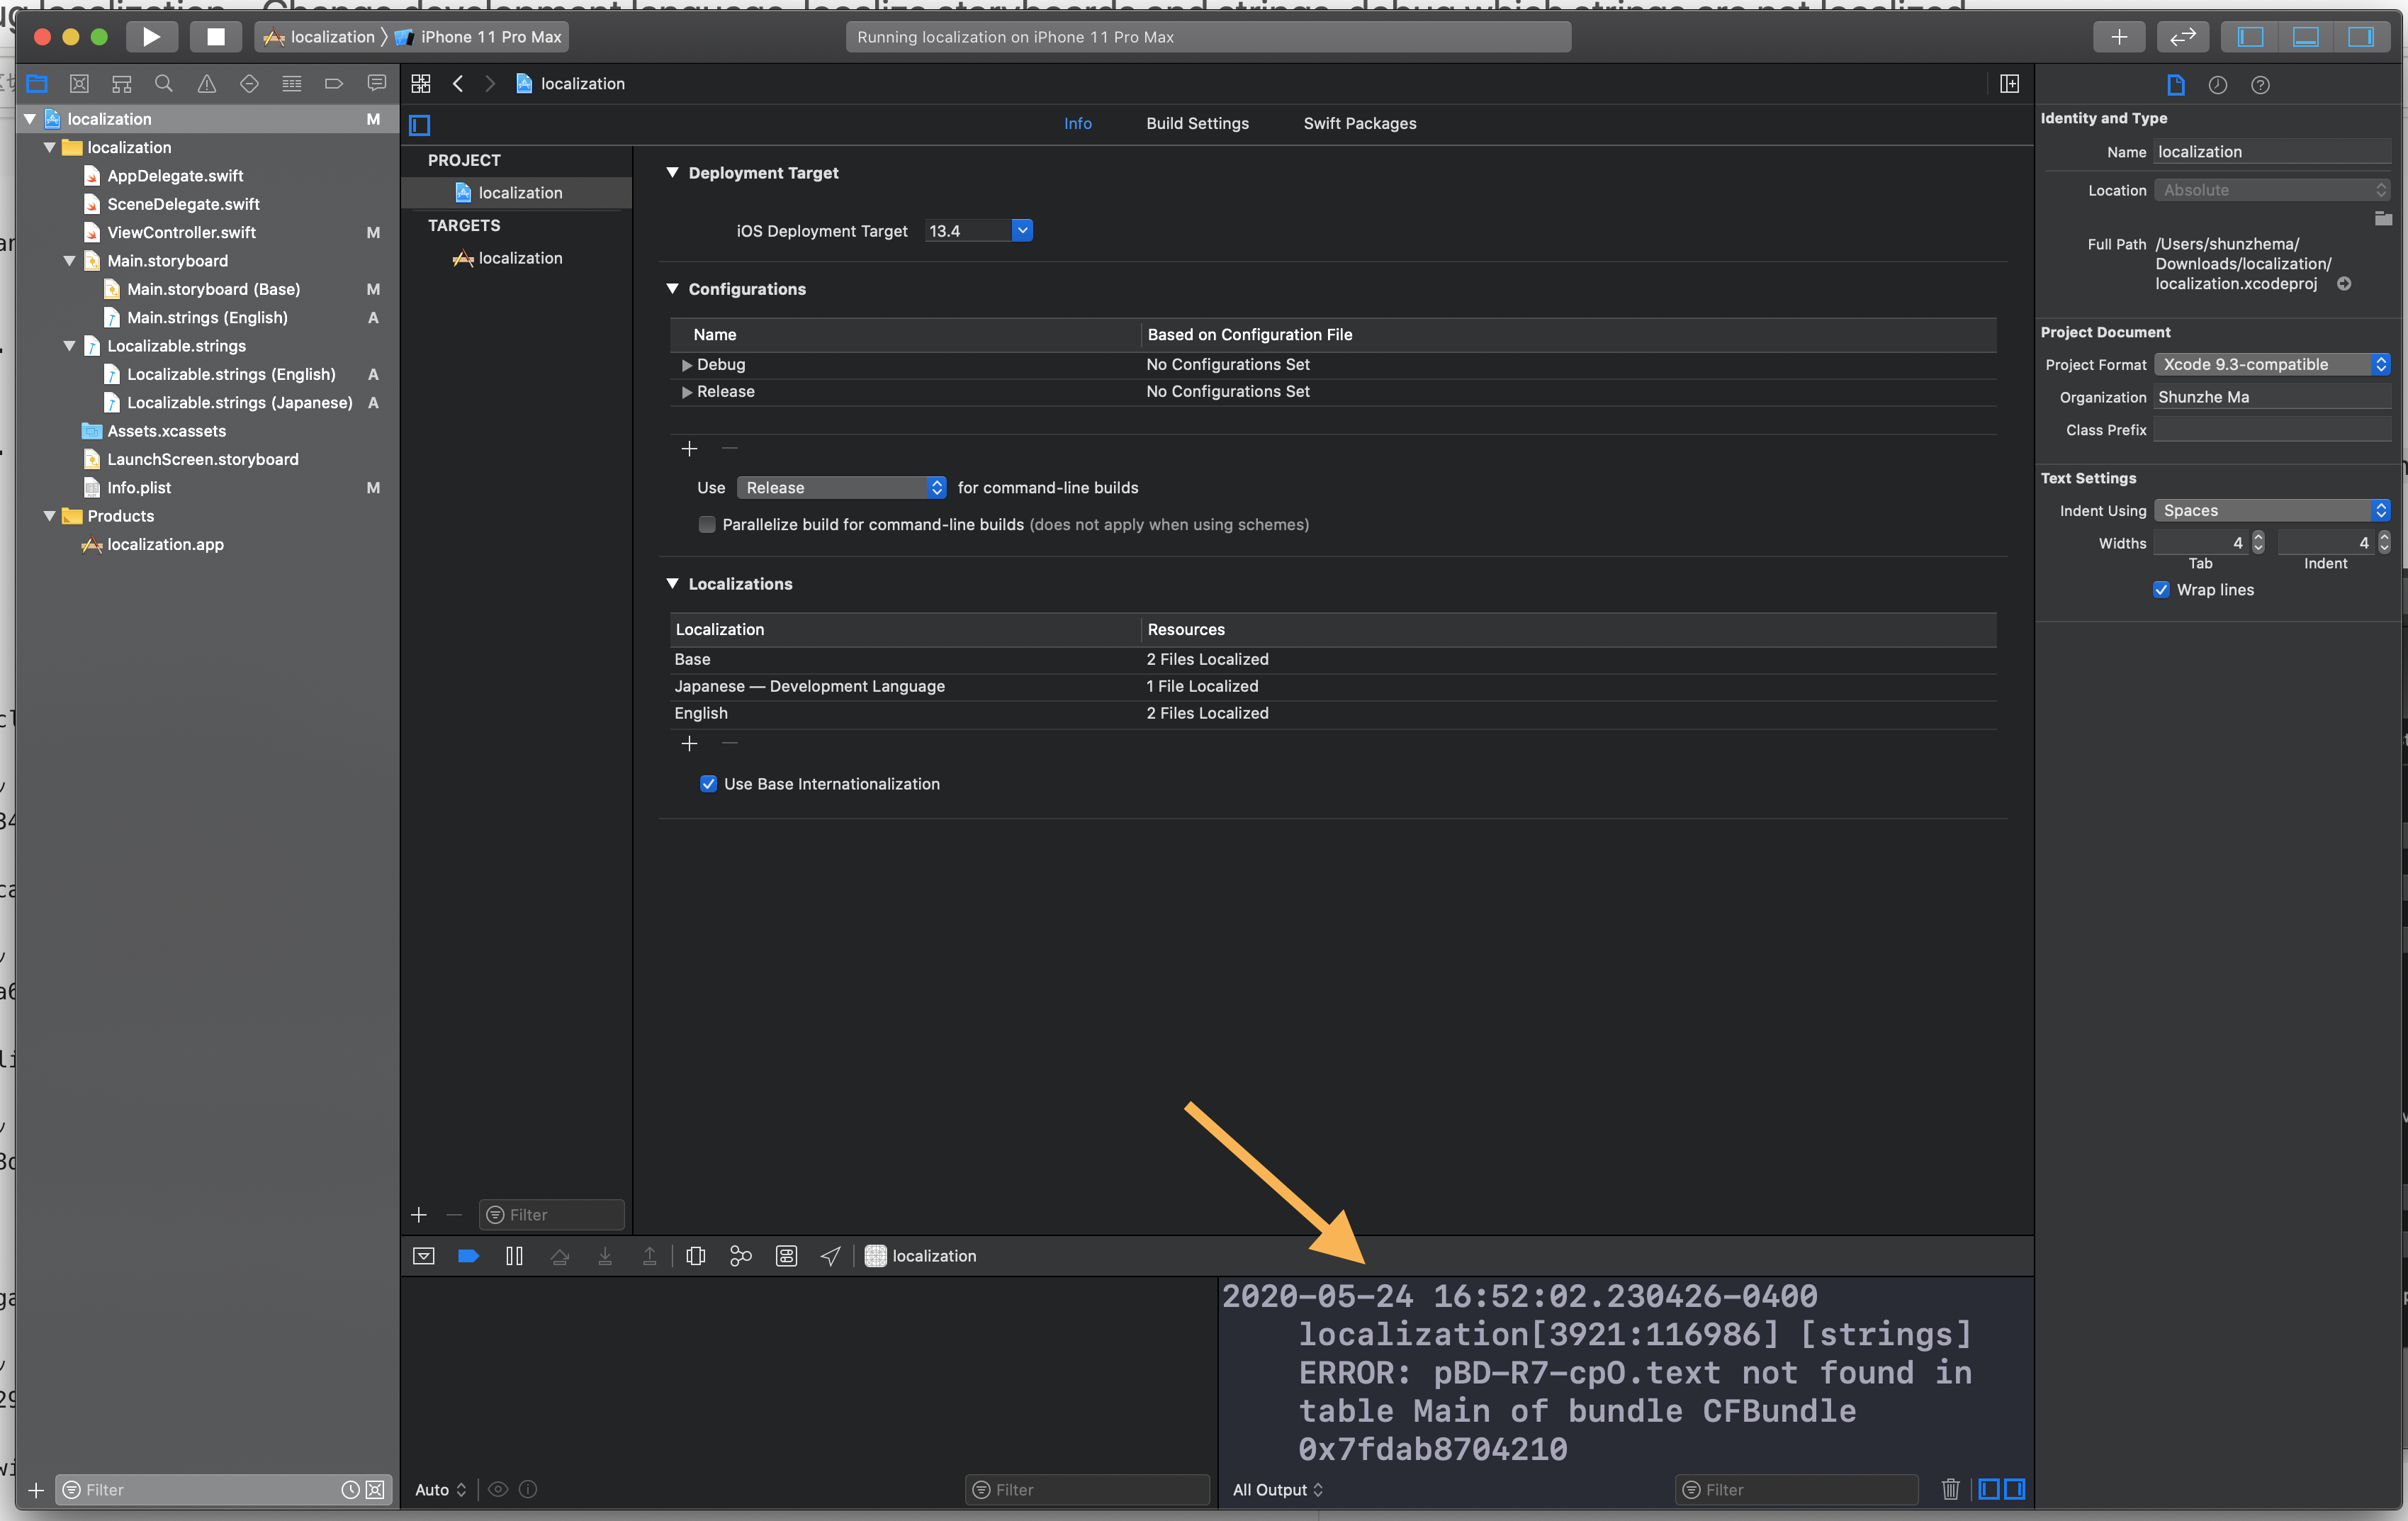
localization[3921:116986] [strings] ERROR:
pBD-R7-cpO.text not found in table Main of bundle CFBundle ...
The last section of this article also notes that on a real device you can change the app's language from that app's Settings entry if you need to verify the shipped behavior outside the simulator.
The most useful lesson in this article is that localization is easier when you treat project settings, storyboard strings, and code strings as separate layers instead of one vague translation problem.
Check the development language first, add languages from the project, let storyboards generate their own
translation files, keep code strings in Localizable.strings, and force alternate languages
during testing. Once those layers are clear, localization stops feeling mysterious and starts looking like
normal project maintenance.