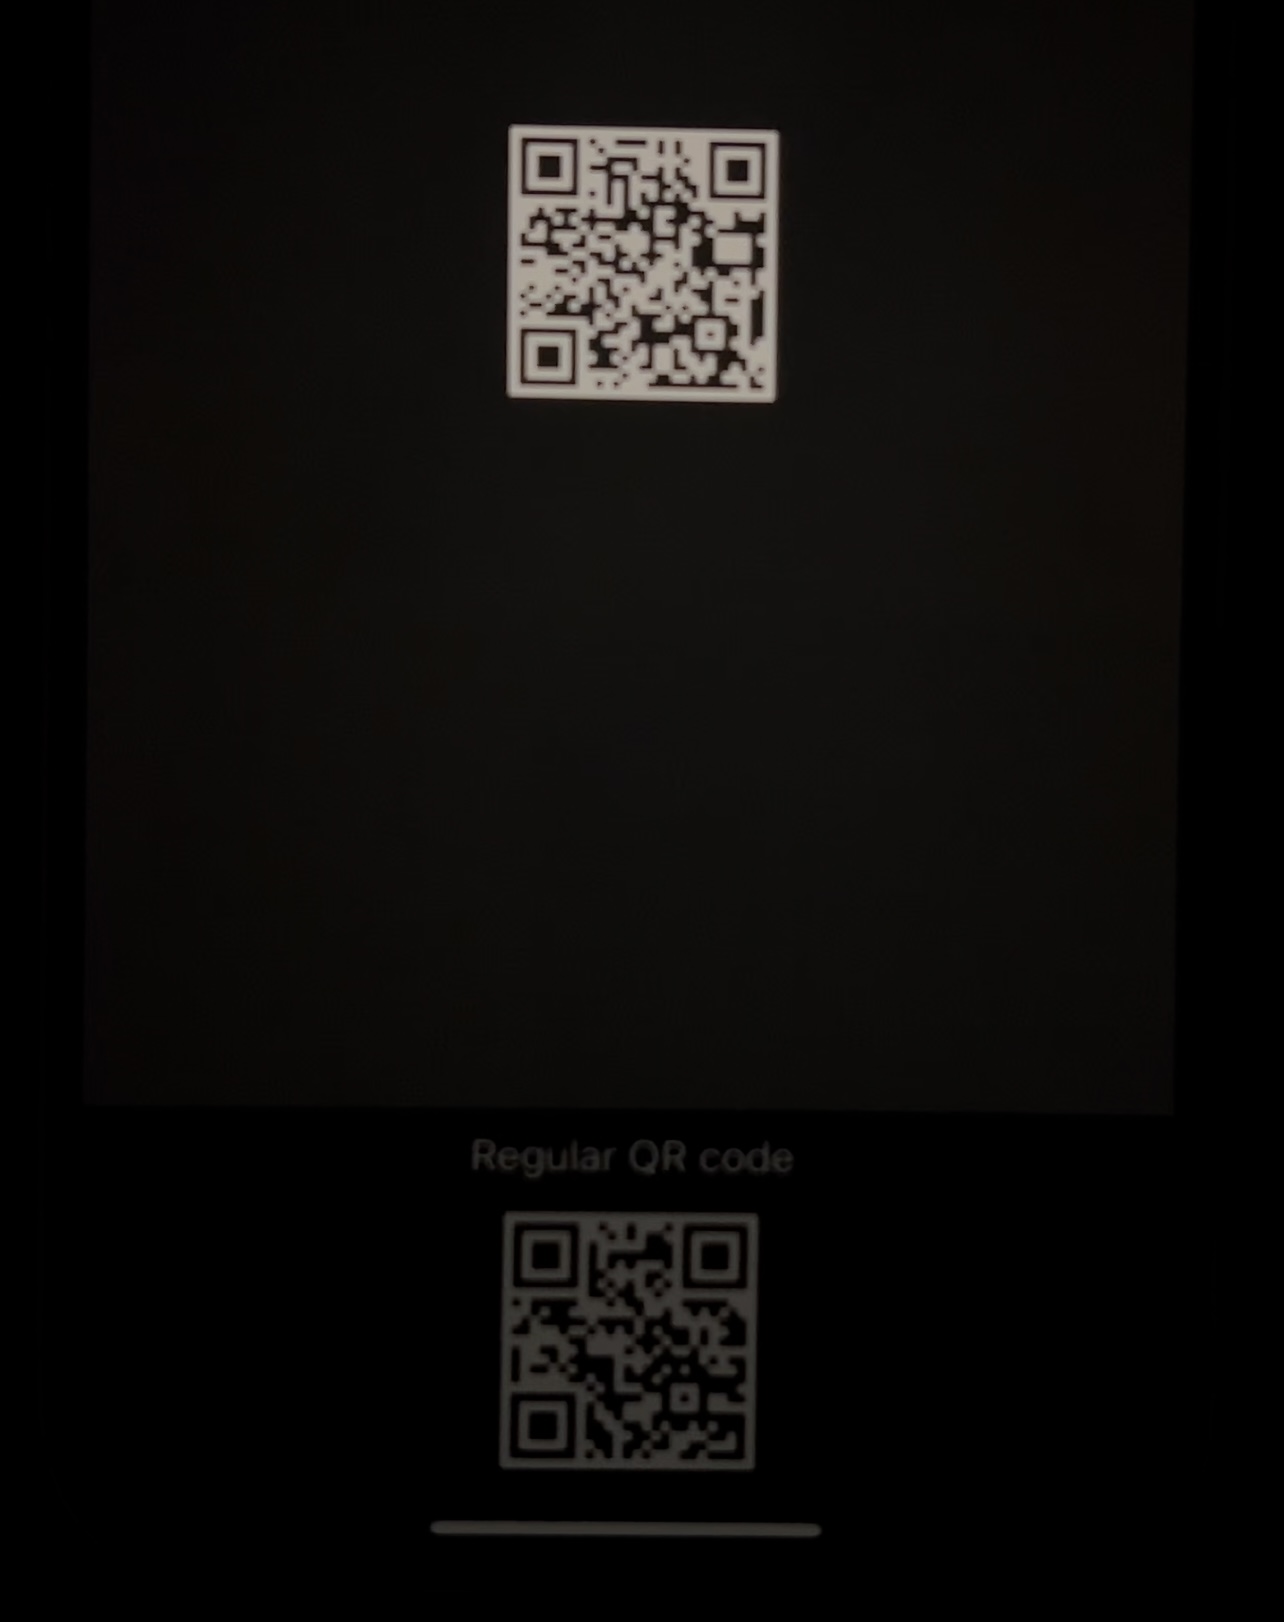
The goal is simple: brighten only the QR code, not the whole phone display.
QR payment and login screens often solve readability by pushing the full display brightness higher. That works, but it is rough at night and usually forces the app to remember the old brightness and restore it later. This article takes a cleaner route by using iOS 16's EDR support so the QR region alone becomes brighter.
The implementation has three layers: generate a QR image, turn it into an EDR-capable brightness mask, and render that image through Metal so the extra headroom actually reaches the display.
Raising screen brightness globally is a blunt tool.
The article starts from a practical UX problem: when an app shows a QR code for scanning, the easy fix is to brighten the entire screen. That can feel harsh in dark environments, and it also means the app has to manage display brightness state on the user's behalf.
If all you really need is a brighter code, it is more precise to brighten just that image region and leave the rest of the interface at the user's chosen brightness.
EDR lets specific pixels exceed the current SDR brightness level.
The key WWDC 2022 change here is dynamic EDR rendering in Metal. In this workflow, brightness is treated as image data:
values above 1.0 can render brighter than the screen's current SDR output when the device supports it.
That gives you exactly what this screen needs:
- Only the QR code can be rendered at maximum brightness.
- The rest of the interface can stay at the user's normal brightness setting.
- You do not need to raise and later restore the whole display brightness manually.
The same technique is not limited to QR codes. Any masked region can be brightened, and values below 1.0 can also be used to darken a region instead.
Before doing anything fancy, check whether the current screen exposes EDR headroom.
The article uses UIScreen.main.currentEDRHeadroom or view.window?.screen.currentEDRHeadroom
to confirm the screen can actually render above SDR. A value greater than 1.0 means there is extra headroom available.
let screen = view.window?.screen
var headroom = CGFloat(1.0)
if #available(iOS 16.0, *) {
    headroom = screen?.currentEDRHeadroom ?? 1.0
}Generate the QR code, create a bright fill layer, and cut that fill to the QR shape.
The image-building side is plain Core Image. First create a QR image with CIQRCodeGenerator,
set the payload through inputMessage, and scale the result up so it is usable on screen.
guard let qrFilter = CIFilter(name: "CIQRCodeGenerator") else {
    return nil
}

let qrCodeContent = "testing-highlighted-qr"
let inputData = qrCodeContent.data(using: .utf8)
qrFilter.setValue(inputData, forKey: "inputMessage")
qrFilter.setValue("H", forKey: "inputCorrectionLevel")

guard let image = qrFilter.outputImage else {
    return nil
}

let sizeTransform = CGAffineTransform(scaleX: 10, y: 10)
let qrImage = image.transformed(by: sizeTransform)
Next, build a solid image whose RGB values equal the current EDR headroom. The article uses
CGColorSpace.extendedLinearSRGB so the color values can exceed the normal SDR range.
let maxRGB = headroom
guard let edrColorSpace = CGColorSpace(name: CGColorSpace.extendedLinearSRGB),
      let maxFillColor = CIColor(
        red: maxRGB,
        green: maxRGB,
        blue: maxRGB,
        colorSpace: edrColorSpace
      ) else {
    return nil
}

let fillImage = CIImage(color: maxFillColor)
With those two images in hand, the QR image becomes the mask and the bright fill becomes the content. The output is then cropped back to the intended rectangle.
let maskFilter = CIFilter.blendWithMask()
maskFilter.maskImage = qrImage
maskFilter.inputImage = fillImage

guard let combinedImage = maskFilter.outputImage else {
    return nil
}

return combinedImage.cropped(
    to: CGRect(x: 0, y: 0, width: 300 * scaleFactor, height: 300 * scaleFactor)
)
That is the essential trick of the whole article: the QR is not a normal white image any more. It is a mask-driven image whose bright pixels can exceed the current SDR output level.
The renderer is a MetalKit delegate that asks a closure for the current CIImage.
To get the EDR image onto the screen, the article creates a custom Renderer class that conforms to
MTKViewDelegate. It owns a Metal device, command queue, a Core Image context backed by that queue,
and a small semaphore used to avoid piling up too many unfinished frames.
import Metal
import MetalKit
import CoreImage

class Renderer: NSObject, MTKViewDelegate, ObservableObject {
    let imageProvider: (_ contentScaleFactor: CGFloat, _ headroom: CGFloat) -> CIImage?
    public let device: MTLDevice? = MTLCreateSystemDefaultDevice()
    let commandQueue: MTLCommandQueue?
    let renderContext: CIContext?
    let renderQueue = DispatchSemaphore(value: 3)

    init(imageProvider: @escaping (_ contentScaleFactor: CGFloat, _ headroom: CGFloat) -> CIImage?) {
        self.imageProvider = imageProvider
        self.commandQueue = self.device?.makeCommandQueue()
        if let commandQueue {
            self.renderContext = CIContext(
                mtlCommandQueue: commandQueue,
                options: [
                    .name: "QR-Code-Renderer",
                    .cacheIntermediates: true,
                    .allowLowPower: true
                ]
            )
        } else {
            self.renderContext = nil
        }
        super.init()
    }

    func draw(in view: MTKView) {}
    func mtkView(_ view: MTKView, drawableSizeWillChange size: CGSize) {}
}
The semaphore is a small but important detail. This article calls it out explicitly because it prevents the next frame from starting before enough prior work has completed.
Render into an EDR-capable texture, then present the drawable like any other Metal frame.
The finished draw(in:) method waits on the semaphore, creates a command buffer,
calculates the current headroom, asks the closure for the CI image, centers that image in the view,
and starts a Core Image render task into a CIRenderDestination.
func draw(in view: MTKView) {
    guard let commandQueue else { return }
    _ = renderQueue.wait(timeout: .distantFuture)

    if let commandBuffer = commandQueue.makeCommandBuffer() {
        commandBuffer.addCompletedHandler { _ in
            self.renderQueue.signal()
        }

        if let drawable = view.currentDrawable {
            let drawSize = view.drawableSize
            let contentScaleFactor = view.contentScaleFactor
            let destination = CIRenderDestination(
                width: Int(drawSize.width),
                height: Int(drawSize.height),
                pixelFormat: view.colorPixelFormat,
                commandBuffer: commandBuffer,
                mtlTextureProvider: { drawable.texture }
            )

            var headroom = CGFloat(1.0)
            if #available(iOS 16.0, *) {
                headroom = view.window?.screen.currentEDRHeadroom ?? 1.0
            }

            guard var image = self.imageProvider(contentScaleFactor, headroom) else {
                return
            }

            let backBounds = CGRect(x: 0, y: 0, width: drawSize.width, height: drawSize.height)
            let shiftX = round((backBounds.size.width + image.extent.origin.x - image.extent.size.width) * 0.5)
            let shiftY = round((backBounds.size.height + image.extent.origin.y - image.extent.size.height) * 0.5)
            image = image.transformed(by: CGAffineTransform(translationX: shiftX, y: shiftY))
            image = image.composited(over: .gray)

            guard let renderContext else { return }
            _ = try? renderContext.startTask(
                toRender: image,
                from: backBounds,
                to: destination,
                at: .zero
            )

            commandBuffer.present(drawable)
            commandBuffer.commit()
        }
    }
}
On the view side, MTKView must be configured to carry EDR-friendly pixel data.
The important switches are enabling extended dynamic range on the metal layer, using an extended color space,
and choosing a float pixel format.
let metalView = MTKView(frame: .zero, device: renderer.device)
metalView.preferredFramesPerSecond = 10
metalView.framebufferOnly = false
metalView.delegate = renderer

if let layer = metalView.layer as? CAMetalLayer {
    if #available(iOS 16.0, *) {
        layer.wantsExtendedDynamicRangeContent = true
    }
    layer.colorspace = CGColorSpace(name: CGColorSpace.extendedLinearDisplayP3)
    metalView.colorPixelFormat = .rgba16Float
}
In UIKit, that view can simply be added with view.addSubview(metalView).
The SwiftUI bridge is just a representable wrapper around the configured MTKView.
This article also shows the same rendering path inside SwiftUI. The wrapper creates the metal view, applies the same EDR configuration, and keeps the renderer attached as the delegate.
import SwiftUI
import MetalKit

struct MetalView: UIViewRepresentable {
    @StateObject var renderer: Renderer

    func makeUIView(context: Context) -> MTKView {
        let view = MTKView(frame: .zero, device: renderer.device)
        view.preferredFramesPerSecond = 10
        view.framebufferOnly = false
        view.delegate = renderer

        if let layer = view.layer as? CAMetalLayer {
            if #available(iOS 16.0, *) {
                layer.wantsExtendedDynamicRangeContent = true
            }
            layer.colorspace = CGColorSpace(name: CGColorSpace.extendedLinearDisplayP3)
            view.colorPixelFormat = .rgba16Float
        }
        return view
    }

    func updateUIView(_ view: MTKView, context: Context) {
        view.delegate = renderer
    }
}
The final SwiftUI screen simply creates a renderer with the QR-generating closure and embeds that renderer in MetalView.
That keeps the QR-generation logic, headroom logic, and EDR presentation path in one place.
struct ContentView: View {
    var body: some View {
        let renderer = Renderer { scaleFactor, headroom -> CIImage? in
            // Build the QR image, bright fill image, and masked output here.
        }

        MetalView(renderer: renderer)
    }
}This is a narrow technique, but it solves the QR-brightness problem cleanly.
The article's value is not in a huge framework. It is in a tight chain of ideas: detect EDR headroom, encode brightness as image data, render through Metal with an EDR-capable destination, and bridge the result into either UIKit or SwiftUI.
If you need a code or highlight region to pop without blasting the entire interface, this is a strong pattern. The same masking approach can also be adapted for other brightened regions, or even darker cutouts, by changing the generated fill values.