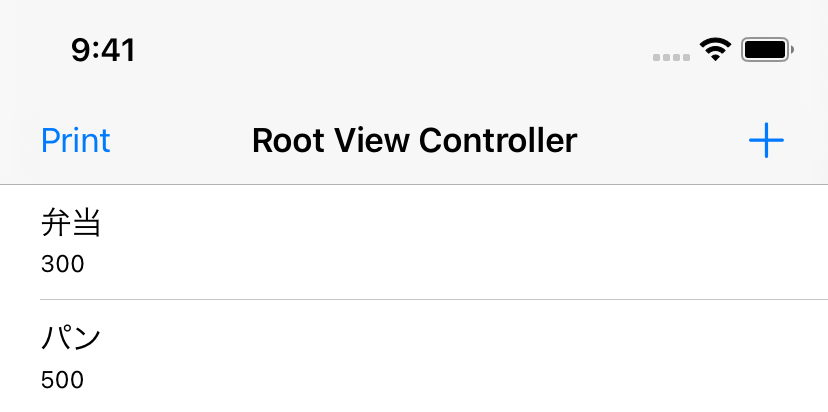
HTML is a practical receipt layout engine when you already know the structure you want to print.
This article uses a small lunch-shop receipt as the example, but the pattern is broader than that. If your app needs to generate invoices, receipts, summaries, or printable reports, HTML gives you tables, spacing, text styling, and simple layout rules without forcing you to manually position every label in Core Graphics.
This article follows the same path: prepare reusable HTML fragments, append one row per purchased item,
convert the finished markup into PDF data, write that data to a temporary file, and hand the result to
QLPreviewController so the user can inspect it immediately.
This article ships both a starting branch and a finished branch, which makes this tutorial easier to follow step by step.
This article points to two versions of the sample app. One branch is the unfinished starter project, and the other is the completed implementation after the PDF pipeline has been added.
Split the receipt into a header, one reusable table row, and a footer so the final HTML is easy to assemble.
The article does not build one huge string all at once. Instead, it breaks the markup into smaller parts: a
headerHTMLstring() function, a getSingleRow(itemName:itemPrice:) helper for each purchased item,
and a footerHTMLstring() function to close the document cleanly.
That structure matters because receipt content is repetitive. Once the table shell is defined, the only part that really changes is the list of rows and the final total.
func headerHTMLstring() -> String {
    // opening HTML, styles, receipt heading, table start
}

func getSingleRow(itemName: String, itemPrice: Int) -> String {
    """
    <tr>
      <td>\(itemName)</td>
      <td style="text-align: right;">\(itemPrice)</td>
    </tr>
    """
}

func footerHTMLstring() -> String {
    // closing table, wrapper markup, and HTML end
}
If you already have a design from the web side, this is also the easiest point to reuse it. Tables and inline styles are often enough for a clean receipt layout.
Once the fragments exist, generating the final HTML is mostly an append loop plus a running total.
This article then builds one large HTML string from the purchase list. For each item, it extracts the name and price, appends a row, and adds the item price into the total. After the loop finishes, it appends the total area and the footer.
var htmlString = headerHTMLstring()
var totalPrice = 0

for item in shoppingItems {
    let rowString = getSingleRow(
        itemName: item.name,
        itemPrice: item.price
    )
    htmlString.append(rowString)
    totalPrice += item.price
}

htmlString.append("<tr><td>Total</td><td>\(totalPrice)</td></tr>")
htmlString.append(footerHTMLstring())
That is the key point where app data turns into printable markup. After this step, the PDF renderer no longer needs to know anything about your model objects. It only needs the final HTML string.
UIPrintPageRenderer plus UIMarkupTextPrintFormatter is the core bridge from HTML into PDF data.
The article uses UIKit printing APIs instead of manual PDF drawing. That is a good fit here because the content starts as HTML.
First, create a page renderer, define the page size, and attach a UIMarkupTextPrintFormatter created from the
assembled HTML string.
let renderer = UIPrintPageRenderer()
let paperSize = CGSize(width: 595.2, height: 841.8)
let paperFrame = CGRect(origin: .zero, size: paperSize)

renderer.setValue(paperFrame, forKey: "paperRect")
renderer.setValue(paperFrame, forKey: "printableRect")

let formatter = UIMarkupTextPrintFormatter(markupText: htmlString)
renderer.addPrintFormatter(formatter, startingAtPageAt: 0)
After that setup, open a PDF graphics context, ask the renderer for its pages, and draw each page into the context. That is what turns the markup into actual PDF bytes.
let pdfData = NSMutableData()
UIGraphicsBeginPDFContextToData(pdfData, .zero, [:])

for pageIndex in 0..<renderer.numberOfPages {
    UIGraphicsBeginPDFPage()
    renderer.drawPage(at: pageIndex, in: UIGraphicsGetPDFContextBounds())
}

UIGraphicsEndPDFContext()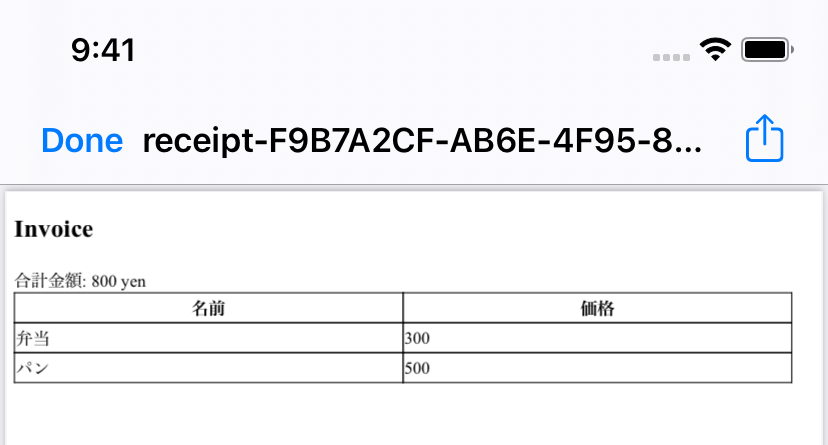
Write the PDF into the app's temporary directory so Quick Look has a real file URL to open.
This article saves the generated NSData into temporary storage with a UUID-based file name such as
receipt-....pdf. That keeps the handoff to the preview controller simple because you are no longer dealing with
in-memory data alone. You have a concrete file path.
func saveToTempDirectory(data: NSData) -> URL? {
    let tempDirectory = NSURL.fileURL(
        withPath: NSTemporaryDirectory(),
        isDirectory: true
    )
    let filePath = tempDirectory.appendingPathComponent(
        "receipt-" + UUID().uuidString + ".pdf"
    )

    do {
        try data.write(to: filePath)
        return filePath
    } catch {
        print(error.localizedDescription)
        return nil
    }
}
For a preview-only flow, temporary storage is usually enough. If the document needs to survive between launches, that is the point where you would move it somewhere more permanent.
QLPreviewController gives the user a finished document viewer with very little additional code.
Once the PDF file exists locally, this article presents it through QLPreviewController. The controller gets
a saved file URL, uses the current view controller as its data source, and then presents the document modally.
self.PDFpath = savedPath

let previewController = QLPreviewController()
previewController.dataSource = self
present(previewController, animated: true, completion: nil)
The last step is implementing QLPreviewControllerDataSource so Quick Look knows how many files exist and which file
URL to load.
extension ViewController: QLPreviewControllerDataSource {
    func numberOfPreviewItems(in controller: QLPreviewController) -> Int {
        PDFpath == nil ? 0 : 1
    }

    func previewController(
        _ controller: QLPreviewController,
        previewItemAt index: Int
    ) -> QLPreviewItem {
        PDFpath! as QLPreviewItem
    }
}
That is enough to give the user a proper PDF presentation flow without building a custom viewer screen yourself.
The value of this approach is not the receipt example. It is the clean pipeline from app data into a sharable document.
This article is small, but it demonstrates a workflow that still holds up well: use HTML where tabular layout is easier, let UIKit render that markup into a PDF, save the result as a file, and rely on Quick Look for immediate presentation.
If your iOS app needs printable output and the layout resembles a web page more than a hand-drawn canvas, this is one of the fastest ways to get there.