The main choice is whether you want Photos-style interaction or the actual mask data.
If your app mostly wants the same behavior users already know from Photos, the high-level route is the better first stop.
ImageAnalysisInteraction gives you subject selection, highlighted state, cropping, and hit-testing without forcing
you to build the full segmentation pipeline yourself.
If you need the mask pixels directly, for example to composite a subject over another image, you can step down into Vision with
VNGenerateForegroundInstanceMaskRequest. That is the lower-level path the second half of the tutorial takes.
Start with ImageAnalysisInteraction when you want subject lifting to feel built into the system.
The basic setup is small. Put the image in a UIImageView, create a persistent
ImageAnalysisInteraction, and add it to the view. The interaction object should live as part of the view or view model,
because you will keep reading from it after analysis finishes.
private let imageView = UIImageView()
private let interaction = ImageAnalysisInteraction()

imageView.image = image
imageView.contentMode = .scaleAspectFit
interaction.preferredInteractionTypes = [.imageSubject]
imageView.addInteraction(interaction)
The preferredInteractionTypes property is where you decide how much of Apple's image-understanding stack to expose.
This article calls out that the same system can also surface text selection, visual lookup, and data detectors, not only lifted subjects.
interaction.preferredInteractionTypes = [
    .dataDetectors,
    .imageSubject,
    .textSelection,
    .visualLookUp
]Once analysis finishes, you can inspect every detected subject, highlight it, crop it, or merge several selections.
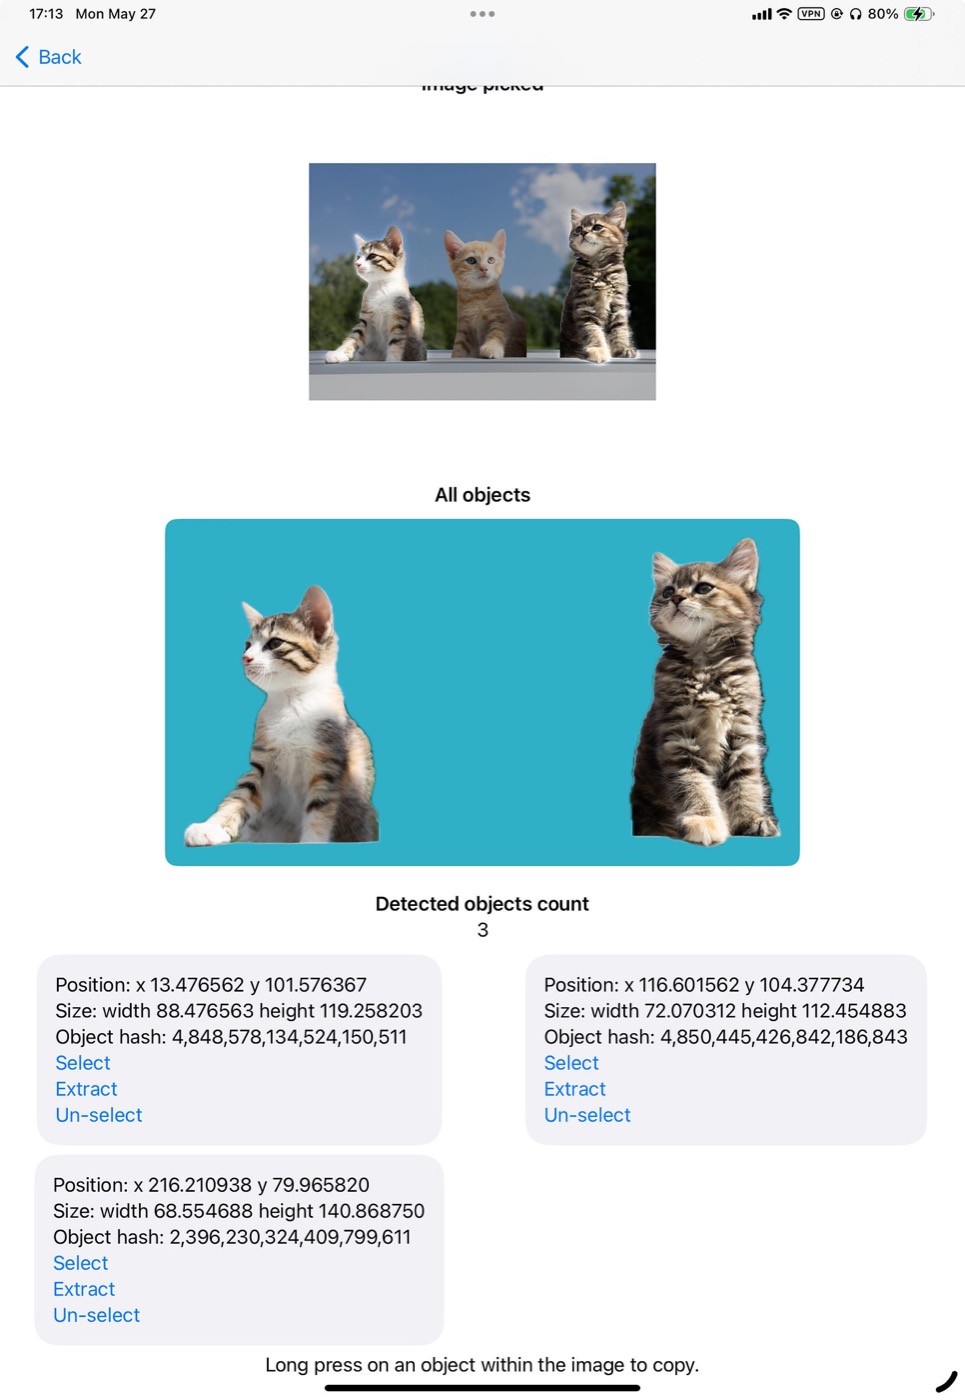
The article runs an ImageAnalyzer, assigns the resulting analysis back to the interaction,
and then asks the interaction for its detected subjects. That gives you a set of ImageAnalysisInteraction.Subject values
which carry bounds, image extraction support, and selection state.
private let analyzer = ImageAnalyzer()

Task { @MainActor in
    let configuration = ImageAnalyzer.Configuration([.visualLookUp])
    let analysis = try await analyzer.analyze(image, configuration: configuration)
    interaction.analysis = analysis

    let subjects = await interaction.subjects
    // interaction.highlightedSubjects = subjects
}
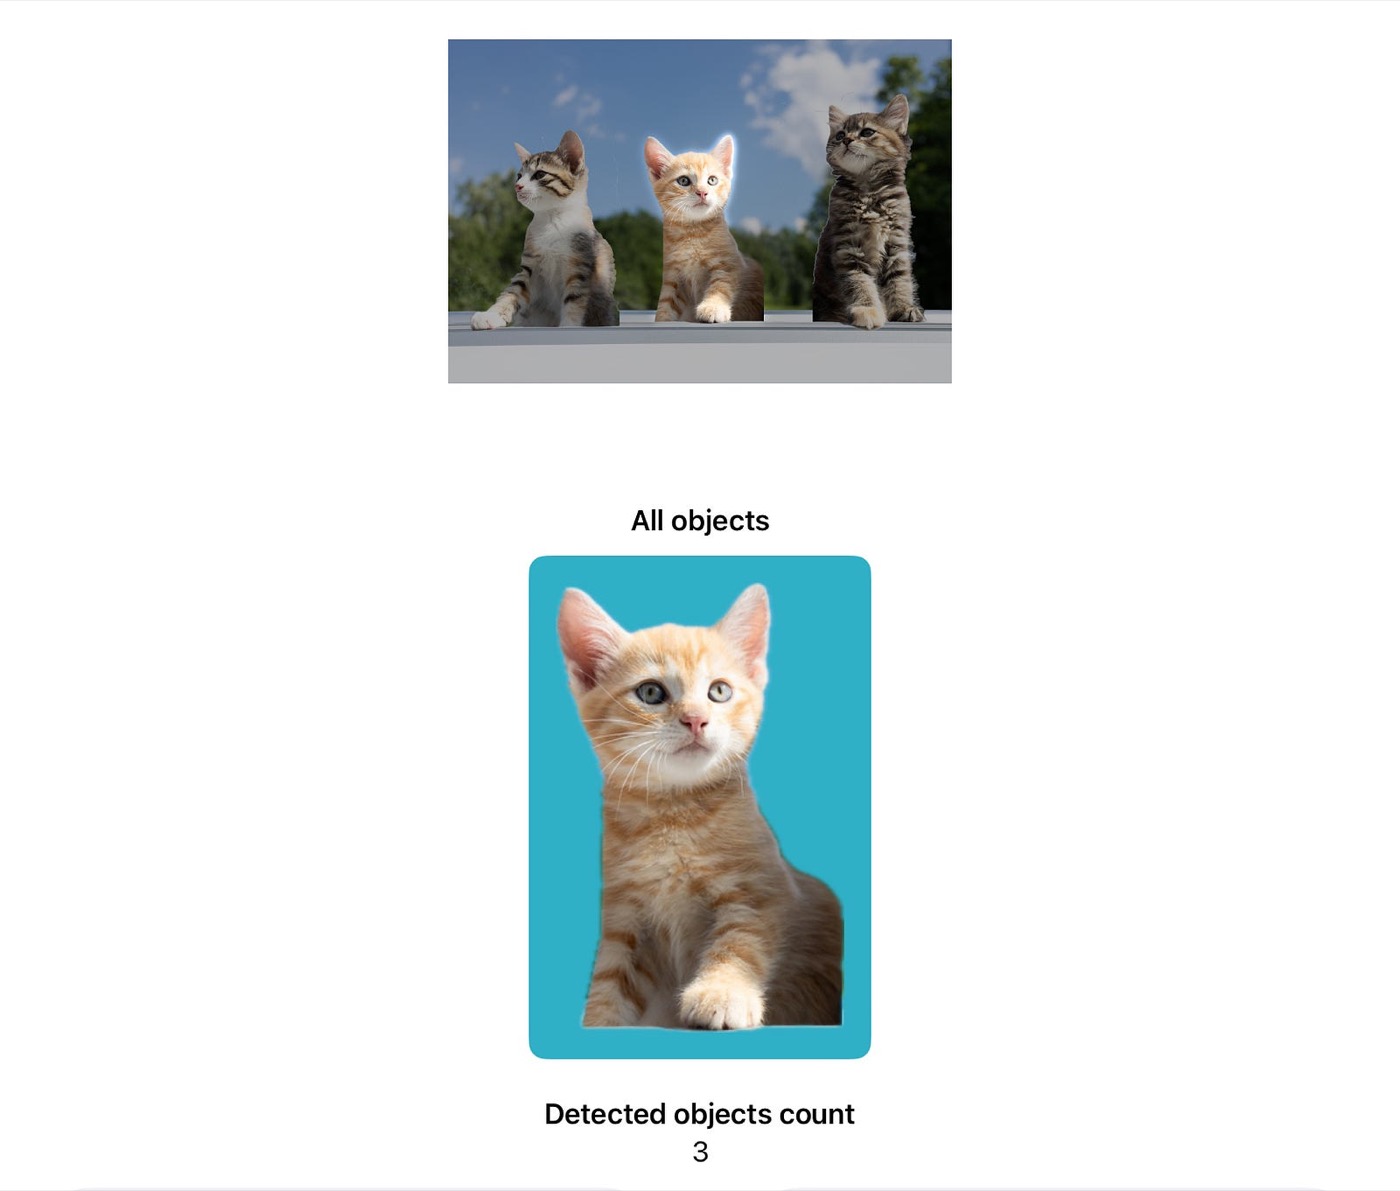
From there the useful operations are straightforward: read bounds to show metadata,
call subject.image to crop one object out, or call interaction.image(for:)
to build one combined image out of whatever is currently highlighted.
if let cropped = try? await subject.image {
    extractedObjectImage = cropped
}

let merged = try await interaction.image(for: interaction.highlightedSubjects)
imageForAllSelectedObjects = merged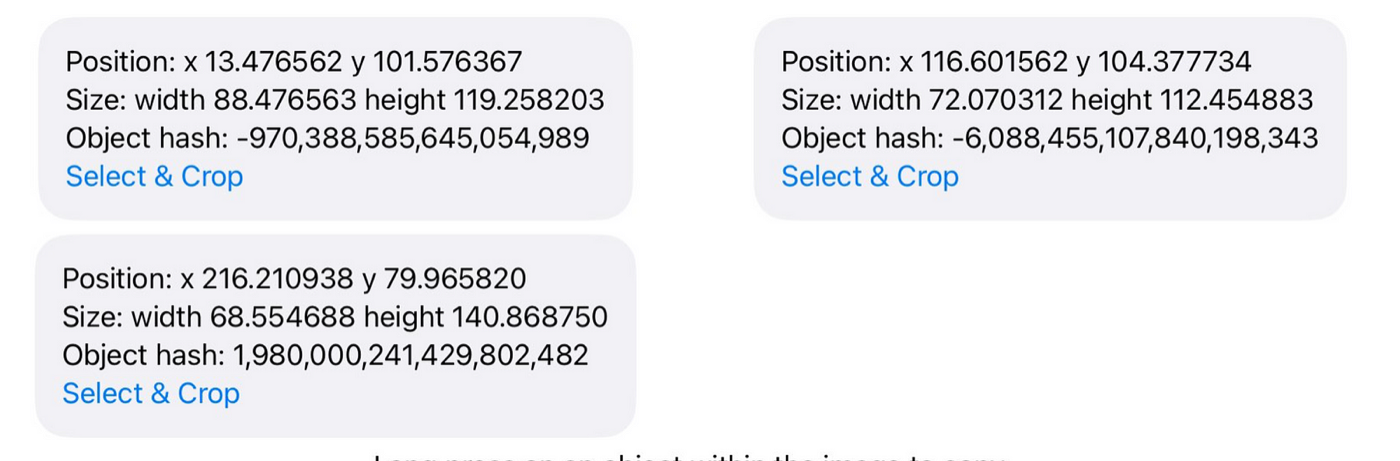
SwiftUI still relies on the same UIKit interaction, so the cleanest bridge is a shared view model plus a UIViewRepresentable wrapper.
The rewrite here follows the same architecture as the original: keep the analyzer and interaction in an
ObservableObject, pass that object into a wrapper view, and let the wrapper own the real UIImageView.
Your SwiftUI screen can then react to selected objects, extracted images, and counts like ordinary state.
@MainActor
final class ImageAnalysisViewModel: ObservableObject {
    let analyzer = ImageAnalyzer()
    let interaction = ImageAnalysisInteraction()
}

struct ObjectPickableImageView: UIViewRepresentable {
    let image: UIImage
    @EnvironmentObject var viewModel: ImageAnalysisViewModel

    func makeUIView(context: Context) -> UIImageView {
        let imageView = UIImageView()
        imageView.image = image
        imageView.contentMode = .scaleAspectFit
        viewModel.interaction.preferredInteractionTypes = [.imageSubject]
        imageView.addInteraction(viewModel.interaction)
        return imageView
    }

    func updateUIView(_ uiView: UIImageView, context: Context) {}
}You can also ask the interaction which subject sits under a tap, then toggle that subject in the highlight set.
This is the bonus path in this article. Instead of waiting for a long press, you can install your own tap gesture
and use subject(at:) to resolve the touched object. The same idea also works from SwiftUI's
.onTapGesture when you can forward the tapped location.
@objc func handleTap(_ gesture: UITapGestureRecognizer) {
    let point = gesture.location(in: imageView)

    Task { @MainActor in
        if let subject = await interaction.subject(at: point) {
            if interaction.highlightedSubjects.contains(subject) {
                interaction.highlightedSubjects.remove(subject)
            } else {
                interaction.highlightedSubjects.insert(subject)
            }
        }
    }
}
Use VNGenerateForegroundInstanceMaskRequest when you need the foreground mask itself, not only the lifted subject experience.
The lower-level branch starts from a CIImage, runs VNGenerateForegroundInstanceMaskRequest,
and keeps the resulting observation for later mask generation. This is the point where you stop asking the system for interaction behavior
and start asking it for the segmentation data.
func performAnalysis(for image: UIImage) throws {
    guard let ciImage = CIImage(image: image) else {
        throw RequestError.failedToGetCIImage
    }

    let request = VNGenerateForegroundInstanceMaskRequest()
    let handler = VNImageRequestHandler(ciImage: ciImage)
    try handler.perform([request])

    guard let observation = request.results?.first else {
        throw RequestError.noSubjectsDetected
    }

    let maskBuffer = try observation.generateScaledMaskForImage(
        forInstances: observation.allInstances,
        from: handler
    )

    let maskImage = CIImage(cvPixelBuffer: maskBuffer)
    maskedImagePreview = maskImage
}
A monochrome preview of the mask is useful for debugging. White pixels mark the foreground instance regions, while black pixels represent the background.
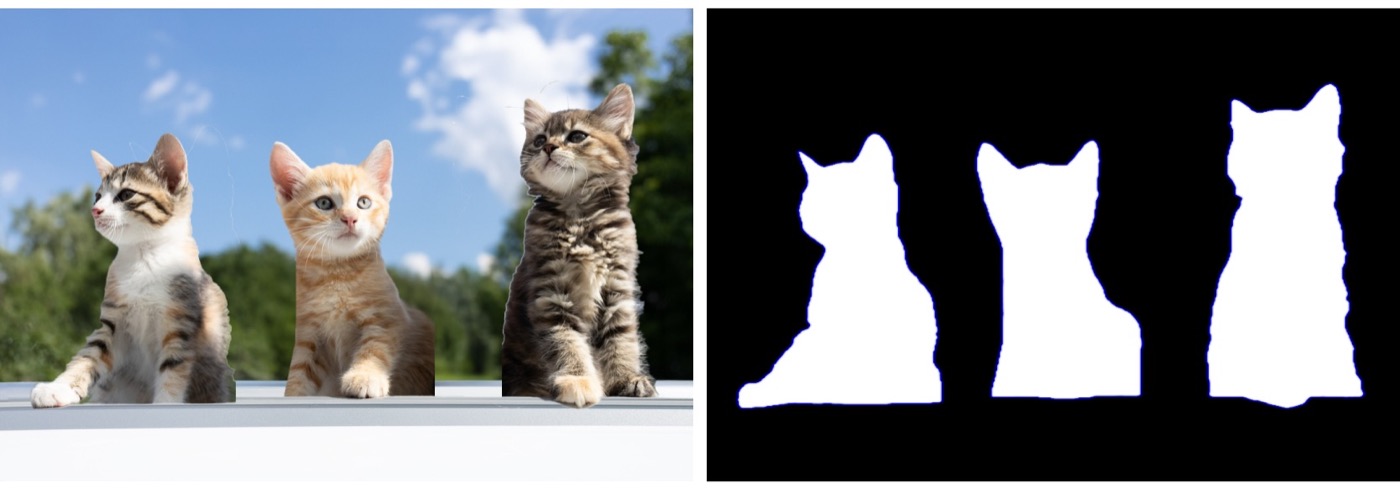
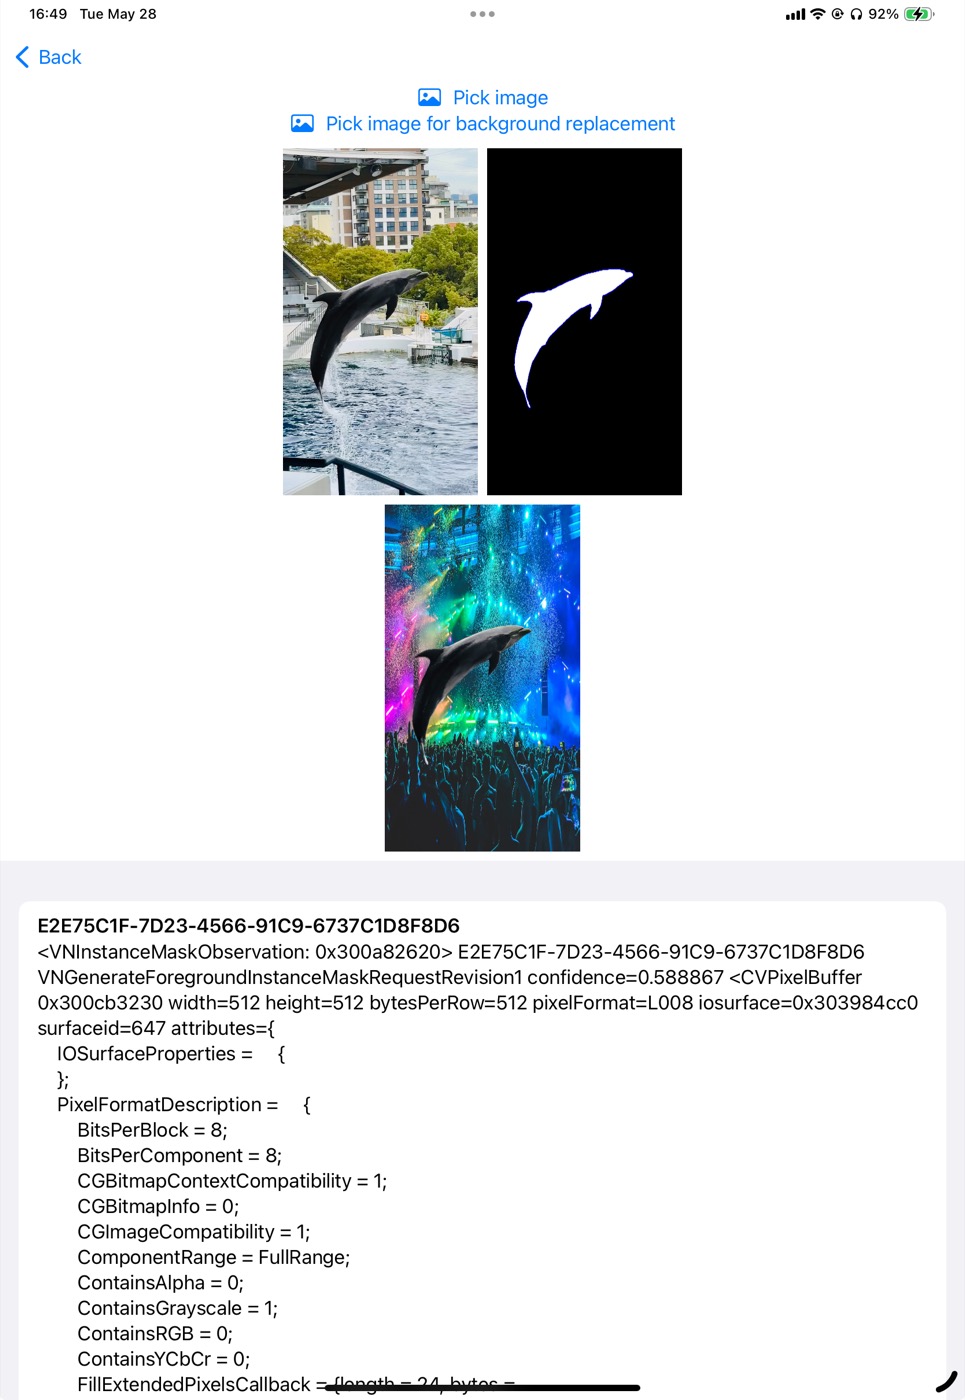
Once you have the mask, the rest is image compositing: feed the original image, the mask, and an optional new background into Core Image.
This article uses CIBlendWithMask for this step. The only practical detail you need to handle carefully is background sizing:
scale and crop any replacement image so it matches the input extent before blending.
let filter = CIFilter(name: "CIBlendWithMask")
filter?.setValue(image, forKey: kCIInputImageKey)
filter?.setValue(mask, forKey: kCIInputMaskImageKey)
filter?.setValue(background, forKey: kCIInputBackgroundImageKey)
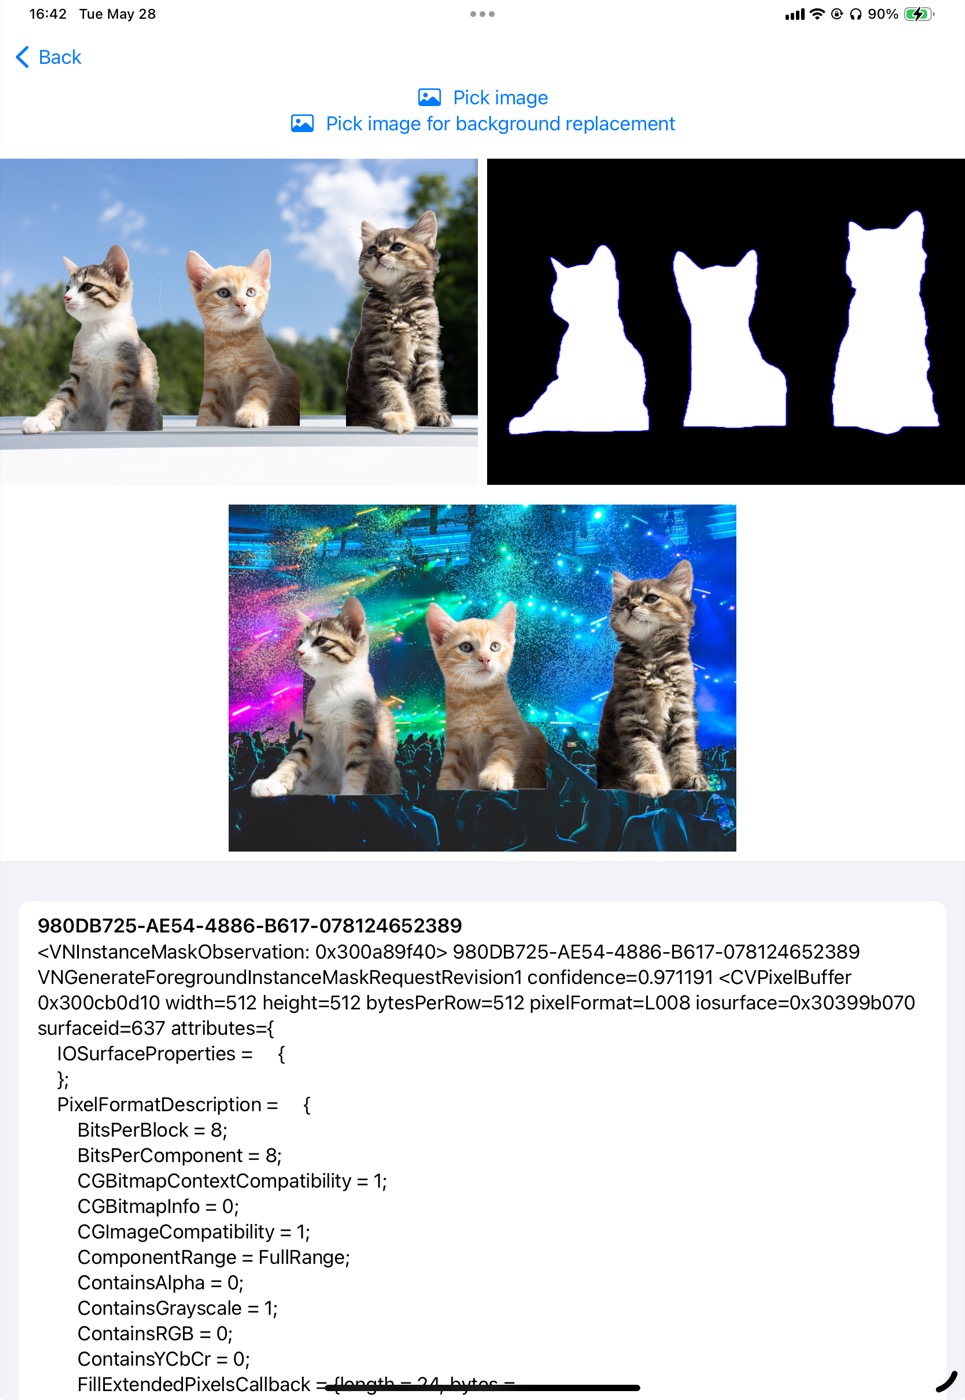
guard let output = filter?.outputImage else { return nil }This is where the tutorial becomes more fun than strictly practical. The same subject-isolation pipeline used on the cats is also reused on other images, and the final example turns the extracted subjects into a small "cat party" scene by placing them over a concert-style background.
The high-level API is usually enough for subject lifting, but Vision is there when you need control over the pixels.
That is the real split in the article. ImageAnalysisInteraction is the fast way to match the system experience for object lifting,
selection, and extraction in both UIKit and SwiftUI. VNGenerateForegroundInstanceMaskRequest is the path you take when your app wants
to build custom compositing or editing behavior on top of the same recognition result.
This article also links to a complete sample project: mszpro/LiftObjectFromImage.