LARight turns biometric rules into a reusable object instead of one-off prompts.
This article frames LARight as more than just another Face ID prompt. In iOS 16 it can sit behind
secret storage, app-wide login state, and private UI. That means one API can cover secure persistence, repeated
reauthorization, and conditional rendering in SwiftUI.
The post focuses on four concrete outcomes: saving data to the Keychain, authenticating with biometrics plus optional
passcode fallback, sharing the unlocked state across multiple views, and hiding sensitive labels with
.redacted when the user is not currently authorized.
LARight.Convert the value to Data, define the access rule, authorize it once, then save the right and secret together.
The storage path in this article begins with a plain string, such as an API token, then converts it into
Data. After that, the important part is the requirement itself. The recommended example uses biometric auth
with device-passcode fallback so the user is not locked out if biometrics are unavailable.
guard let encodedData = secretValue.data(using: .utf8) else {
return
}
func store(data: Data, withIdentifier: String) async throws {
let right = LARight(requirement: .biometry(fallback: .devicePasscode))
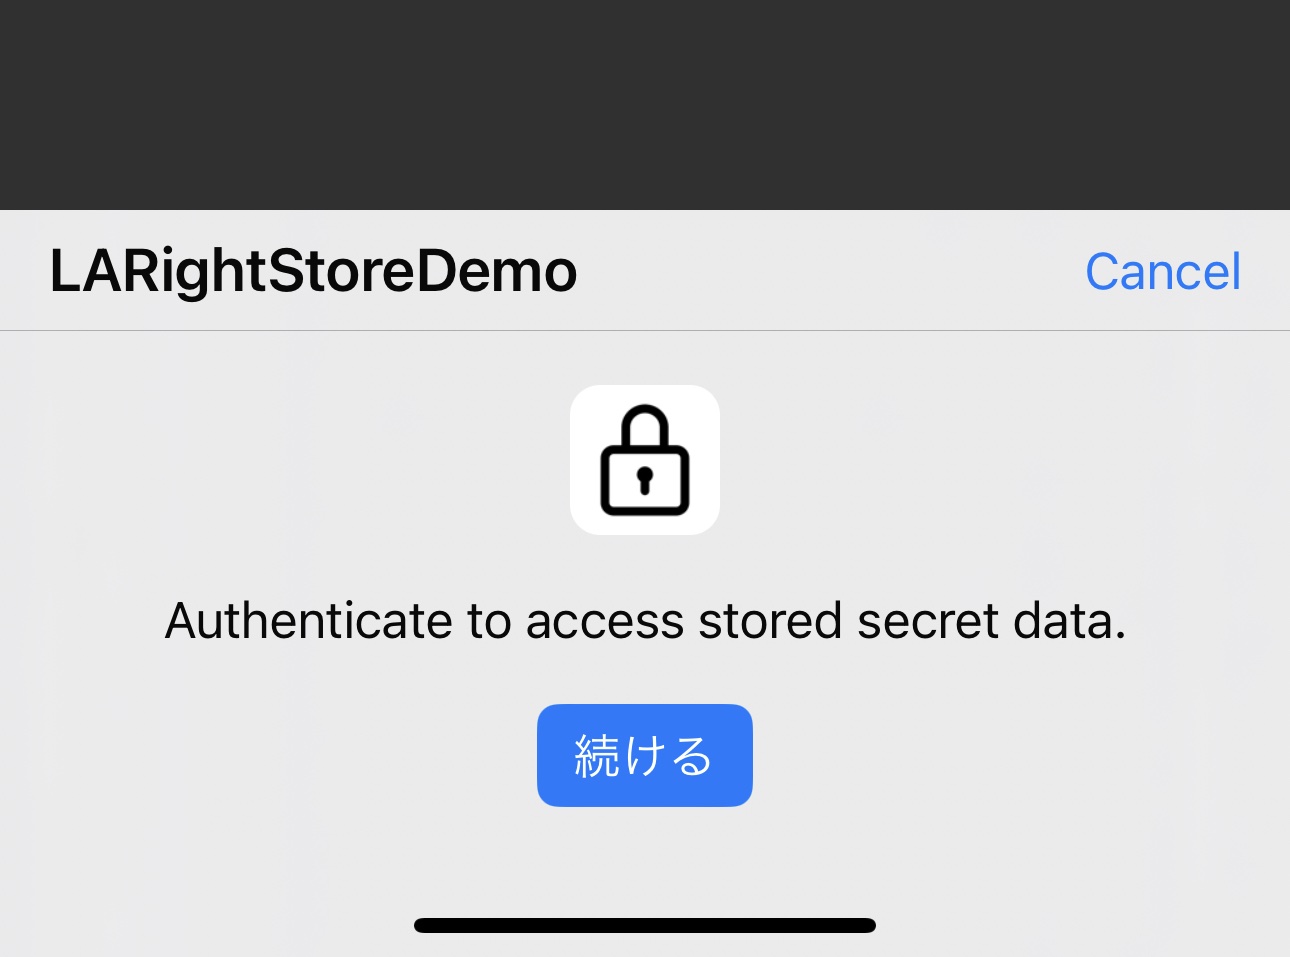
try await right.authorize(
localizedReason: "Authenticate to access stored secret data."
)
_ = try await LARightStore.shared.saveRight(
right,
identifier: withIdentifier,
secret: data
)
}
The article also calls out an important tradeoff: if you use plain .biometry without passcode fallback,
later disabling Face ID or Touch ID can make that secret inaccessible. It also reminds you to add
NSFaceIDUsageDescription to Info.plist.
Loading the value back is a two-step flow: recover the saved right, then authorize that same right again.
To fetch the secret, the saved identifier is used to look up the existing LARight. Once loaded, the app
asks the user to authorize it again and then reads the raw bytes from the protected secret.
func fetchData(withIdentifier: String) async throws -> Data {
    let right = try await LARightStore.shared.right(forIdentifier: withIdentifier)
    try await right.authorize(
        localizedReason: "Authenticate to access stored secret data."
    )
    return try await right.secret.rawData
}
The post explicitly points out the role of await here: the fetch does not continue until the system
authentication flow completes. If your identifier changes over time, you also need to persist that identifier somewhere
else, such as Core Data or UserDefaults.
The article wraps the save, read, and delete actions into a small form-based demo view.
The complete demo in this article uses a Form with fields for the identifier and secret value, then
buttons that call the async store, fetch, and remove functions. It is intentionally small, but it shows the end-to-end
shape clearly enough to lift into a real app.
struct SecretStoreDemo: View {
    @State private var dataIdentifier: String = "demo"
    @State private var secretValue: String = ""
    @State private var statusStr: String = ""

    var body: some View {
        Form {
            Section {
                TextField("Data identifier", text: $dataIdentifier)
                TextField("Secret value", text: $secretValue)
            }
            Section {
                Button("Save value") { ... }
                Button("Read value") { ... }
                Button("Delete data") { ... }
            }
            Section {
                if !statusStr.isEmpty {
                    Text(statusStr)
                }
            }
        }
    }
}
The delete path is equally direct: LARightStore.shared.removeRight(forIdentifier:) removes the saved entry
and the demo clears the in-memory text fields after that.
For broader privacy controls, the article promotes one shared observable object that owns the current login right.
Some apps need more than a single secret read. If several screens contain private information, prompting for Face ID on
every view transition becomes awkward. The article solves that by introducing a shared ObservableObject with
one loginRight and one published currentLoginState.
final class AppWideAuthentication: NSObject, ObservableObject {
    static let shared = AppWideAuthentication()

    @Published var loginRight =
        LARight(requirement: .biometry(fallback: .devicePasscode))
    @Published var currentLoginState: LARight.State = .unknown

    func login() async throws {
        try await loginRight.authorize(
            localizedReason: "Authenticate to access stored secret data."
        )
        DispatchQueue.main.async {
            self.currentLoginState = self.loginRight.state
        }
    }

    func logout() async {
        await loginRight.deauthorize()
        DispatchQueue.main.async {
            self.currentLoginState = self.loginRight.state
        }
    }
}
SwiftUI views can then observe AppWideAuthentication.shared, expose login and logout buttons, and read
the same authorization state from anywhere in the app.
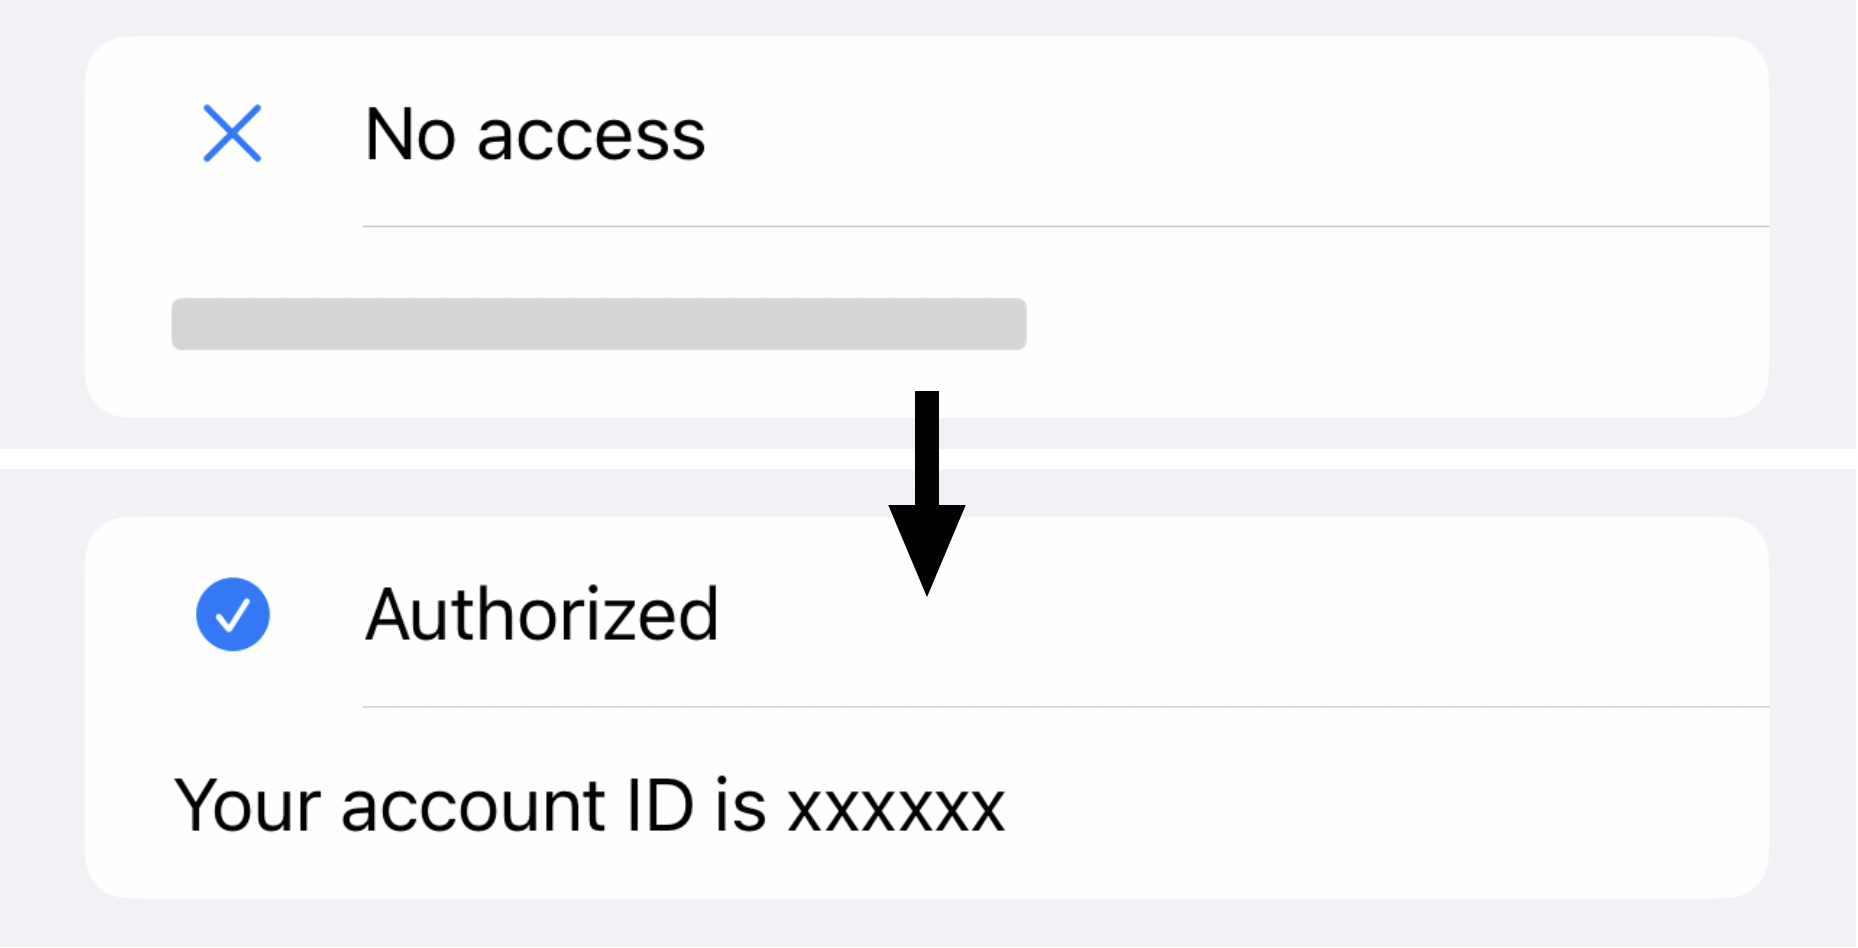
Once the shared auth state exists, .redacted becomes the simplest way to keep sensitive text off screen.
The last idea in the article is intentionally lightweight: do not build a custom blur or placeholder system if the stock redaction API already matches your needs. When the user is unauthorized, the private label uses placeholder redaction. When authorization succeeds, the redaction reason becomes empty and the real content appears.
struct ContentView: View {
    @ObservedObject var appAuth = AppWideAuthentication.shared

    var body: some View {
        Text("Your account ID is xxxxxx")
            .redacted(
                reason: (appAuth.currentLoginState == .authorized)
                    ? []
                    : .placeholder
            )
    }
}
The article also shows a small status label example elsewhere in the app so views can react to
.authorized versus .unknown or unauthenticated states without reimplementing the auth logic.
LARight is most useful when you treat authorization as shared app state, not just a one-time prompt.
That is the core takeaway from the post. The same right object can define how a secret is protected, reauthorize access later, and feed a global SwiftUI privacy model. With that in place, secure storage and conditional UI stop being separate problems and become one consistent flow.