Live Activities arrive on the lock screen first, and on Dynamic Island for supported iPhones.
This article was written in September 2022, when Live Activities had been removed from iOS 16.0 and were only available in the iOS 16.1 public beta. That timing matters: this is an iOS 16.1-or-later feature, and the Dynamic Island presentation is specifically relevant to iPhone 14 Pro-class hardware.
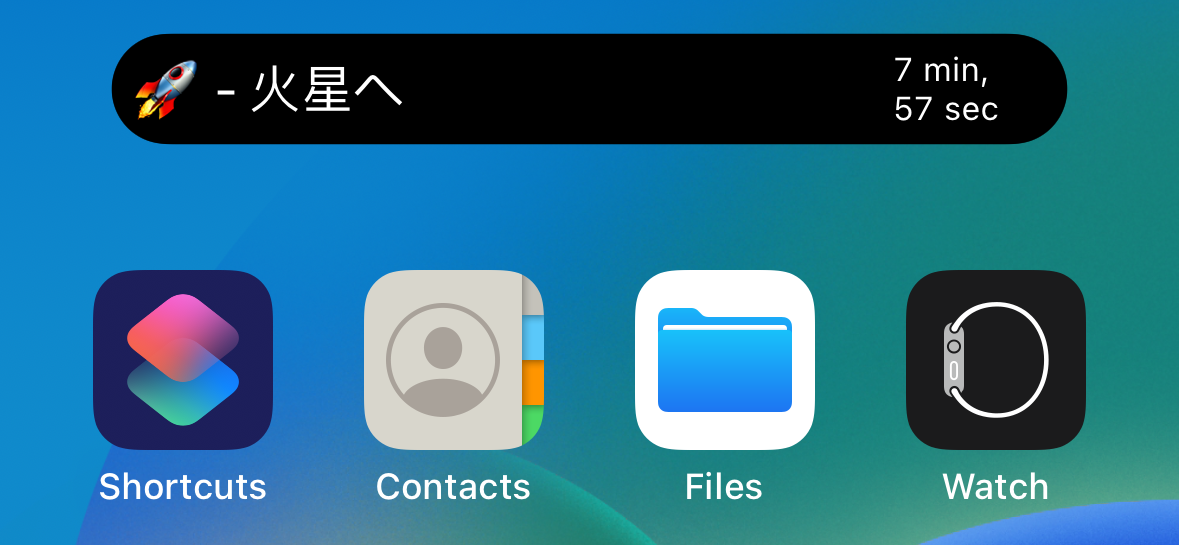
The UI surface is split across two places. Every supported iPhone can show the Live Activity on the lock screen. On Dynamic Island devices, the same activity can also render in compact, expanded, or minimal forms above the app.
Dynamic Island has compact, expanded, and minimal forms, while the lock screen gets the wider Live Activity card.
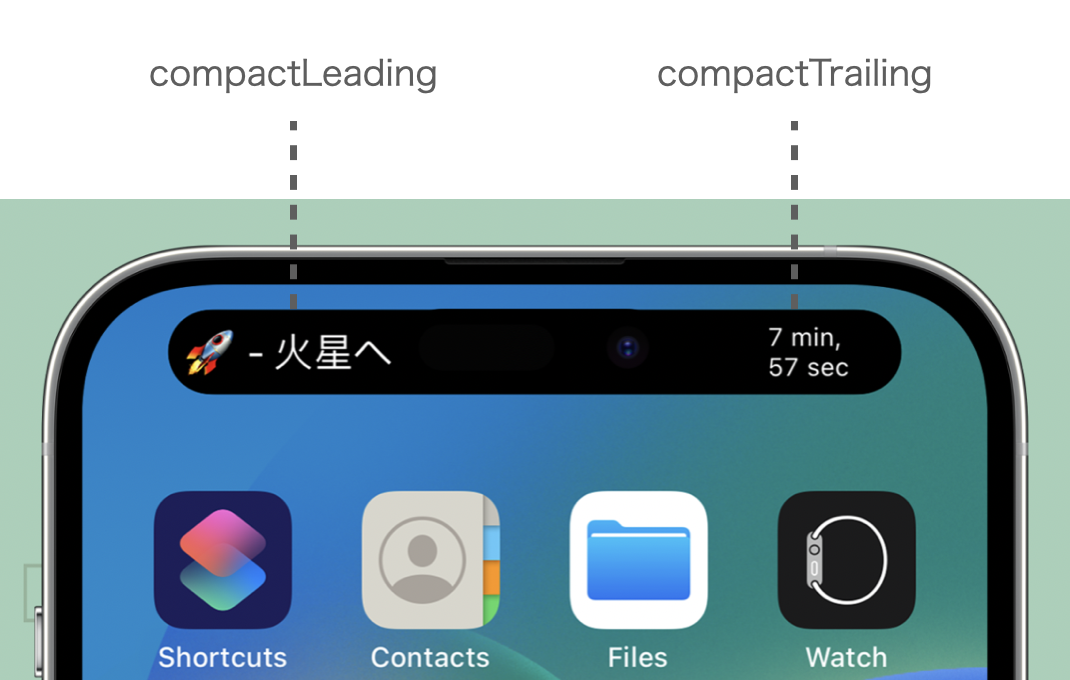
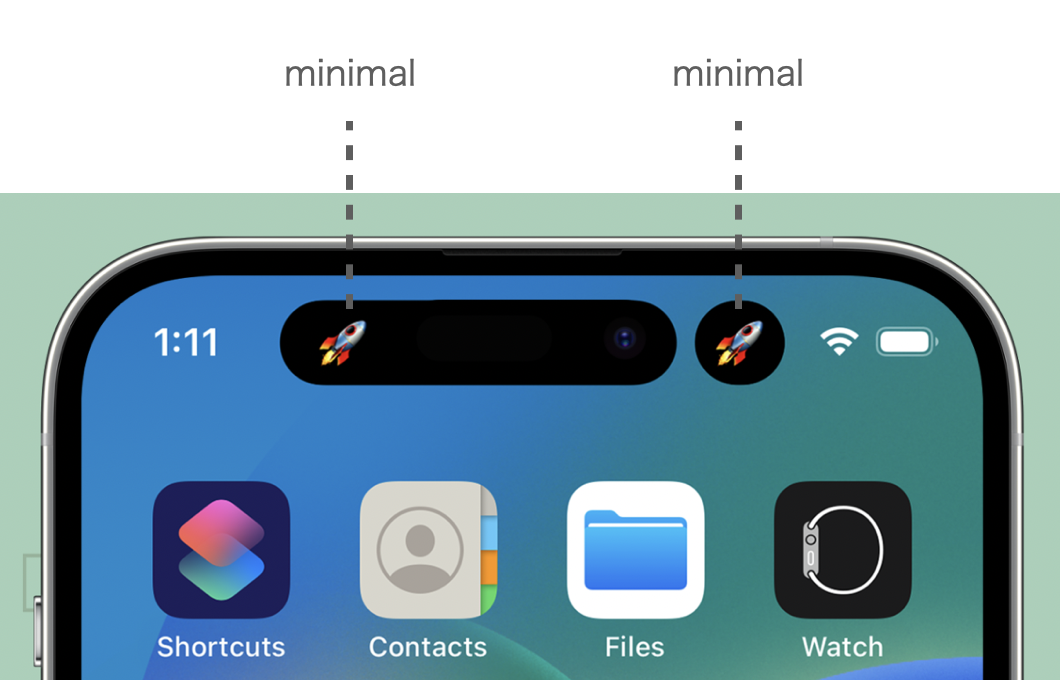
Before writing code, the article first maps the four surfaces you need to think about. Compact mode gives you a leading and trailing slot with very little width. Expanded mode appears when the user long-presses the island. Minimal mode is used when the system has to shrink activities even further, such as when multiple activities are present. The lock screen version is the most spacious and works on non-Dynamic-Island iPhones too.
The feature gate is simple: a widget extension, an iOS 16.1 deployment target, and the Live Activities plist flag.
The first setup step is making sure the iOS app already has a widget extension target. From there, this article
sets the minimum deployment target to iOS 16.1, while also recommending if #available(iOS 16.1, *)
checks if the wider app still supports older systems.
Both the main app and the widget extension need NSSupportsLiveActivities set to YES
in Info.plist. That is the switch that tells the system the app is allowed to publish Live Activities at all.
Model the activity with static fields outside and changing fields inside ContentState.
The article uses a fictional space-trip example to explain the split between data that stays fixed for the whole session
and data that changes while the activity is alive. In ActivityKit, that means your type conforms to
ActivityAttributes, while the changing values live in a nested ContentState struct.
import Foundation
import ActivityKit

struct TripAppAttributes: ActivityAttributes {
    enum TripStatus: String {
        case predeparture
        case inflight
        case landed
    }

    public struct ContentState: Codable, Hashable {
        var tripStatus: String
        var arrivalTime: Date
    }

    var shipNumber: String
    var departureTime: Date
    var userStopPlanetName: String
    var userCabinNumber: String
}
In this example, the ship number, departure time, destination, and cabin number stay constant. The trip status
and arrival time can change, so they belong in ContentState.
Replace the normal widget body with ActivityConfiguration.
A regular widget configuration is not enough for this UI. The widget target needs an
ActivityConfiguration instead, keyed to the attribute type you defined above.
The first closure renders the lock screen activity, and the dynamicIsland closure handles every island variant.
@main
struct LiveActivitiesTestWidget: Widget {
    let kind: String = "LiveActivitiesTestWidget"

    var body: some WidgetConfiguration {
        ActivityConfiguration(for: TripAppAttributes.self) { context in
            LiveActivitiesTestWidgetEntryView(
                attribute: context.attributes,
                state: context.state
            )
        } dynamicIsland: { context in
            // Dynamic Island content goes here.
        }
    }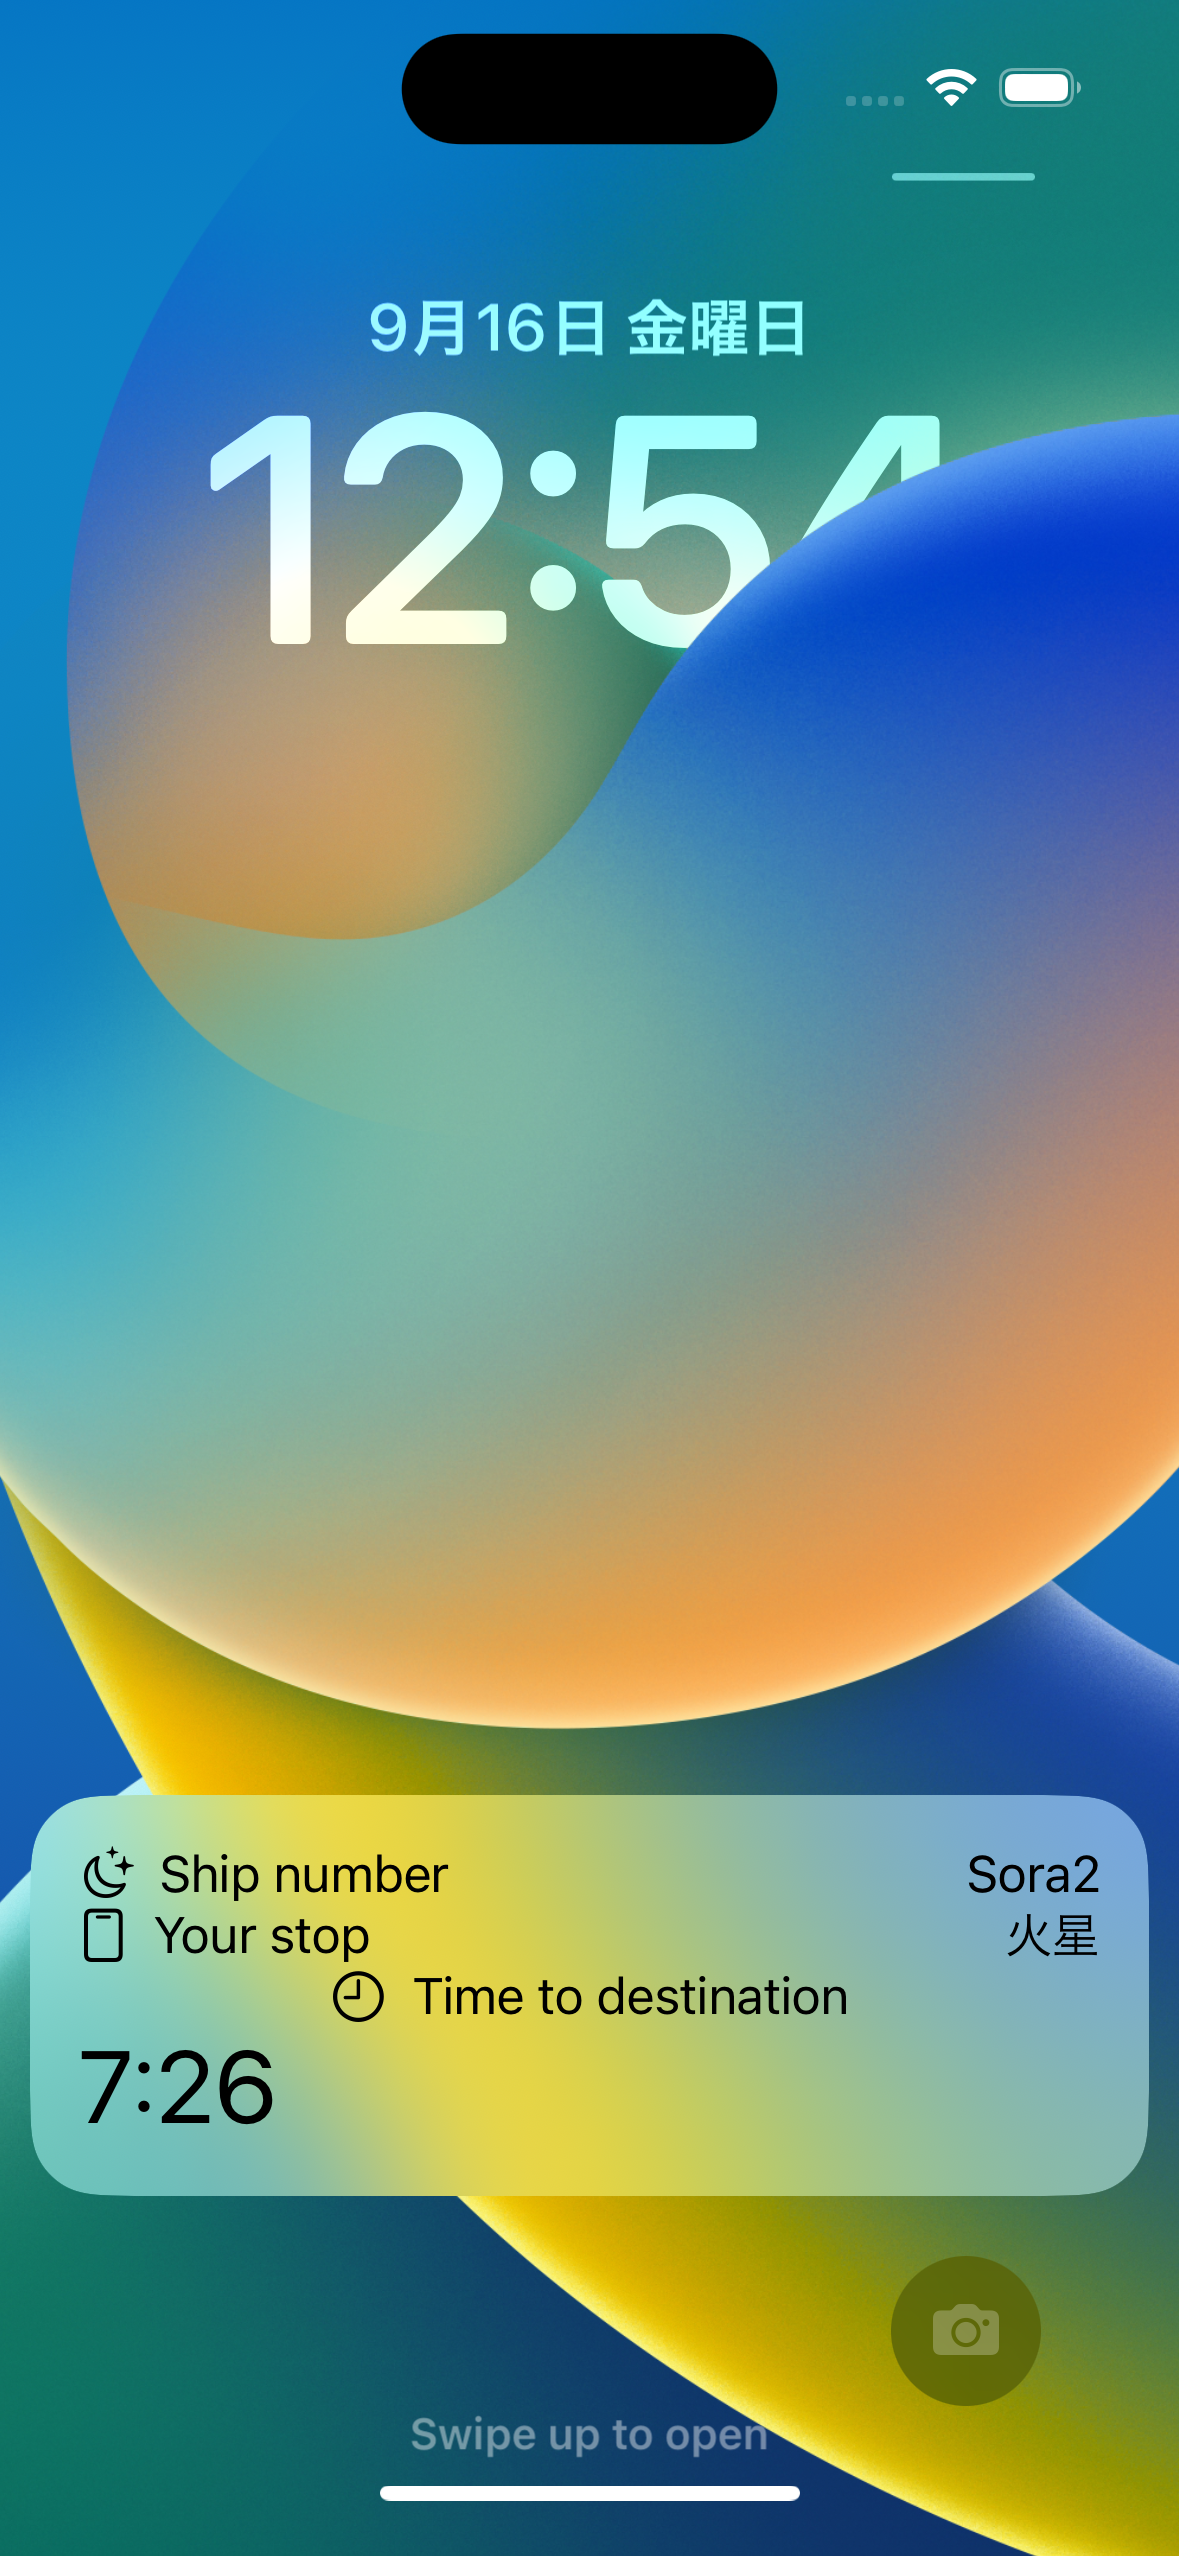
}The lock screen view is just SwiftUI, but it should be designed around changing state.
The article's LiveActivitiesTestWidgetEntryView reads both the static attributes and the mutable content state,
then branches the body based on the current trip status. That is the view shown underneath the island on the lock screen.

struct LiveActivitiesTestWidgetEntryView: View {
    @State var attribute: TripAppAttributes
    @State var state: TripAppAttributes.ContentState

    var body: some View {
        VStack(alignment: .center) {
            HStack {
                Label("Ship number", systemImage: "moon.stars")
                Spacer()
                Text(attribute.shipNumber)
            }

            HStack {
                Label("Your stop", systemImage: "lanyardcard")
                Spacer()
                Text(attribute.userStopPlanetName)
            }

            switch TripAppAttributes.TripStatus(rawValue: state.tripStatus) {
            case .predeparture:
                Text(attribute.userCabinNumber)
            case .inflight:
                Label("Currently in trip", systemImage: "clock")
            case .landed:
                Label("Landed", systemImage: "checkmark.circle.fill")
            default:
                Text("Unknown trip status")
            }
        }
        .padding()
    }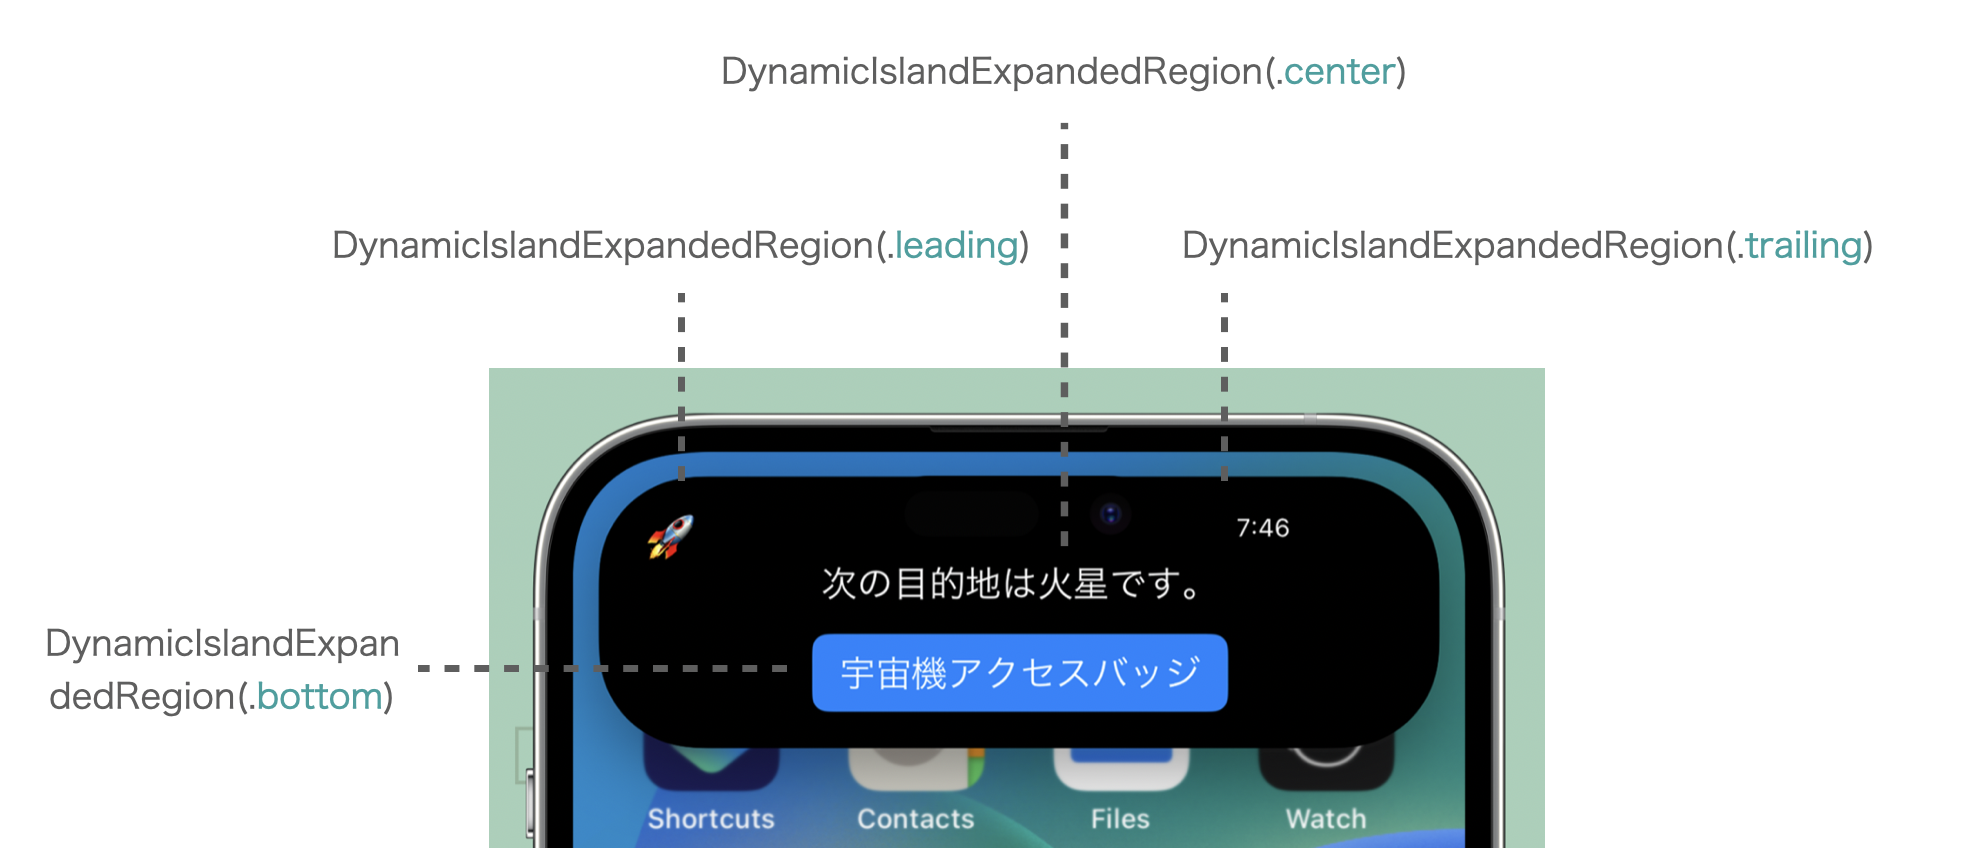
}Expanded mode has four named regions, and you must also supply compact and minimal variants.
The Dynamic Island configuration starts with the expanded layout. The article uses four explicit regions:
.leading, .trailing, .center, and .bottom.
After that, it supplies separate content for compactLeading, compactTrailing, and minimal.
DynamicIsland {
    DynamicIslandExpandedRegion(.leading) {
        Image(systemName: "moon.stars.fill")
    }
    DynamicIslandExpandedRegion(.trailing) {
        Text(context.state.arrivalTime, style: .timer)
            .font(.caption2)
    }
    DynamicIslandExpandedRegion(.center) {
        Text("Next stop: \(context.attributes.userStopPlanetName)")
    }
    DynamicIslandExpandedRegion(.bottom) {
        Button("Spacecraft access badge") { }
            .buttonStyle(.borderedProminent)
    }
} compactLeading: {
    Text("Trip - \(context.attributes.shipNumber)")
} compactTrailing: {
    Text(context.state.arrivalTime, style: .relative)
        .frame(width: 50)
        .monospacedDigit()
        .font(.caption2)
} minimal: {
    Image(systemName: "moon.stars.fill")
}
The design guidance in the article is practical. Expanded leading and trailing areas should stay short. The center can carry a sentence or scoreboard-like summary. The bottom is a good place for a button. Minimal mode should remain icon-like because the system can shrink activities aggressively when multiple ones are active.
Starting the activity happens in the main app, not inside the widget extension.
Once the widget extension knows how to render the activity, the main app can create it by building the fixed attributes,
preparing the initial content state, and sending them to Activity.request.
let attributes = TripAppAttributes(
    shipNumber: "To Mars",
    departureTime: Date(),
    userStopPlanetName: "Mars",
    userCabinNumber: "A-07"
)

let contentState = TripAppAttributes.ContentState(
    tripStatus: TripAppAttributes.TripStatus.inflight.rawValue,
    arrivalTime: Calendar.current.date(
        byAdding: .minute,
        value: 8,
        to: Date()
    ) ?? Date()
)

do {
    self.currentActivity = try Activity<TripAppAttributes>.request(
        attributes: attributes,
        contentState: contentState,
        pushType: nil
    )
} catch {
    print(error.localizedDescription)
}
You can inspect existing activities later through Activity<TripAppAttributes>.activities.
The post also notes that users can disable Live Activities for an app, so it is worth checking
ActivityAuthorizationInfo().areActivitiesEnabled before relying on them.
Updates can come from the app itself or from your server through liveactivity pushes.
For local updates, the flow is simple: build a new ContentState and call update(using:)
on the current activity. The article demonstrates extending the arrival time by ten minutes.
Button("Trip arrival time +10 minutes") {
    Task {
        guard let currentActivity else { return }

        let updatedState = TripAppAttributes.ContentState(
            tripStatus: TripAppAttributes.TripStatus.inflight.rawValue,
            arrivalTime: Calendar.current.date(
                byAdding: .minute,
                value: 10,
                to: currentActivity.contentState.arrivalTime
            ) ?? Date()
        )

        await currentActivity.update(using: updatedState)
    }
}
Remote updates are a little more operational. You send the activity's pushToken to your server,
then encode the latest content-state as JSON in the same shape as the Swift struct.
apns-push-type: liveactivity, set apns-topic to [BundleID].push-type.liveactivity, send event: update for changes or event: end to stop the activity, and keep watching pushTokenUpdates because the token can change.
Ending the activity means sending a final state and a dismissal policy.
The final step is not just removing the widget. You tell ActivityKit what the end state should be, then let the system decide when to dismiss it according to the chosen policy.
Button("End activity") {
    Task {
        guard let currentActivity else { return }

        let updatedState = TripAppAttributes.ContentState(
            tripStatus: TripAppAttributes.TripStatus.landed.rawValue,
            arrivalTime: Date()
        )

        await currentActivity.end(
            using: updatedState,
            dismissalPolicy: .default
        )
    }
}
That fits the general lifecycle the article teaches: request the activity, update it as state changes, and end it with one last snapshot when the event is over.
The important mental model is not the UI chrome. It is the lifecycle.
The Dynamic Island screenshots are what make this topic eye-catching, but the durable lesson is the shape of the API:
define immutable and mutable data separately, wire the widget extension through ActivityConfiguration,
describe every island state, and let the main app or server drive the content updates.
For early ActivityKit-era code, this article is still a useful reference because it walks through the complete path from prerequisites to teardown without hiding the operational details.