
MapKit in iOS 16 became much more useful for apps that need real place picking, not just static maps.
This article opens with a simple point: MapKit is already free and built in, but iOS 16 makes it more interactive. Users can tap map features directly, apps can provide Look Around previews, and autocomplete flows can stay within Apple's own search stack.
The post was tested against the iOS 16 beta era, so it also calls out where the code requires iOS 16 and where the same ideas still apply on older systems.


Start with a plain MKMapView, register an annotation view, and opt into selectable map features.
The first feature in the post is tapping places directly from the map. The setup is small: create or connect an
MKMapView, register a reusable marker view, and choose which system-provided map features the user can select.
private var mapView: MKMapView = .init(frame: .zero)
// @IBOutlet weak var mapView: MKMapView!

mapView.register(
    MKMarkerAnnotationView.self,
    forAnnotationViewWithReuseIdentifier: "featureAnnotation"
)

mapView.selectableMapFeatures = [.pointsOfInterest]
mapView.delegate = context.coordinator
mapView.showsUserLocation = true
The article also calls out the other categories available for selectableMapFeatures:
points of interest, physical features such as rivers or mountain ranges, and territorial boundaries.
MKCoordinateRegion around that coordinate.
Use MKMapFeatureAnnotation in viewFor to attach richer callouts to real map features.
Once the user taps a supported feature, MapKit hands you an MKMapFeatureAnnotation. The article handles that inside
mapView(_:viewFor:), dequeues a marker view, enables callouts, and adds accessory views on both sides.
public func mapView(
    _ mapView: MKMapView,
    viewFor annotation: MKAnnotation
) -> MKAnnotationView? {
    if let annotation = annotation as? MKMapFeatureAnnotation {
        let markerAnnotationView = mapView.dequeueReusableAnnotationView(
            withIdentifier: "featureAnnotation",
            for: annotation
        )

        if let markerAnnotationView = markerAnnotationView as? MKMarkerAnnotationView {
            markerAnnotationView.animatesWhenAdded = true
            markerAnnotationView.canShowCallout = true

            let infoButton = UIButton(type: .detailDisclosure)
            markerAnnotationView.rightCalloutAccessoryView = infoButton

            if let tappedFeatureColor = annotation.iconStyle?.backgroundColor,
               let image = annotation.iconStyle?.image {
                let imageView = UIImageView(
                    image: image.withTintColor(
                        tappedFeatureColor,
                        renderingMode: .alwaysOriginal
                    )
                )
                imageView.bounds = CGRect(
                    origin: .zero,
                    size: CGSize(width: 50, height: 50)
                )
                markerAnnotationView.leftCalloutAccessoryView = imageView
            }
        }

        return markerAnnotationView
    } else {
        return nil
    }
}
The place picker works in SwiftUI through a small UIViewRepresentable wrapper.
The article then packages the same map behavior into a SwiftUI-compatible wrapper called
PickFromMap_ViewAdaptor. The wrapper owns an MKMapView, registers the feature annotation view,
wires the delegate through a coordinator, and optionally centers on a caller-provided coordinate.
@available(iOS 16, *)
public struct PickFromMap_ViewAdaptor: UIViewRepresentable {
    public typealias UIViewType = MKMapView

    private var mapView: MKMapView = .init(frame: .zero)
    private var userLocationCoordinate: CLLocationCoordinate2D?

    public init(userLocationCoordinate: CLLocationCoordinate2D?) {
        self.userLocationCoordinate = userLocationCoordinate
    }

    public func makeUIView(
        context: UIViewRepresentableContext<PickFromMap_ViewAdaptor>
    ) -> MKMapView {
        mapView.register(
            MKMarkerAnnotationView.self,
            forAnnotationViewWithReuseIdentifier: "featureAnnotation"
        )
        mapView.selectableMapFeatures = [.pointsOfInterest]
        mapView.showsUserLocation = true
        mapView.delegate = context.coordinator
        return mapView
    }

    public func makeCoordinator() -> Coordinator {
        Coordinator()
    }
}
The full sample in this article keeps the delegate code in the coordinator, so the SwiftUI screen can stay thin.
The tapped annotation is only a start. Use MKMapItemRequest to fetch richer place metadata.
The post points out an important limitation: the selected MKMapFeatureAnnotation already tells you the title,
type, and some presentation data, but it is not the full place record. If you need more detail, build an
MKMapItemRequest from the feature annotation.
public func mapView(
    _ mapView: MKMapView,
    annotationView view: MKAnnotationView,
    calloutAccessoryControlTapped control: UIControl
) {
    if let annotation = view.annotation as? MKMapFeatureAnnotation {
        let detailRequest = MKMapItemRequest(mapFeatureAnnotation: annotation)
        detailRequest.getMapItem { mapItem, error in
            print(mapItem)
        }

        self.selectedAnnotation = annotation
    }
}
That is the point where a selection UI can turn into a booking flow, address fill, store detail screen, or route destination.
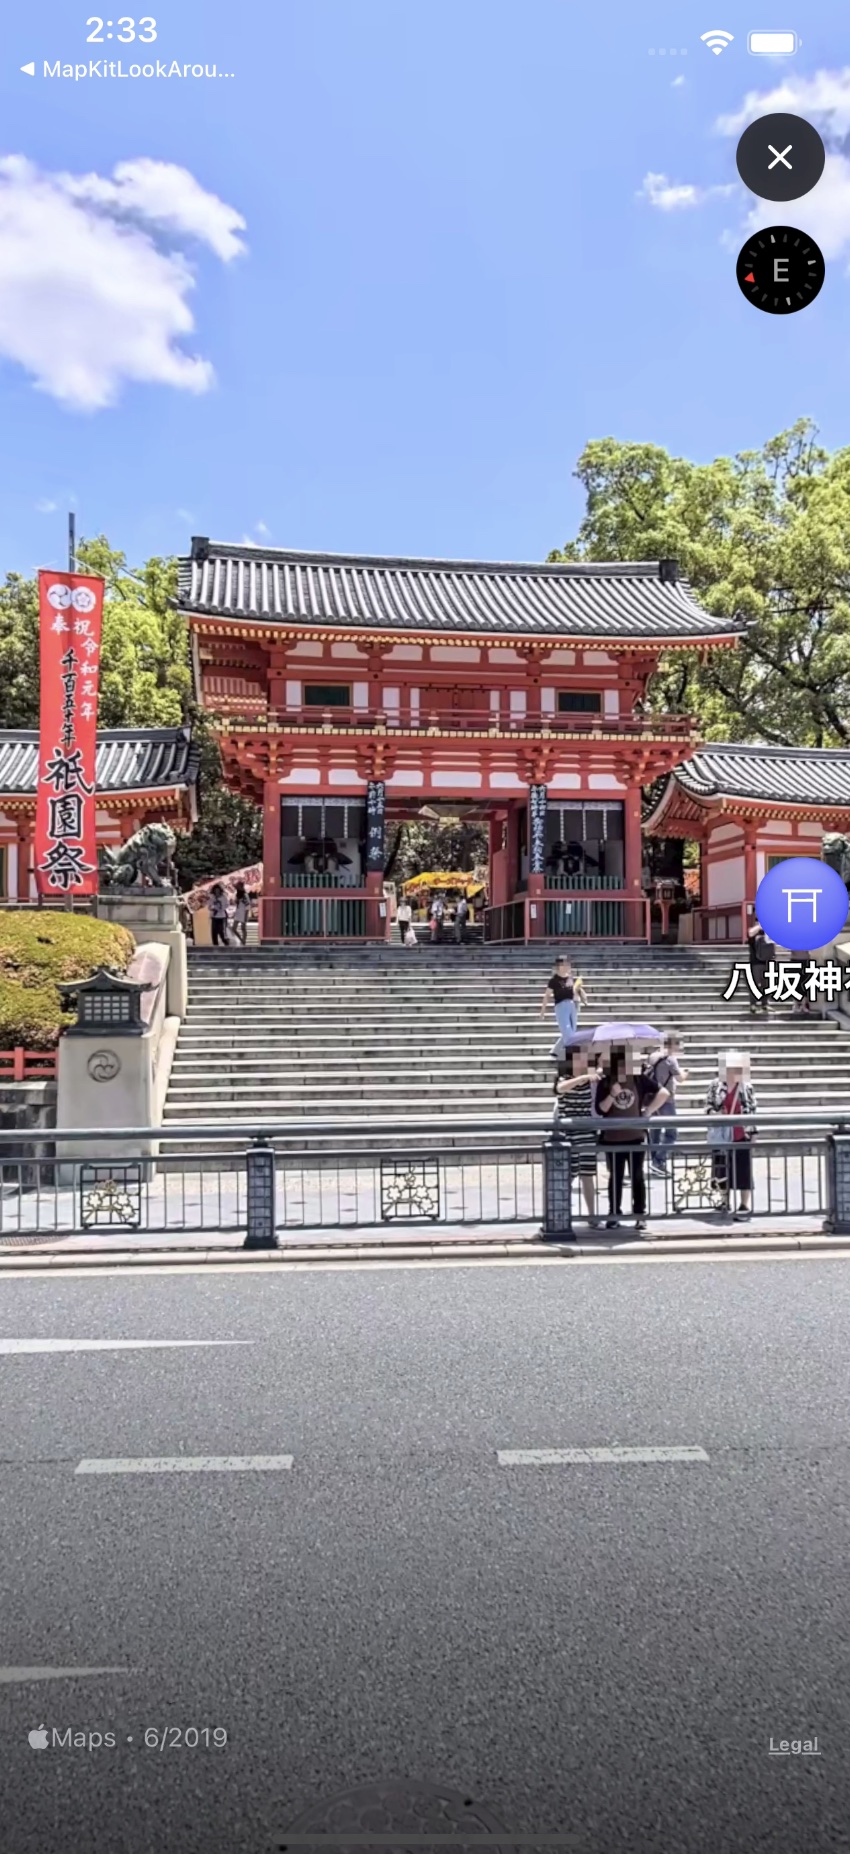
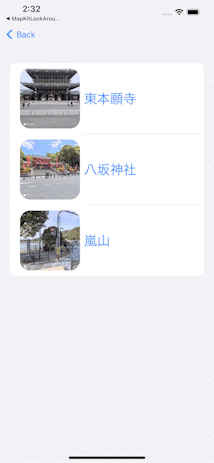
Look Around starts with an MKLookAroundSceneRequest, then a snapshotter if you only need a preview image.
For static previews, the article first requests a scene from a coordinate, then turns that scene into an image through
MKLookAroundSnapshotter. It shows both the older completion-handler path and the cleaner async version.
let sceneRequest = MKLookAroundSceneRequest(
    coordinate: snapshotLocationCoordinate
)

sceneRequest.getSceneWithCompletionHandler { scene, error in
    guard error == nil, let scene = scene else {
        return
    }
    // ...
}
.task {
let sceneRequest = MKLookAroundSceneRequest(
coordinate: snapshotLocationCoordinate
)
if let scene = try? await sceneRequest.scene {
let snapshotter = MKLookAroundSnapshotter(
scene: scene,
options: .init()
)
if let snapshotImage = try? await snapshotter.snapshot.image {
DispatchQueue.main.async {
self.generatedSnapshotImage = snapshotImage
}
}
}
}
The SwiftUI example in the article stores both the generated image and the returned scene so the app can later open the full interactive viewer.
When the user wants more than a thumbnail, present MKLookAroundViewController.
Once you already have a scene object, showing the immersive street-level view is direct:
let lookaroundVC = MKLookAroundViewController(scene: lookaroundScene)
The article also notes that navigation inside the viewer is enabled by default. If the app should behave more like a fixed preview than a free-roaming street view, set isNavigationEnabled to false.
MKLocalSearchCompleter gives you suggestions, but you still need to define region, result type, and filtering rules.
For autocomplete, the post builds a plain completer, updates its region around the user or another center point,
and wires the results back through MKLocalSearchCompleterDelegate.
private var searchCompleter: MKLocalSearchCompleter = .init()

public func updateSearchRegion(
    center: CLLocationCoordinate2D,
    radius: CLLocationDistance
) {
    let newRegion = MKCoordinateRegion(
        center: center,
        latitudinalMeters: radius,
        longitudinalMeters: radius
    )
    searchCompleter.region = newRegion
    self.autoCompleteRegion = newRegion
}

public func startProvidingSuggestions() {
    searchCompleter.delegate = self
    searchCompleter.resultTypes = resultTypes
    searchCompleter.pointOfInterestFilter = pointOfInterestFilter
}

public func updateUserSearchString(_ text: String) {
    searchCompleter.queryFragment = text
}
public func completerDidUpdateResults(
_ completer: MKLocalSearchCompleter
) {
DispatchQueue.main.async {
self.completionResults = completer.results
}
}
public func completer(
_ completer: MKLocalSearchCompleter,
didFailWithError error: Error
) {
DispatchQueue.main.async {
self.completionResults = []
}
}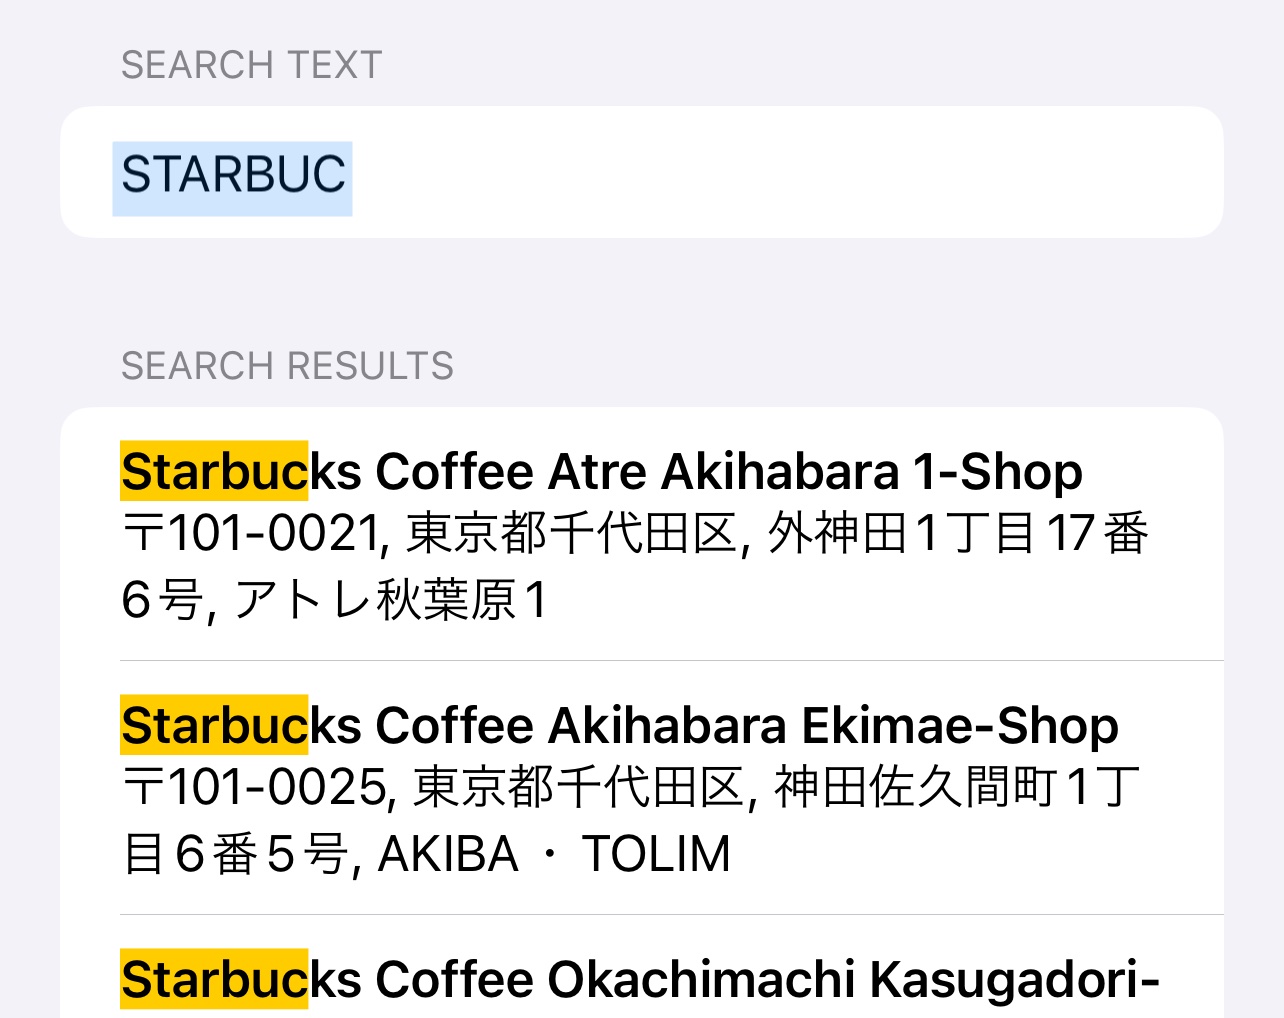
This article also includes a helper adapted from Apple sample code to highlight the matched substrings in each result:
private func createHighlightedString(
    text: String,
    rangeValues: [NSValue]
) -> NSAttributedString {
    let attributes = [
        NSAttributedString.Key.backgroundColor: UIColor.yellow
    ]
    let highlightedString = NSMutableAttributedString(string: text)
    let ranges = rangeValues.map { $0.rangeValue }
    ranges.forEach { range in
        highlightedString.addAttributes(attributes, range: range)
    }
    return highlightedString
}Two smaller MapKit patterns still matter even if your deployment target goes below iOS 16.
The last part of the article collects older-system tips that still fit real shipping apps: restricting how far the camera can move and filtering which categories of points of interest the map should show.
static let event = MKCoordinateRegion(
    center: CLLocationCoordinate2D.eventCenter,
    latitudinalMeters: 200,
    longitudinalMeters: 200
)
static let cameraBoundary = MKCoordinateRegion(
    center: CLLocationCoordinate2D.eventCenter,
    latitudinalMeters: 100,
    longitudinalMeters: 80
)

mapView.region = .event
mapView.cameraBoundary = MKMapView.CameraBoundary(
    coordinateRegion: .cameraBoundary
)
mapView.cameraZoomRange = MKMapView.CameraZoomRange(
    minCenterCoordinateDistance: 250,
    maxCenterCoordinateDistance: 800
)
mapView.pointOfInterestFilter = MKPointOfInterestFilter(
including: [.restaurant, .cafe]
)Those two controls are simple, but they help a lot when the map is part of a focused event, retail, or venue workflow rather than a general-purpose explorer.
The thread through the whole article is that MapKit became a more complete app surface, not just a display widget.
The useful shift in this post is not any single API name. It is the fact that place selection, street-level previews, and typed suggestions can now stay inside the app with much less custom infrastructure than before.
For iOS 16-era MapKit work, this article is still a solid reference because it covers the full chain: map feature taps, richer callouts, detail requests, snapshots, full Look Around presentation, and search completions in one place.