VisionKit in iOS 16 can recognize text and codes with much less custom camera code than older approaches required.
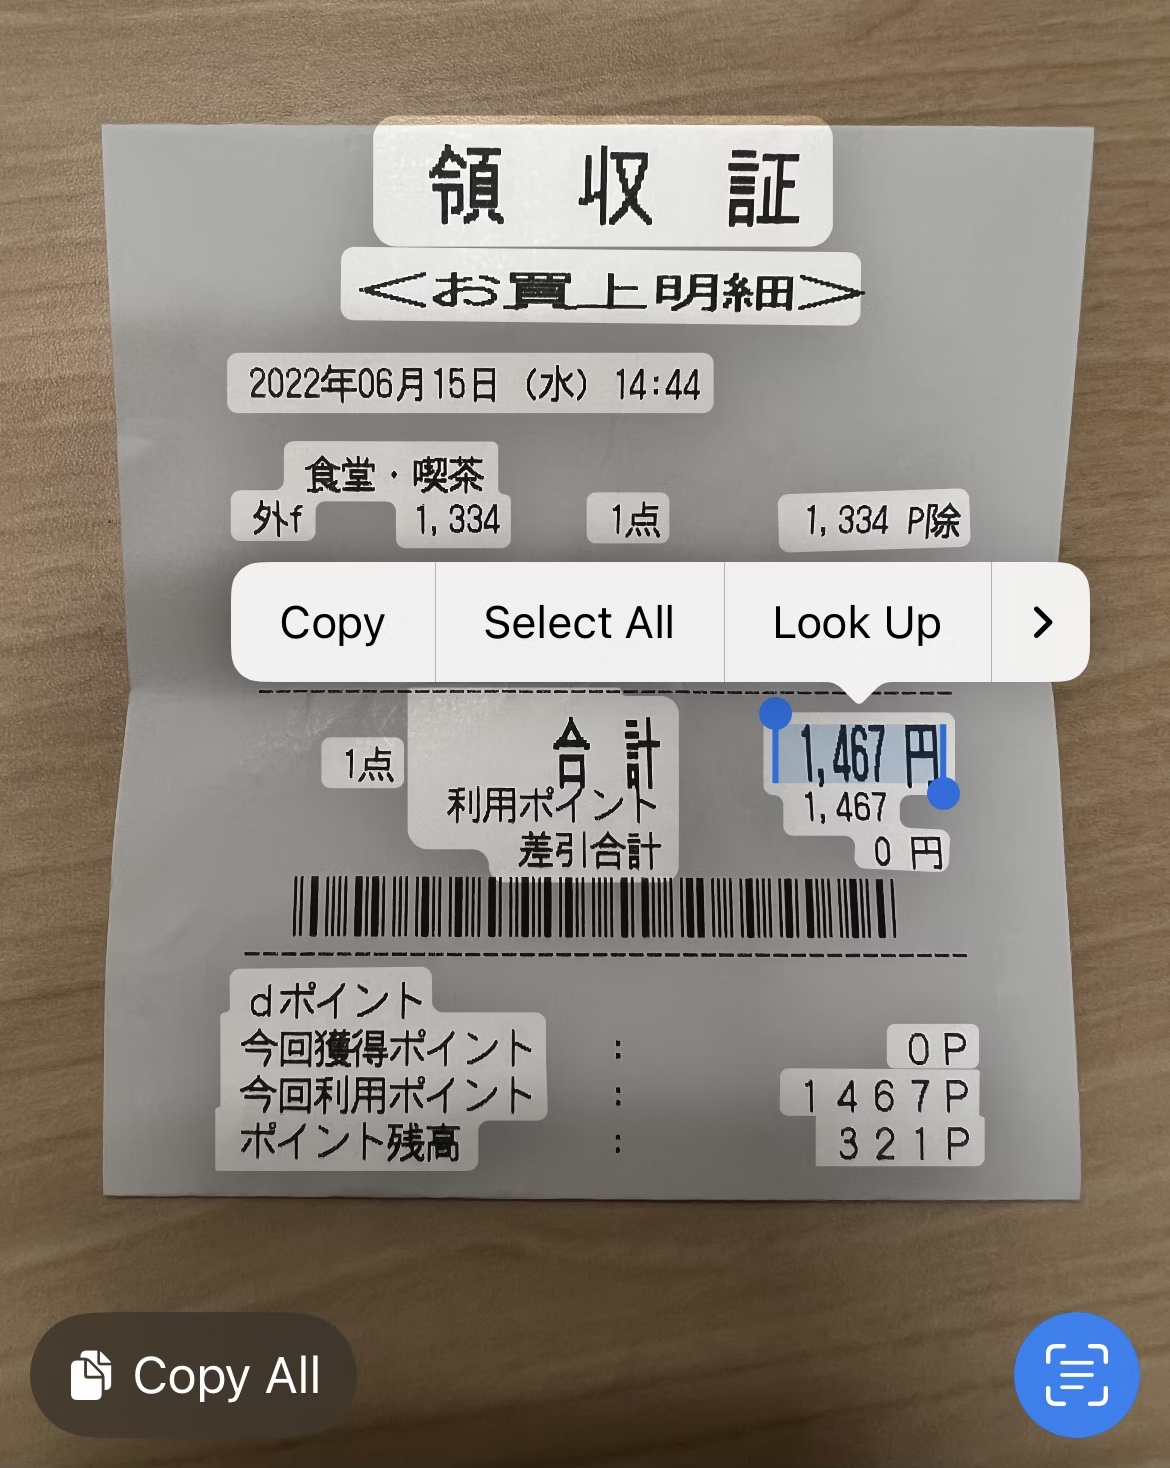
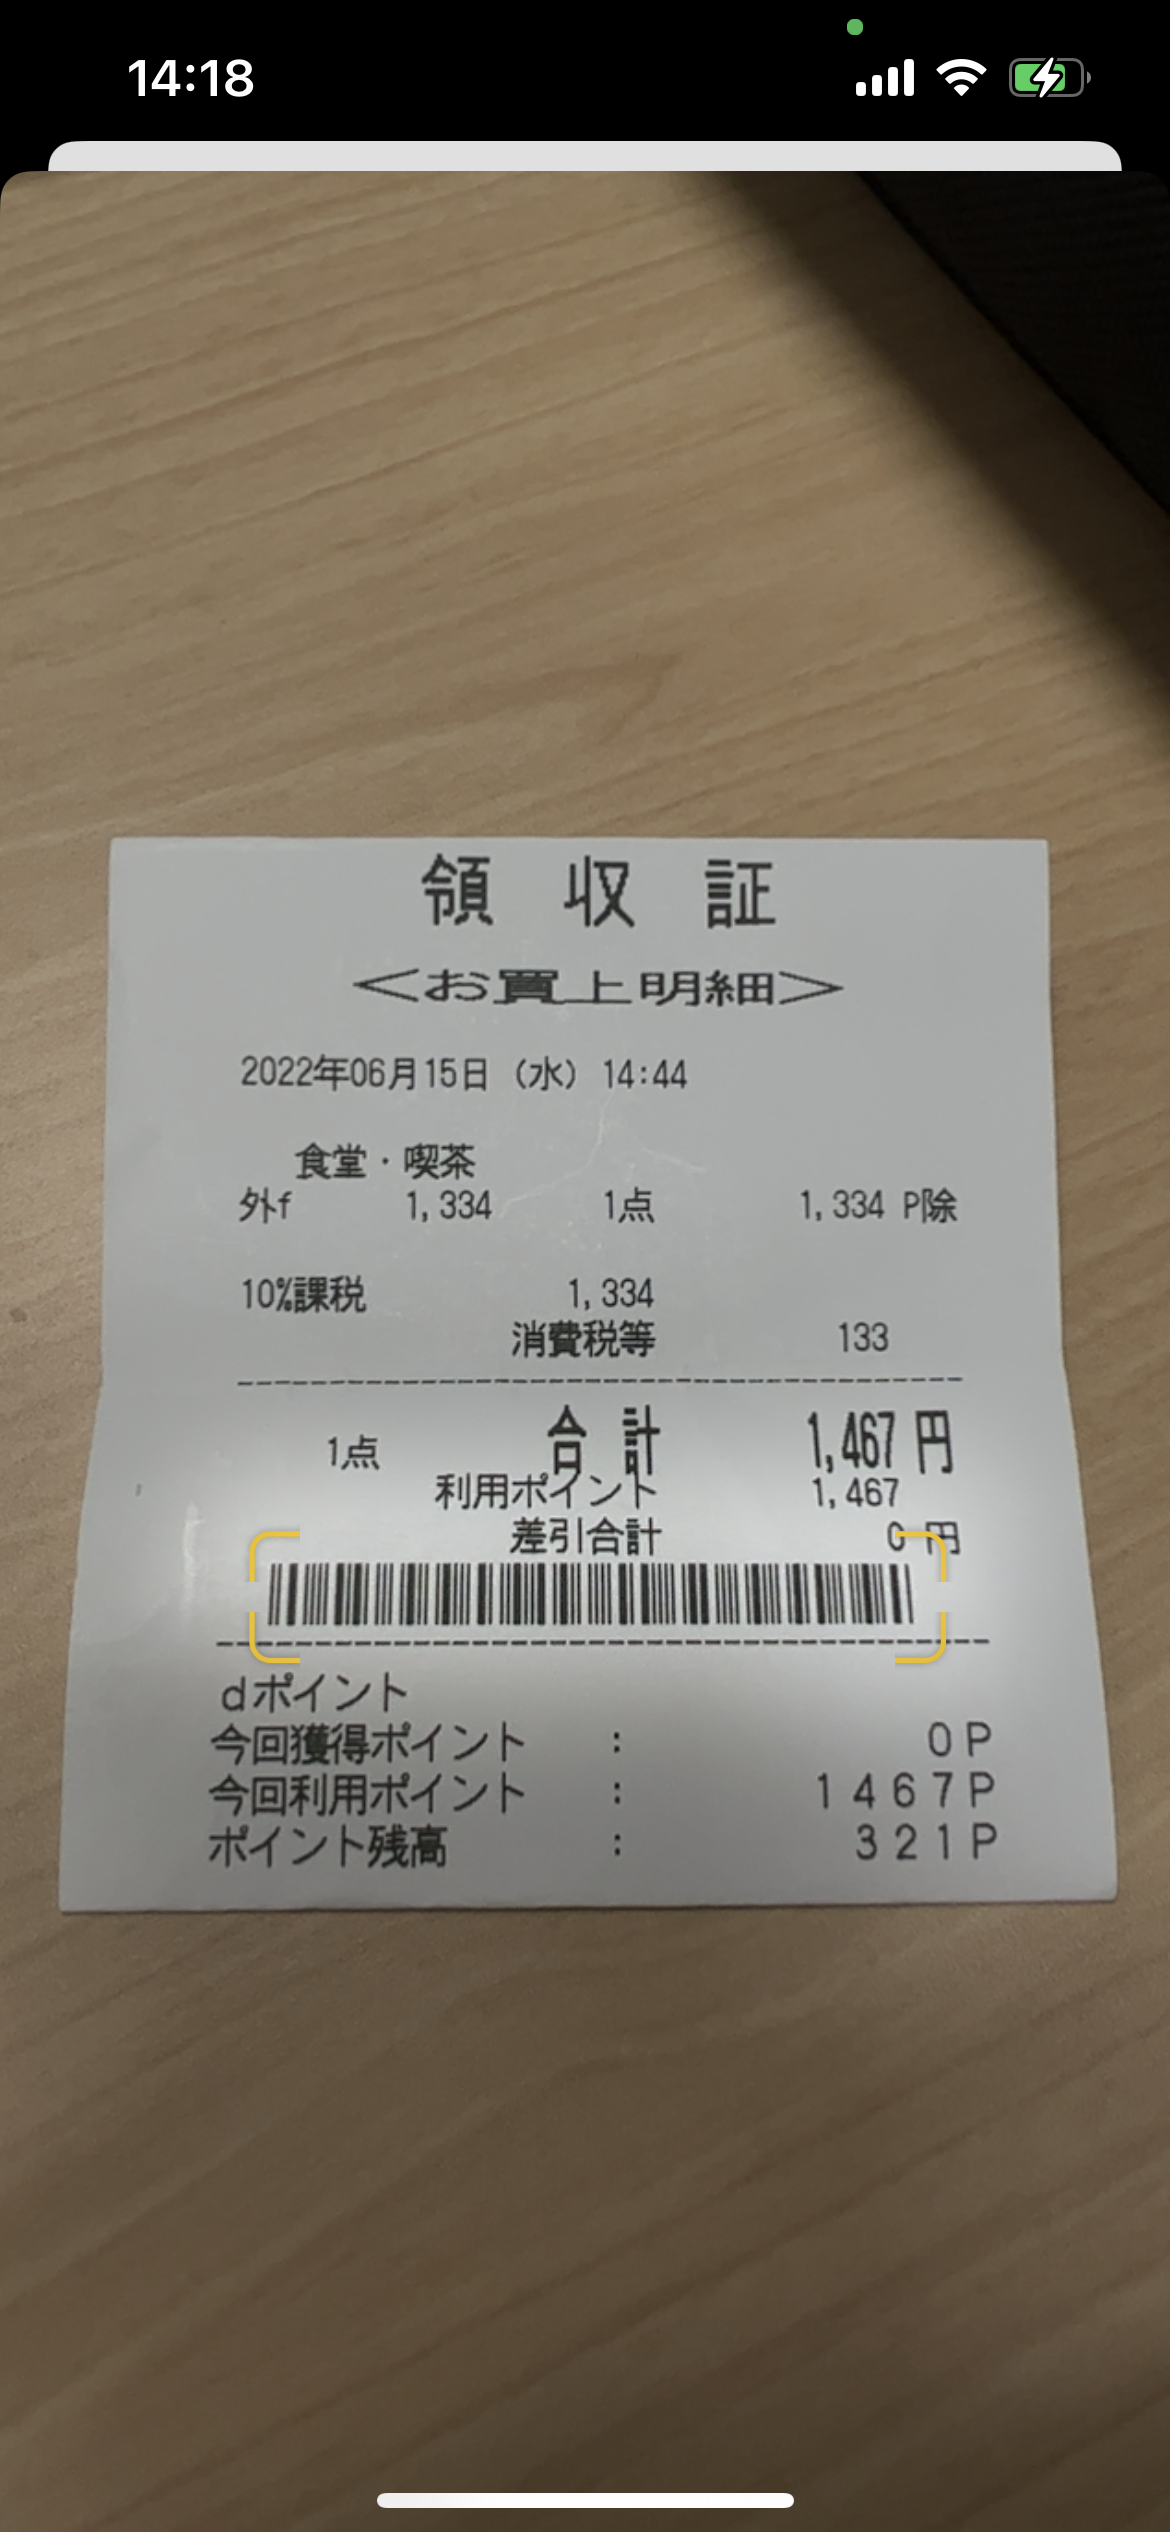
This article centers on a simple payoff: your app can recognize text from a live camera stream in just a few lines, including Japanese text, and it can also let users select recognized text from a static image with an overlay that feels close to the built-in Photos experience.
The post was written using public WWDC videos, docs, and sample code from the iOS 16 beta period, so it also notes that the framework was tested with Xcode 14 beta and iOS 16 simulator and device builds at the time.
Start by asking for camera usage permission, then present DataScannerViewController if the device supports it.
The first implementation path uses a live camera stream. The article begins with two prerequisites:
add NSCameraUsageDescription to Info.plist, and import the
VisionKit framework.
Before presenting the scanner, the post recommends checking both
DataScannerViewController.isSupported and
DataScannerViewController.isAvailable. After that, the scanner can be initialized,
assigned a delegate, started, and presented.
@IBAction func actionShowDataScanner() {
    let scannerVC = DataScannerViewController(
        recognizedDataTypes: [.text()],
        qualityLevel: .fast,
        recognizesMultipleItems: false,
        isHighFrameRateTrackingEnabled: false,
        isGuidanceEnabled: true,
        isHighlightingEnabled: true
    )
    scannerVC.delegate = self
    try? scannerVC.startScanning()
    self.present(scannerVC, animated: true)
}
The API is primarily UIKit-first, which is why the article starts from a storyboard-based controller before getting to SwiftUI compatibility later.
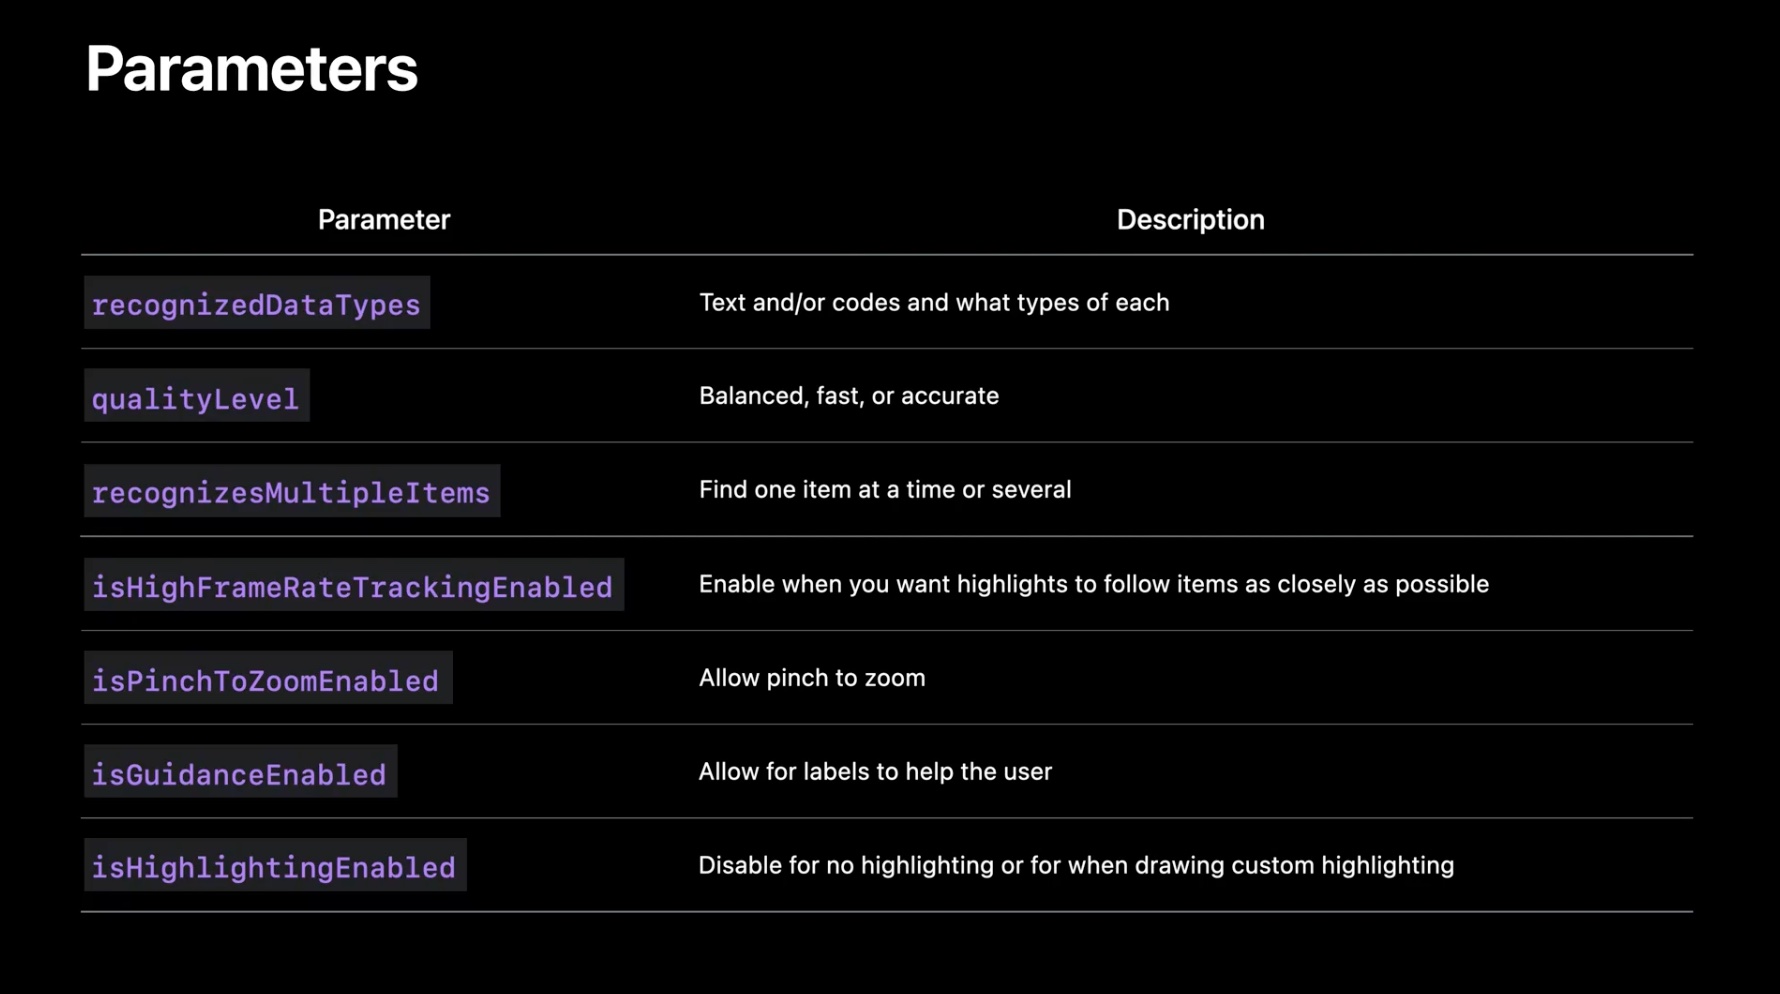
recognizedDataTypes is where you decide whether the scanner behaves like live text, a phone-number detector, or a QR tool.
The article spends time on this parameter because it changes the product shape more than any of the visual
toggles. For example, [.text(languages: ["ja"])] asks for Japanese text recognition, while
[.text(languages: ["ja"], textContentType: .telephoneNumber)] narrows the results to phone numbers.
recognizedDataTypes: [.text(languages: ["ja"])]
recognizedDataTypes: [
    .text(languages: ["ja"], textContentType: .telephoneNumber)
]
recognizedDataTypes: [.barcode()]
This article also lists other useful content types such as date and duration values, email addresses, flight numbers, street addresses, shipment tracking numbers, and URLs. If no language is specified, VisionKit falls back to the user's preferred system languages.
Tapped highlights come back through the delegate, which is where text transcripts or barcode payloads become usable app data.
Once the user taps a highlighted result, the scanner delivers a RecognizedItem. The article reads
either the text transcript or the barcode payload string directly in the delegate callback.
extension ViewController: DataScannerViewControllerDelegate {
    func dataScanner(
        _ dataScanner: DataScannerViewController,
        didTapOn item: RecognizedItem
    ) {
        switch item {
        case .text(let text):
            print(text.transcript)
        case .barcode(let barcode):
            print(barcode.payloadStringValue)
        }
    }
}
The article also calls out the scanner's behavioral options, including resolution quality, whether multiple items should be recognized, frame-rate tracking, pinch to zoom, guidance prompts, and highlight visibility.
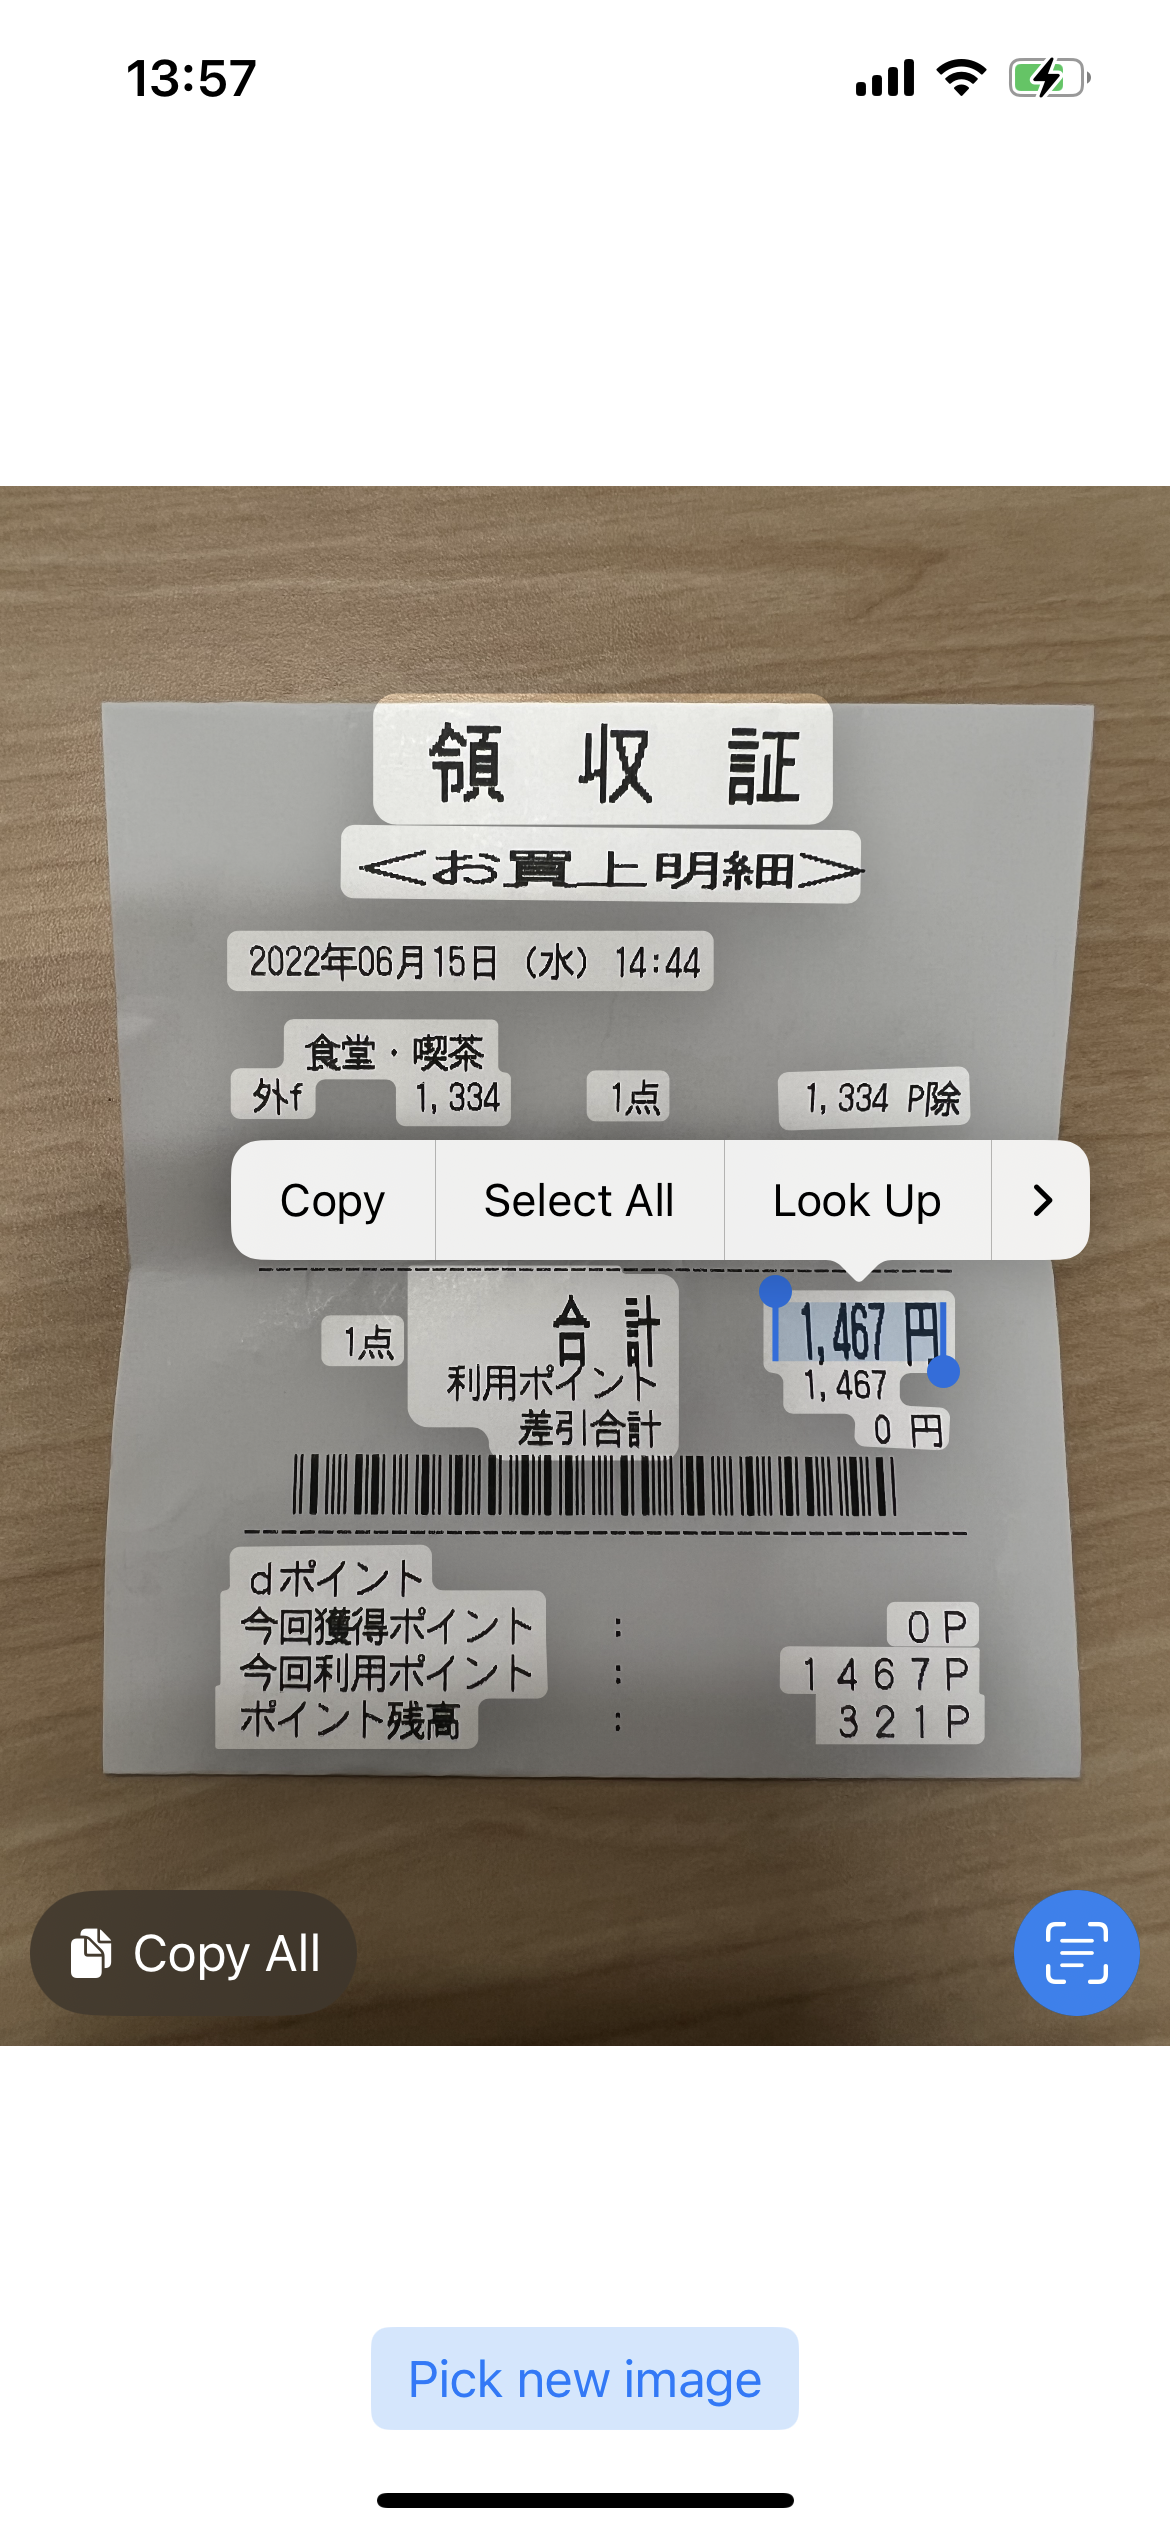
For a saved or captured image, the flow changes: analyze the image first, then overlay the interaction results onto the image view.
The second half of the article leaves the live camera behind and instead scans a still image. The setup uses an
UIImageView, an ImageAnalyzer, and an
ImageAnalysisInteraction attached to the image view so the results can appear as an overlay.
@IBOutlet weak var imageView: UIImageView!

let analyzer = ImageAnalyzer()
let interaction = ImageAnalysisInteraction()

imageView.addInteraction(interaction)
When a new image arrives, the previous analysis is cleared, the image view is updated, and the analysis task starts again.
interaction.preferredInteractionTypes = []
interaction.analysis = nil
self.imageView.image = imageObj
self.analyzeCurrentImage()

func analyzeCurrentImage() {
    guard let image = imageView.image else {
        return
    }

    Task {
        let configuration = ImageAnalyzer.Configuration([.text, .machineReadableCode])
        do {
            let analysis = try await analyzer.analyze(
                image,
                configuration: configuration
            )
            if let analysis = analysis {
                interaction.analysis = analysis
                interaction.preferredInteractionTypes = .textSelection
            }
        } catch {
            print(error)
        }
    }
}
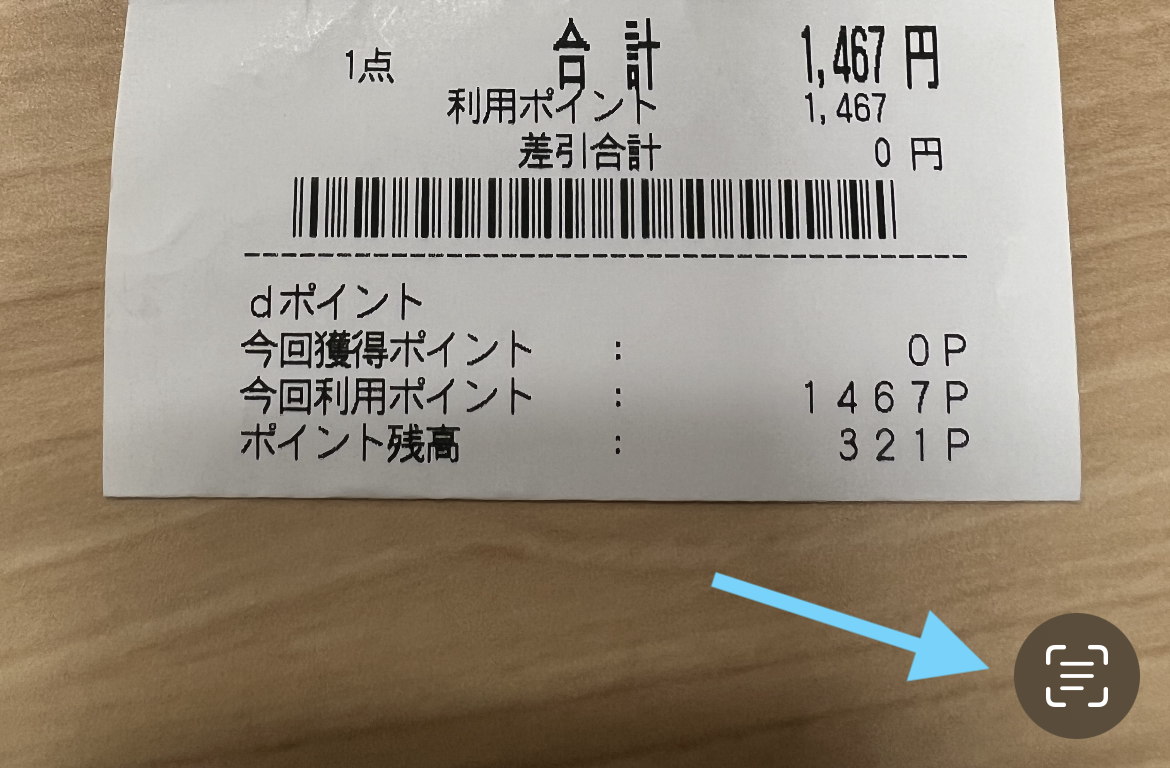
The article then points out two useful switches:
interaction.allowLongPressForDataDetectorsInTextMode lets the user long-press detected text
directly, and interaction.selectableItemsHighlighted can auto-highlight recognized items once
analysis finishes.

This article ends by pointing to wrapper components that expose both VisionKit paths to SwiftUI.
Because these APIs are UIKit-oriented, the article finishes by linking to an open-source wrapper library.
It wraps DataScannerViewController so it can be presented from SwiftUI as a sheet, and wraps
the image-analysis interaction flow so it can be displayed directly in a SwiftUI view.
VisionKit splits cleanly into a live scanner and an image overlay pipeline, and that distinction makes the API easier to reason about.
That is the most useful way to read this article today. If you need immediate, camera-driven recognition with
tap handling, use DataScannerViewController. If you need text selection on a saved image, use
ImageAnalyzer with ImageAnalysisInteraction. The surrounding UI can stay simple once
that division is clear.