UIHostingConfiguration makes SwiftUI a first-class option for UIKit list content on iOS 16.
Before iOS 16, embedding SwiftUI inside UIKit lists usually meant extra wrapping or full custom host-controller work.
The new configuration API cuts that down sharply. You can now provide a SwiftUI view directly as the content for a
UICollectionViewListCell or UITableViewCell, and do something similar for collection supplementary views.
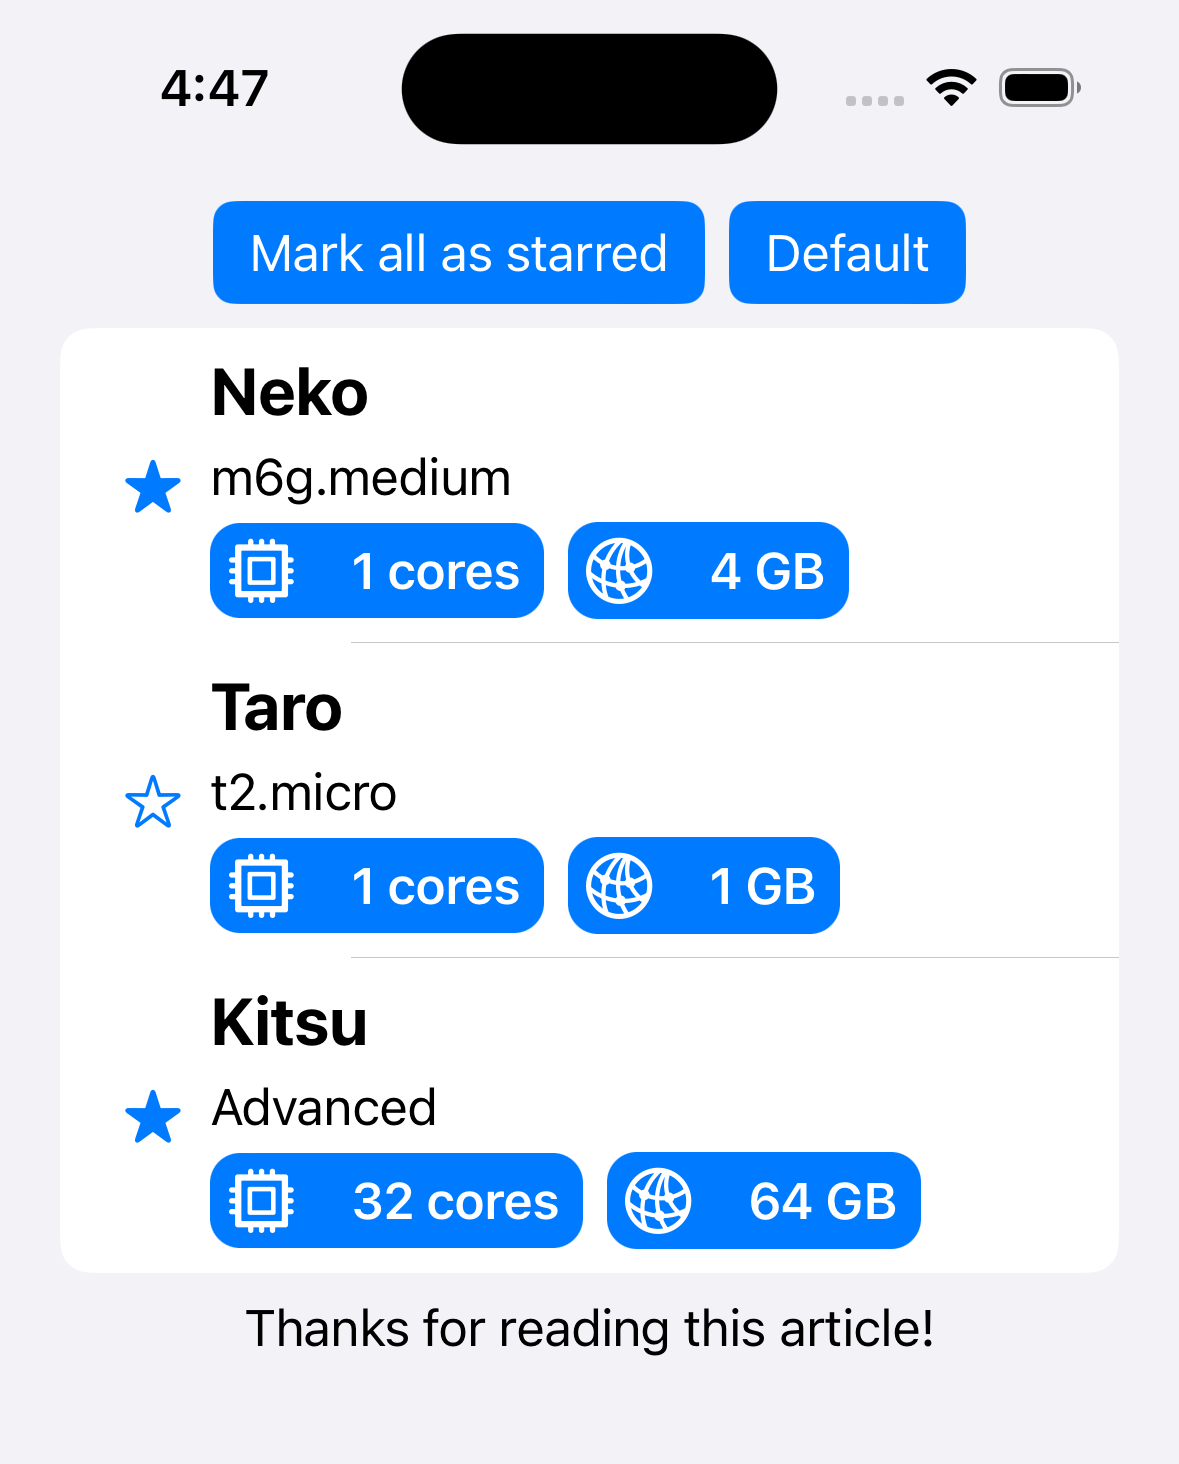
The article demonstrates this with a small server-list example where each row shows server details and lets the user toggle a star directly from the SwiftUI view.
UICollectionView is the more flexible long-term path, but UITableView remains the simpler table-specific API.
The article explicitly compares the two. UITableView is easier when all you need is a plain vertical table,
but UICollectionView has the broader customization surface and, with list layouts, can still behave like a table.
That is why the tutorial spends most of its time on the collection-view variant first: once the list layout is in place, you get modern spacing, rounded grouped styling, and flexible supplementary view support without giving up UIKit structure.
If the SwiftUI row needs to mutate UIKit-owned data, the model has to become observation-friendly.
The example starts with a ServerConfiguration model that holds server name, region, hardware info, and a starred flag.
That flag is changed from inside the SwiftUI row, so this article converts the model from a value-type struct into an ObservableObject class and marks the mutable property with @Published.
class ServerConfiguration: ObservableObject {
    var serverNickname: String
    var serverRegion: String
    var serverHardwareType: String
    var numberOfCPUCores: Int
    var gbOfMemory: Int
    var networkMaxSpeedGB: Int?
    @Published var isServerStarred: Bool

    init(
        serverNickname: String,
        serverRegion: String,
        serverHardwareType: String,
        numberOfCPUCores: Int,
        gbOfMemory: Int,
        networkMaxSpeedGB: Int? = nil,
        isServerStarred: Bool
    ) {
        self.serverNickname = serverNickname
        self.serverRegion = serverRegion
        self.serverHardwareType = serverHardwareType
        self.numberOfCPUCores = numberOfCPUCores
        self.gbOfMemory = gbOfMemory
        self.networkMaxSpeedGB = networkMaxSpeedGB
        self.isServerStarred = isServerStarred
    }
}
That one change is what lets UIKit keep the source array while SwiftUI mutates and reloads the row automatically.
The article also includes a small DemoData.demoServers array as the source for both the collection and table examples.
The SwiftUI side is just a normal view that observes the shared item.
Once the model conforms to ObservableObject, the SwiftUI row can read it through @ObservedObject
and toggle the starred state directly from a button.
struct ServerCollectionViewCell: View {
    @ObservedObject var item: ServerConfiguration

    var body: some View {
        HStack {
            Button {
                item.isServerStarred.toggle()
            } label: {
                Image(systemName: item.isServerStarred ? "star.fill" : "star")
            }

            Text(item.serverNickname)
        }
    }
}
The important part is not the layout itself. It is the data flow: SwiftUI is operating on the exact same model objects the UIKit controller owns, so the row content stays in sync without manual reload bookkeeping.
For UICollectionView, the cleanest path is list layout plus a CellRegistration that installs a hosting configuration.
The article starts from a UICollectionViewController, sets the layout to a list-style compositional layout, and then defines a cell registration whose only real job is to assign a SwiftUI view to contentConfiguration.
override func viewDidLoad() {
    super.viewDidLoad()

    var listLayoutConfig = UICollectionLayoutListConfiguration(appearance: .insetGrouped)
    let listLayout = UICollectionViewCompositionalLayout.list(using: listLayoutConfig)
    self.collectionView.collectionViewLayout = listLayout
}
private var swiftUICellViewRegister:
UICollectionView.CellRegistration<UICollectionViewListCell, ServerConfiguration> = {
.init { cell, indexPath, item in
cell.contentConfiguration = UIHostingConfiguration {
ServerCollectionViewCell(item: item)
}
}
}()
Then cellForItemAt simply dequeues through that registration instead of manually building a UIKit view hierarchy.
override func collectionView(
    _ collectionView: UICollectionView,
    cellForItemAt indexPath: IndexPath
) -> UICollectionViewCell {
    let serverInfo = servers[indexPath.row]
    let cell = collectionView.dequeueConfiguredReusableCell(
        using: swiftUICellViewRegister,
        for: indexPath,
        item: serverInfo
    )
    return cell
}
That is the core pattern of the article. Once the registration exists, SwiftUI content becomes just another cell configuration.
Headers and footers use the same idea, but you have to enable supplementary mode and register them separately.
For list-based collection views, the first switch is turning header and footer support on in the list layout configuration.
var listLayoutConfig = UICollectionLayoutListConfiguration(appearance: .insetGrouped)
listLayoutConfig.headerMode = .supplementary
listLayoutConfig.footerMode = .supplementary
A footer can be registered directly as a stored property because it does not need self access in the example.
private var swiftUIFooterViewRegister:
UICollectionView.SupplementaryRegistration<UICollectionViewCell> =
.init(elementKind: UICollectionView.elementKindSectionFooter) {
    footer, elementKind, indexPath in

    footer.contentConfiguration = UIHostingConfiguration {
        Text("Thanks for reading this article!")
    }
}
Then the controller applies it in viewForSupplementaryElementOfKind.
override func collectionView(
    _ collectionView: UICollectionView,
    viewForSupplementaryElementOfKind kind: String,
    at indexPath: IndexPath
) -> UICollectionReusableView {
    switch kind {
    case UICollectionView.elementKindSectionFooter:
        return collectionView.dequeueConfiguredReusableSupplementary(
            using: swiftUIFooterViewRegister,
            for: indexPath
        )
    default:
        return .init()
    }
}
The header example is slightly different because it needs to call controller methods such as markAllAsStarred().
For that reason, this article stores the header registration as an optional and initializes it inside viewDidLoad, capturing [unowned self].
private var swiftUIHeaderViewRegister:
UICollectionView.SupplementaryRegistration<UICollectionViewCell>?
self.swiftUIHeaderViewRegister = .init(
elementKind: UICollectionView.elementKindSectionHeader
) { [unowned self] header, elementKind, indexPath in
header.contentConfiguration = UIHostingConfiguration {
HStack {
Button("Mark all as starred") {
self.markAllAsStarred()
}
.buttonStyle(.borderedProminent)
Button("Default") {
self.markAllAsNotStarred()
}
.buttonStyle(.borderedProminent)
}
}
}That solves the usual "stored closure cannot use self yet" problem cleanly.
The UITableView version is simpler for rows, but headers and footers still fall back to UIHostingController.
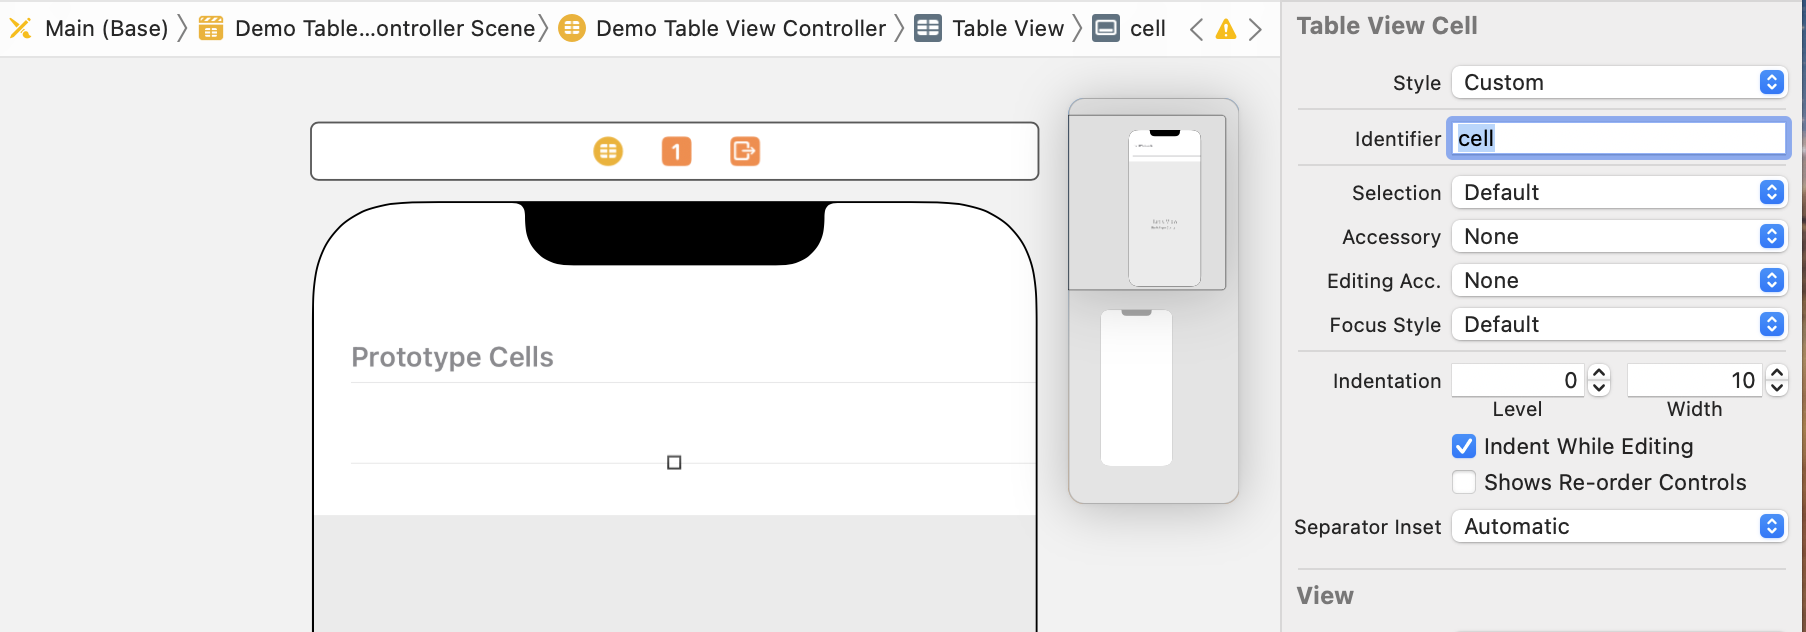
For table rows, the approach is almost identical: create an empty prototype cell in Interface Builder or a XIB,
set its identifier to cell, dequeue it in cellForRowAt, and assign a hosting configuration as the cell content.
cell.override func tableView(
_ tableView: UITableView,
cellForRowAt indexPath: IndexPath
) -> UITableViewCell {
let cell = tableView.dequeueReusableCell(withIdentifier: "cell", for: indexPath)
let item = servers[indexPath.row]
cell.contentConfiguration = UIHostingConfiguration {
ServerCollectionViewCell(item: item)
}
return cell
}
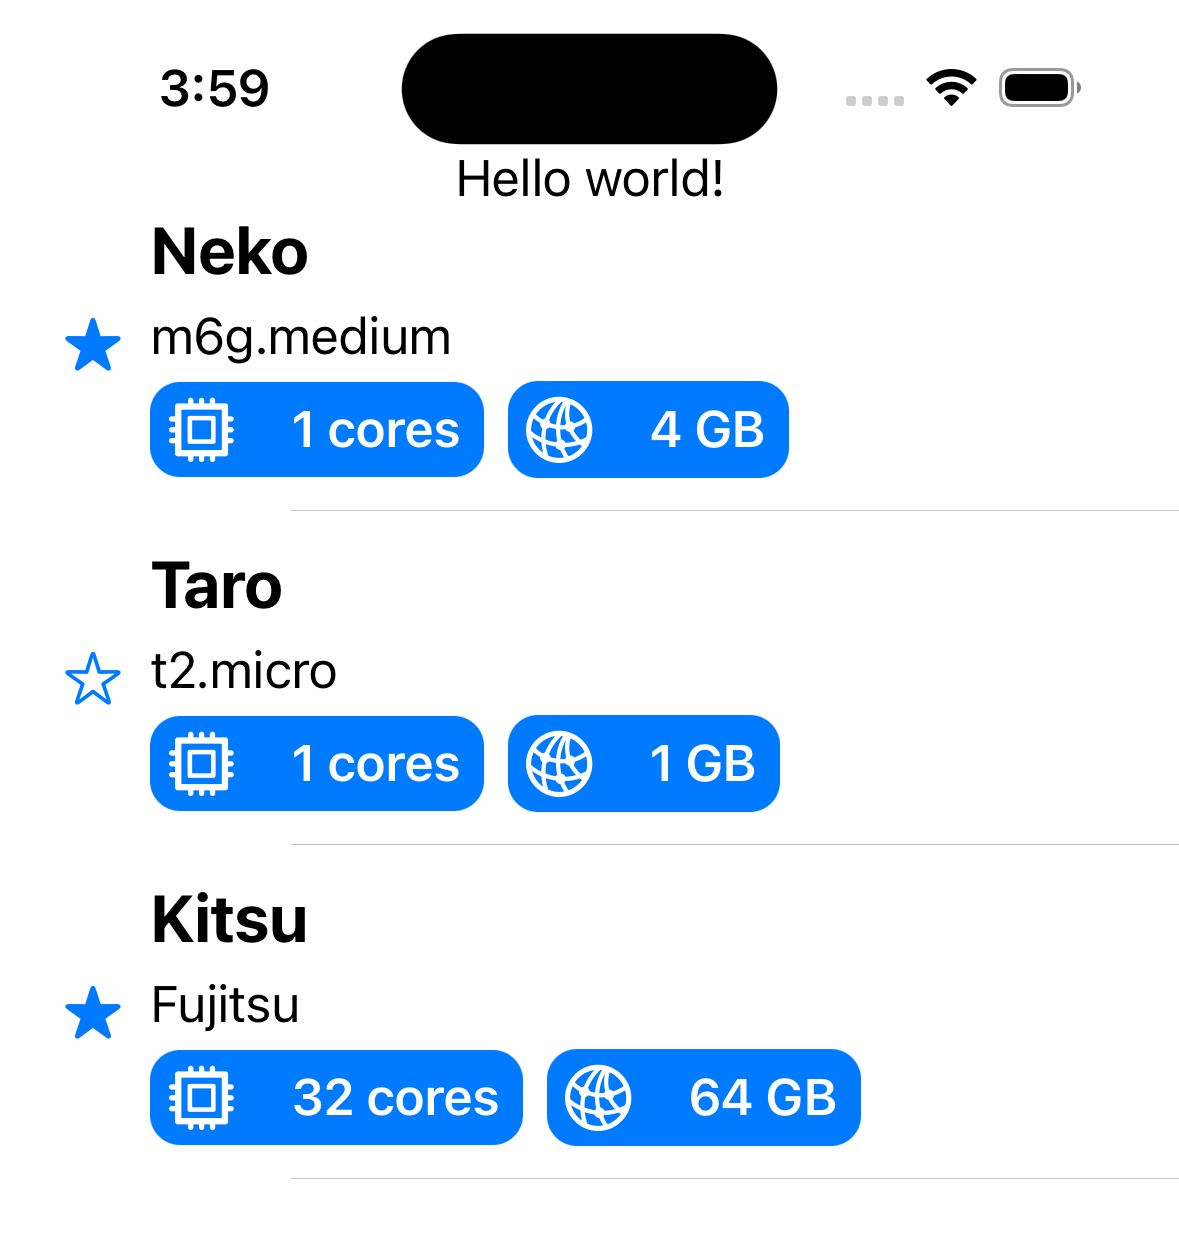
The article then points out one limit of this route: for table header and footer views, it uses UIHostingController
and assigns the hosted view directly to tableHeaderView.
struct HelloWorldHeaderView: View {
    var body: some View {
        Text("Hello world!")
    }
}

override func viewDidLoad() {
    super.viewDidLoad()
    tableView.tableHeaderView = UIHostingController(
        rootView: HelloWorldHeaderView()
    ).view
}
So the broader summary is: UIHostingConfiguration is excellent for row content in both list types,
but the collection-view API gives the more complete and elegant story when you also need supplementary views.
The win here is not that UIKit disappears. It is that UIKit lists can now host SwiftUI content without a lot of ceremony.
The article's migration path is pragmatic: keep your UIKit controller, keep your data source,
make the model observable where direct SwiftUI edits are needed, then let UIHostingConfiguration
own the row rendering.
If you are maintaining a UIKit app and want to introduce SwiftUI incrementally, this is one of the cleanest places to start. List rows, collection headers, and collection footers become much easier to iterate on without rewriting the whole screen.