Pure SwiftUI apps do not rely on the old AppDelegate-first login examples.
This article starts from a practical gap: most LINE Login guides were written for UIKit-style apps,
while a SwiftUI app often has only an App entry point and no hand-written SceneDelegate.
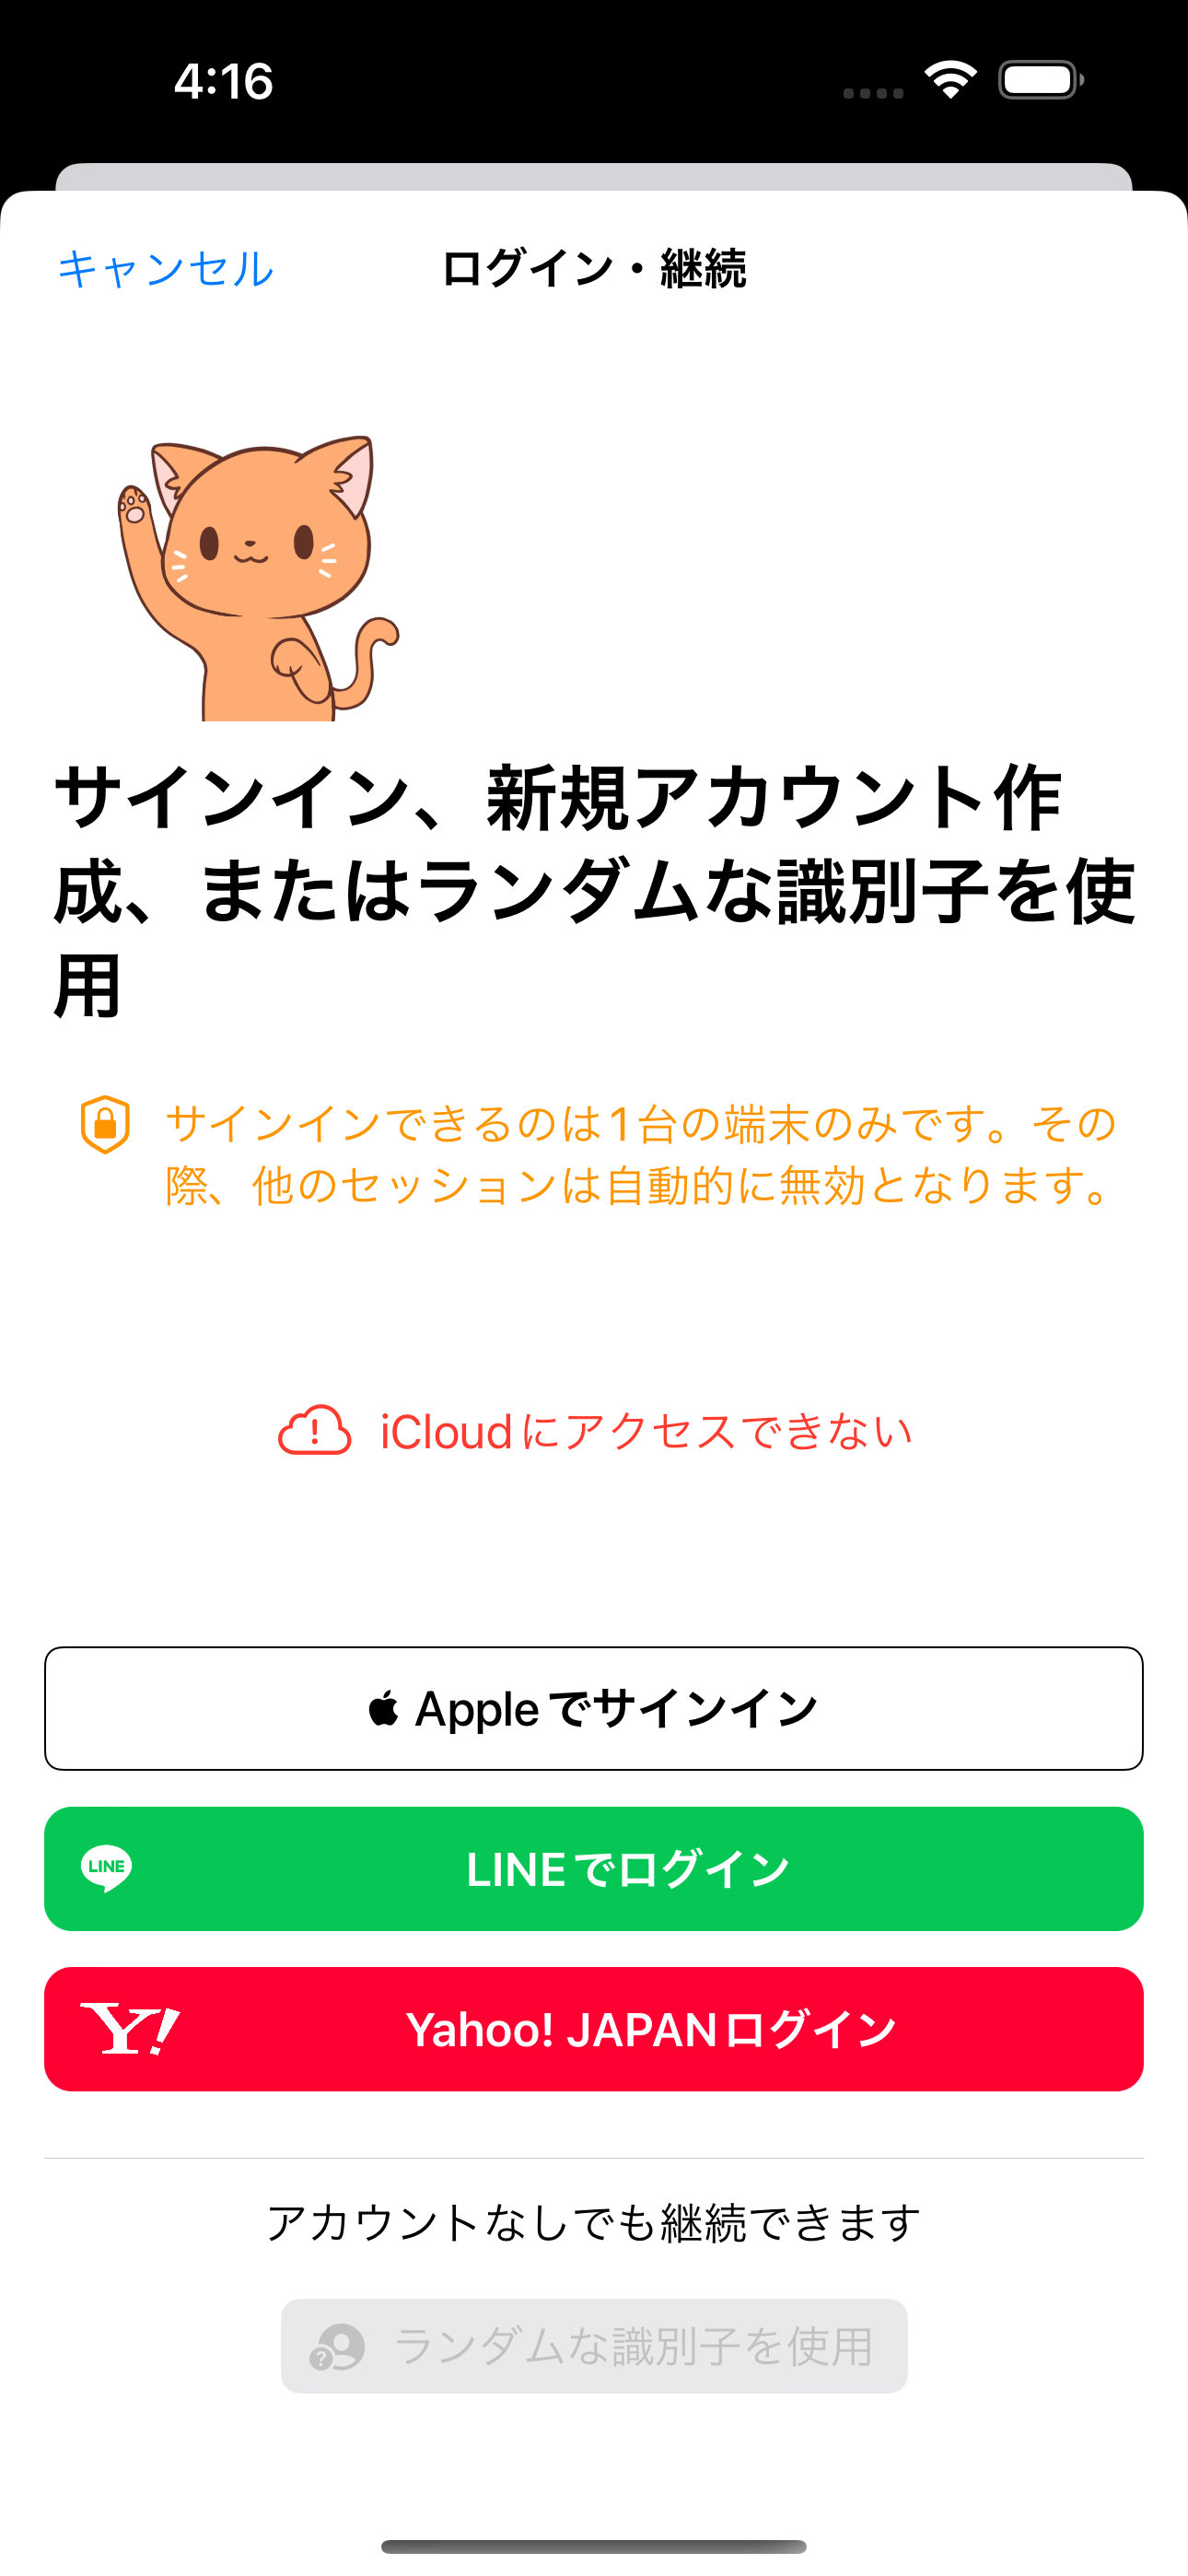
After authentication succeeds, LINE returns to your app through a custom URL scheme. In SwiftUI, the clean place
to receive that callback is the onOpenURL modifier attached to the app's main scene content.
import SwiftUI

@main
struct TestApp: App {
    var body: some Scene {
        WindowGroup {
            ContentView()
        }
    }
}@UIApplicationDelegateAdaptor for SDK setup, then use onOpenURL to hand the login callback back to LineSDK.LoginManager.
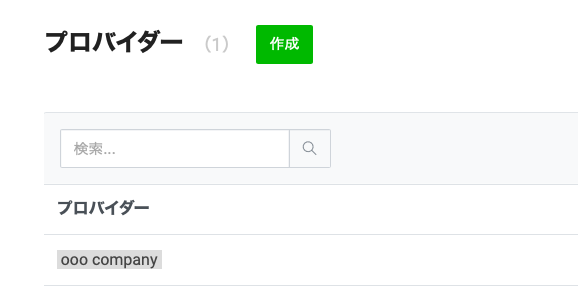
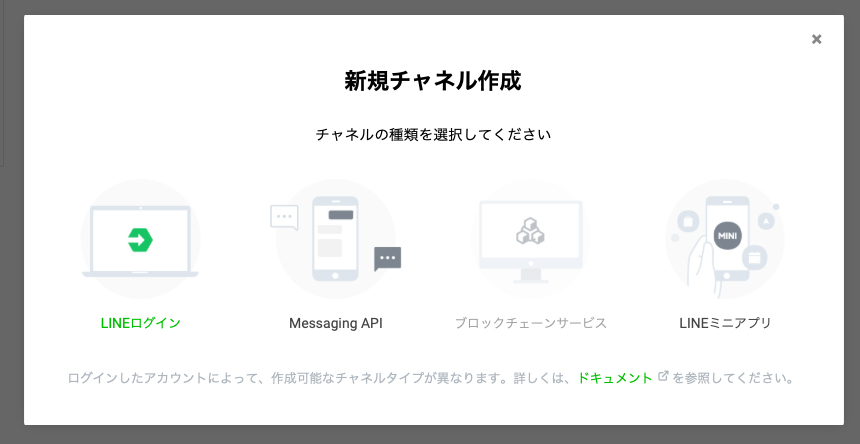
Create a provider, create a LINE Login channel, and record both the bundle ID and channel ID.
The first part happens in the LINE Developers console. Create a provider, add a channel whose type is
LINE Login, and mark the app as a native application when you fill in the new channel form.
After the channel exists, open its settings and enter your iOS bundle identifier in the LINE Login section. You also need the channel ID from the basic settings tab because that value is used later during SDK initialization.


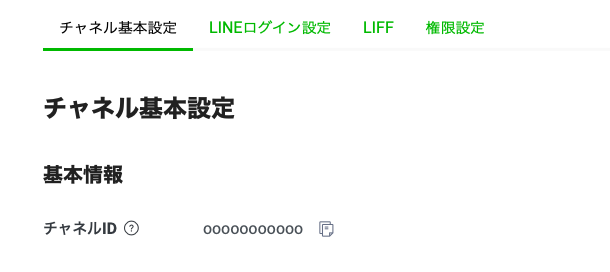
LoginManager.shared.setup(channelID:).Add the LINE iOS SDK through Swift Package Manager.
The article uses the package distribution of the SDK. In Xcode, choose File > Add Packages,
paste the repository URL below, and add the LineSDK product to your app target.
https://github.com/line/line-sdk-ios-swift.git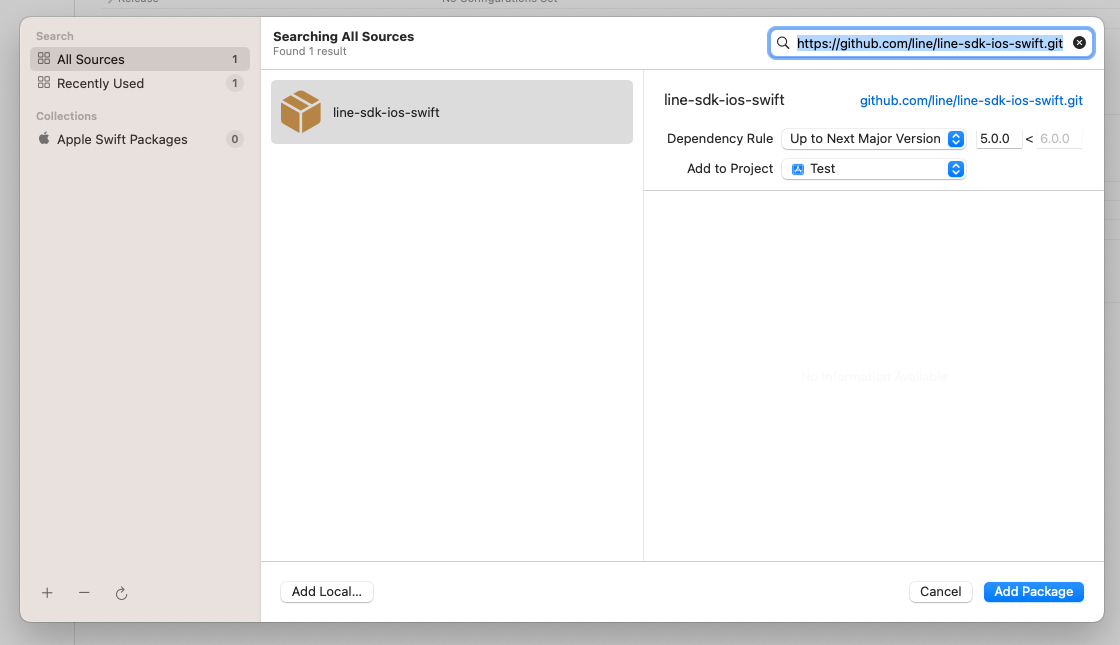
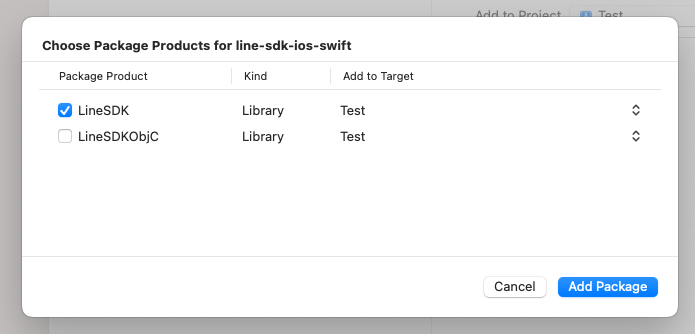
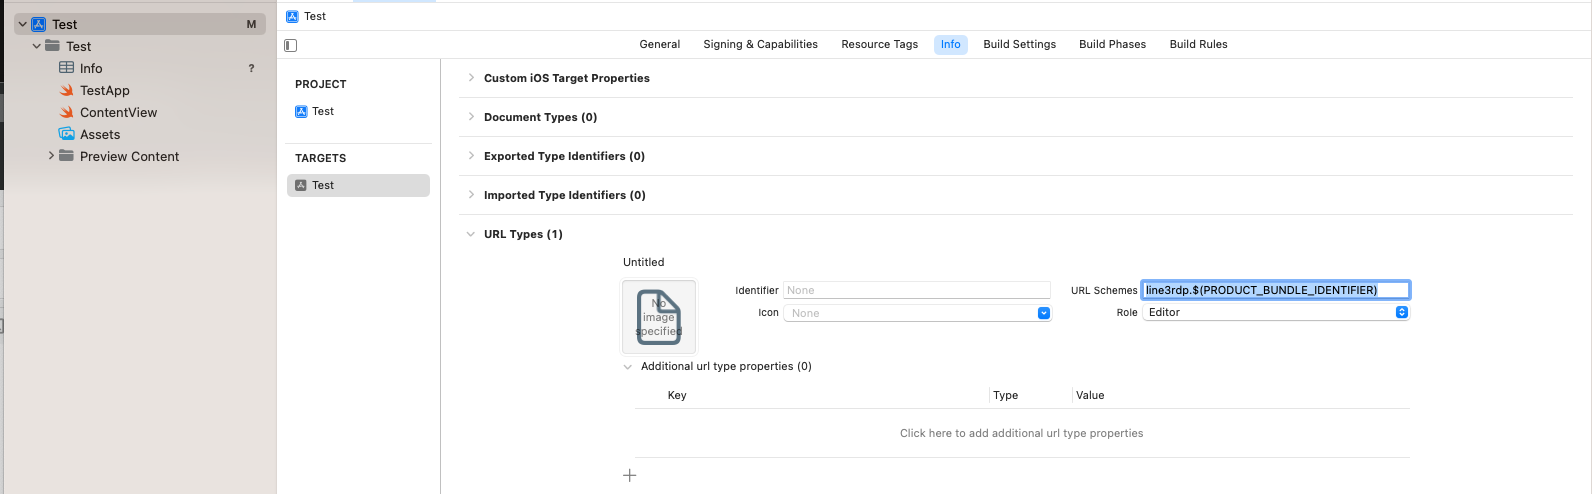
LineSDK product and attach it to your main iOS target.Define the URL type that LINE will call after authentication completes.
Once the user signs in, LINE opens your app through a custom URL scheme. Add that URL type in the target's
Info tab using this format:
line3rdp.$(PRODUCT_BUNDLE_IDENTIFIER)That scheme is what the SDK later checks when it routes the callback URL back through the login manager.
Use a delegate adaptor to initialize the SDK from a SwiftUI app.
Even in a SwiftUI-first app, the SDK setup still belongs in application launch. The clean bridge is
@UIApplicationDelegateAdaptor, which lets the SwiftUI app host a small delegate class without
switching the project back to an old app lifecycle.
import SwiftUI
import LineSDK

@main
struct LearnEnglishGPTApp: App {

    @UIApplicationDelegateAdaptor(AppDelegate.self) var appDelegate

    var body: some Scene {
        WindowGroup {
            ContentView()
        }
    }
}

final class AppDelegate: UIResponder, UIApplicationDelegate, UIWindowSceneDelegate {
    func application(
        _ application: UIApplication,
        didFinishLaunchingWithOptions launchOptions: [UIApplication.LaunchOptionsKey: Any]? = nil
    ) -> Bool {
        LineSDK.LoginManager.shared.setup(
            channelID: "YOUR_CHANNEL_ID",
            universalLinkURL: nil
        )
        return true
    }
}
Replace YOUR_CHANNEL_ID with the value from the LINE Developers console. At this point, the SDK is ready,
but the app still needs to pass the incoming URL back to the login manager.
Receive the LINE callback in SwiftUI and forward it to LoginManager.
This is the key SwiftUI-specific step. Attach onOpenURL to the main content of the app, detect the
LINE scheme, and call LoginManager.shared.application(_:open:).
import SwiftUI
import LineSDK

@main
struct LearnEnglishGPTApp: App {

    @UIApplicationDelegateAdaptor(AppDelegate.self) var appDelegate

    var body: some Scene {
        WindowGroup {
            ContentView()
                .onOpenURL { openedURL in
                    if openedURL.absoluteString.contains("line3rdp") {
                        _ = LineSDK.LoginManager.shared.application(
                            UIApplication.shared,
                            open: openedURL
                        )
                    }
                }
        }
    }
}
Once this hook is in place, the external LINE authentication flow can round-trip back into your SwiftUI app without needing a UIKit root controller to catch the URL.
Wrap the SDK login button and use an observable object to report success, loading state, and errors.
The SDK already provides a UIKit login button, so the article bridges it into SwiftUI with UIViewRepresentable.
The wrapper stores a shared state object and uses a coordinator that conforms to LoginButtonDelegate.
final class LineLoginStatus: NSObject, ObservableObject {
    @Published var isLoggingIn: Bool = false
    @Published var signInSuccessful_userID: String?
    @Published var errorMessage: String?
}

struct LineLoginButtonCompatibleView: UIViewRepresentable {

    @ObservedObject var stateManager: LineLoginStatus

    func makeUIView(context: Context) -> UIView {
        let containerView = UIView()
        let loginButton = LoginButton()
        loginButton.delegate = context.coordinator
        loginButton.permissions = [.profile, .openID]
        loginButton.translatesAutoresizingMaskIntoConstraints = false

        containerView.addSubview(loginButton)
        NSLayoutConstraint.activate([
            loginButton.centerXAnchor.constraint(equalTo: containerView.centerXAnchor),
            loginButton.centerYAnchor.constraint(equalTo: containerView.centerYAnchor)
        ])
        return containerView
    }

    func updateUIView(_ view: UIView, context: Context) {}

    func makeCoordinator() -> Coordinator {
        Coordinator(self)
    }

    final class Coordinator: NSObject, LoginButtonDelegate {
        let parent: LineLoginButtonCompatibleView

        init(_ parent: LineLoginButtonCompatibleView) {
            self.parent = parent
        }

        func loginButtonDidStartLogin(_ button: LoginButton) {
            parent.stateManager.isLoggingIn = true
        }

        func loginButton(_ button: LoginButton, didSucceedLogin loginResult: LoginResult) {
            parent.stateManager.signInSuccessful_userID = loginResult.userProfile?.userID
            parent.stateManager.isLoggingIn = false
        }

        func loginButton(_ button: LoginButton, didFailLogin error: LineSDKError) {
            parent.stateManager.errorMessage = error.localizedDescription
            parent.stateManager.isLoggingIn = false
        }
    }
}
Use onChange to reflect login state back into the view.
The final screen in the article is a simple SwiftUI form. It shows the bridged login button, listens for changes on the observable object, and moves those values into local view state for a progress indicator, a success label, and an error label.
struct SignInSheet: View {

    @ObservedObject var lineLoginStatus: LineLoginStatus = .init()

    @State private var loggedInUserID: String?
    @State private var errorMessage: String?
    @State private var isProcessingLogin: Bool = false

    var body: some View {
        Form {
            Section("Button") {
                LineLoginButtonCompatibleView(stateManager: lineLoginStatus)
                    .onChange(of: lineLoginStatus.signInSuccessful_userID) { newValue in
                        if let newValue {
                            loggedInUserID = newValue
                        }
                    }
                    .onChange(of: lineLoginStatus.errorMessage) { newValue in
                        if let newValue {
                            errorMessage = newValue
                        }
                    }
                    .onChange(of: lineLoginStatus.isLoggingIn) { newValue in
                        isProcessingLogin = newValue
                    }
                    .frame(height: 45)
                    .padding(.top, 5)
            }

            Section("Result") {
                if isProcessingLogin {
                    ProgressView()
                }
                if let loggedInUserID {
                    Label(loggedInUserID, systemImage: "checkmark.circle")
                }
                if let errorMessage {
                    Label(errorMessage, systemImage: "xmark")
                }
            }
        }
    }
}
The main architectural point is modest but useful: the SDK can stay inside a thin bridge layer, while the visible screen remains ordinary SwiftUI state and view code.
The missing piece for SwiftUI is not the login SDK itself. It is how you route lifecycle events back into it.
Once the channel is registered, the package is added, and the URL scheme is declared, the SwiftUI integration becomes fairly direct:
initialize the SDK through a delegate adaptor, forward the callback with onOpenURL, and bridge the provided button through
UIViewRepresentable.
That is enough to get profile access working without abandoning a SwiftUI-first app structure.