What changed in iOS 14 was not that UICollectionView became a table view clone. It became flexible enough that many table-style screens no longer needed a separate list API.
This article keeps this idea intentionally simple: with around sixty-five lines of code plus a storyboard,
you can render a grouped list UI that looks very close to a modern table view while still building on
UICollectionView.
The post walks through four steps: connect the collection view from Interface Builder, configure a list-style compositional layout, back it with a diffable data source, and feed sectioned data into a snapshot.
The starting point is still ordinary UIKit wiring: create a UICollectionView in storyboard and expose it through an outlet.
The article does not use a fully programmatic view hierarchy. It starts from storyboard, then connects the collection view to the view controller with a single outlet:
@IBOutlet weak var collectionView: UICollectionView!That keeps the rest of the example focused on the iOS 14 collection view APIs instead of layout boilerplate.
The core of the migration is UICollectionLayoutListConfiguration, which gives UICollectionView a real list appearance.
In viewDidLoad, this article creates a list configuration with the
.insetGrouped appearance, builds a list layout from it, and assigns that layout to the collection view.
var layoutConfig = UICollectionLayoutListConfiguration(
    appearance: .insetGrouped
)
let layout = UICollectionViewCompositionalLayout.list(
    using: layoutConfig
)
collectionView.collectionViewLayout = layout
The article then shows two header strategies. If the first item in each section should double as the header title, use:
layoutConfig.headerMode = .firstItemInSectionIf you want a custom supplementary header instead, switch to:
layoutConfig.headerMode = .supplementaryThe source calls out that the supplementary path requires your data source to provide a reusable header view separately.
Once the layout looks like a list, the next upgrade is to stop thinking in classic delegate-style cell creation and move to a diffable data source with cell registration.
The example defines a custom subclass of UICollectionViewDiffableDataSource<Section, String>.
Each row is just a string in this demo, but the same pattern can be used with your own model types.
class TableDataSource: UICollectionViewDiffableDataSource<Section, String> {

    init(collectionView: UICollectionView) {
        let cell = UICollectionView.CellRegistration<UICollectionViewListCell, String> {
            cell, indexPath, item in
            var content = cell.defaultContentConfiguration()
            content.text = item
            cell.contentConfiguration = content
        }

        super.init(collectionView: collectionView) {
            collectionView, indexPath, item in
            collectionView.dequeueConfiguredReusableCell(
                using: cell,
                for: indexPath,
                item: item
            )
        }
    }
}
The article also notes that if you choose supplementary headers, this custom data source is the place where you would add the header-view implementation too.
The section model is intentionally tiny: two sections, two arrays, and one snapshot reload function.
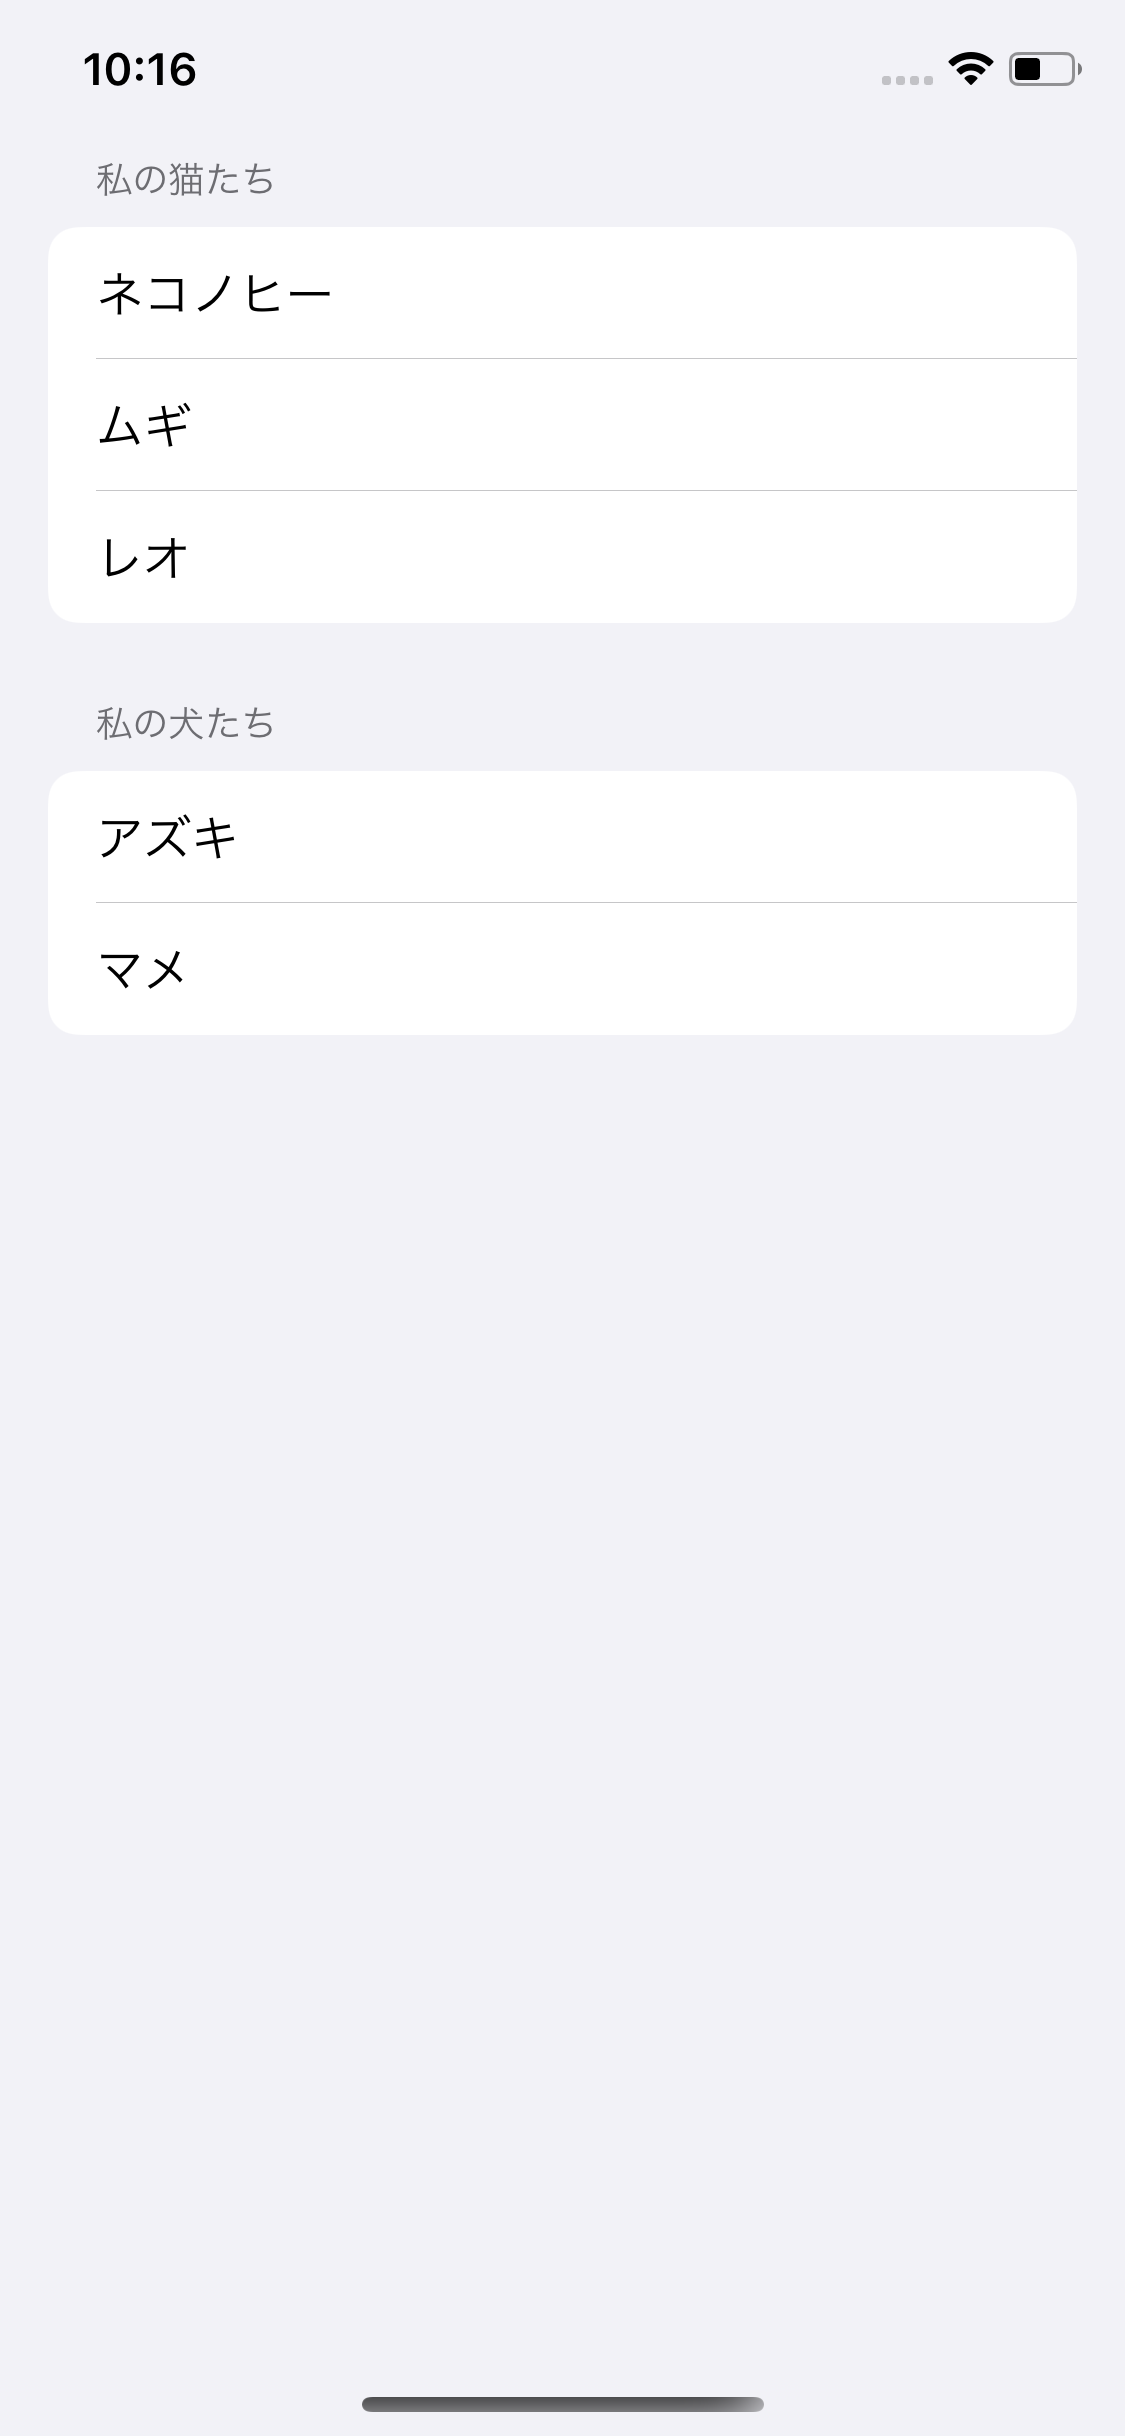
The demo uses two sections, myCats and myDogs, plus two local arrays that hold the visible strings.
When headerMode is set to .firstItemInSection, the first string in each array acts as the section title.
enum Section {
    case myCats
    case myDogs
}

var myCats = ["My cats", "Cat 1", "Cat 2", "Cat 3"]
var myDogs = ["My dogs", "Dog 1", "Dog 2"]

var collectionViewDataSource: UICollectionViewDiffableDataSource<Section, String>!
The data source gets created in viewDidLoad, assigned to the collection view, and then driven by a snapshot:
self.collectionViewDataSource = TableDataSource(
    collectionView: self.collectionView
)
collectionView.dataSource = self.collectionViewDataSource
reloadList()
func reloadList() {
var snapshot = NSDiffableDataSourceSnapshot<Section, String>()
snapshot.appendSections([.myCats, .myDogs])
snapshot.appendItems(self.myCats, toSection: .myCats)
snapshot.appendItems(self.myDogs, toSection: .myDogs)
self.collectionViewDataSource.apply(snapshot)
self.collectionView.reloadData()
}That is the article's real point: once the list layout and diffable data source are in place, the actual data loading becomes very direct.
The finished screen already looks close enough to a modern grouped table view that the old UITableView boundary starts to matter less.
The real upgrade here is not one API. It is that UICollectionView became a more unified foundation for both grid and list interfaces.
That is why this early iOS 14 article still holds up. It demonstrates a compact path from storyboard wiring to a table-like list UI using the newer list configuration and diffable snapshot APIs.
If you were previously reaching for UITableView by reflex, this was one of the first releases that made that reflex worth questioning.