A search token is just a small tagged item inside the search field, but it changes the search UI from free text into structured input.
This article uses tokens as category selectors inside an iOS search view. Instead of letting the user type only plain text,
the search field can also contain labeled chips that represent things like Movies, Music, or Documents.
The post then carries that idea across two integration styles. UIKit is straightforward because UISearchController already owns the search field.
SwiftUI is the harder part, because at the time of this article, .searchable did not expose token support yet.
A UISearchToken needs visible UI and a hidden identifier you can read back later.
The article starts with the token object itself. A token can be created from an icon and a label, then tagged with an identifier through
representedObject. That identifier can be any type, but a string is the simplest option.
var token = UISearchToken(
    icon: UIImage(systemName: "swift"),
    text: "SwiftUI"
)
token.representedObject = "#swiftui"
Later, you can recover that identifier and use it in your own filtering logic:
if let identifier = token.representedObject as? String {
    print(identifier)
}
That separation is the useful design detail. The token renders something user-friendly, while representedObject keeps the machine-friendly value.
UIKit support is the simple case: assign the token array directly to the search text field inside UISearchController.
Once you already have a search controller, tokens are attached through the embedded search text field:
searchController.searchBar.searchTextField.tokens = searchTokensThis article also points out that the text field exposes token-specific operations such as inserting, removing, and querying tokens within a text range. Those APIs make the token list more than a static decoration.
open var tokens: [UISearchToken]
open func insertToken(_ token: UISearchToken, at tokenIndex: Int)
open func removeToken(at tokenIndex: Int)
open func positionOfToken(at tokenIndex: Int) -> UITextPosition
open func tokens(in textRange: UITextRange) -> [UISearchToken]Because SwiftUI did not expose token support directly, the article embeds a UIKit search controller into the SwiftUI navigation bar.
The first step is a small hosting controller whose only job is to own a UISearchController and assign it to the parent navigation item.
class NavBarEmbeddedSearch: UIViewController {
    let searchController = UISearchController()

    override func viewDidLoad() {
        searchController.hidesNavigationBarDuringPresentation = true
        searchController.obscuresBackgroundDuringPresentation = false
    }

    override func viewWillAppear(_ animated: Bool) {
        self.parent?.navigationItem.searchController = searchController
    }
}
After that, SwiftUI can host the bridge through UIViewControllerRepresentable.
The representable stores bindings for the search text and token array, and defines a coordinator that receives updates from the UIKit controller.
fileprivate struct SearchBar: UIViewControllerRepresentable {
    @Binding var searchText: String
    @Binding var searchTokens: [UISearchToken]

    func makeUIViewController(context: Context) -> NavBarEmbeddedSearch {
        // Configure the search controller here.
    }

    func updateUIViewController(_ controller: NavBarEmbeddedSearch, context: Context) {
    }

    func makeCoordinator() -> Coordinator {
        Coordinator(searchText: $searchText, searchTokens: $searchTokens)
    }

    class Coordinator: NSObject, UISearchResultsUpdating {
        @Binding var searchText: String
        @Binding var searchTokens: [UISearchToken]

        init(searchText: Binding<String>, searchTokens: Binding<[UISearchToken]>) {
            self._searchText = searchText
            self._searchTokens = searchTokens
        }

        func updateSearchResults(for searchController: UISearchController) {
            // Push UIKit changes back into SwiftUI state.
        }
    }
}The important bridge logic is small: initialize the controller with tokens, then copy both text and tokens back into SwiftUI whenever the search UI changes.
In makeUIViewController, the representable populates the UIKit token array and assigns the coordinator as the search results updater:
func makeUIViewController(context: Context) -> NavBarEmbeddedSearch {
    let controller = NavBarEmbeddedSearch()
    controller.searchController.searchBar.searchTextField.tokens = searchTokens
    controller.searchController.searchResultsUpdater = context.coordinator
    return controller
}
Then the coordinator mirrors the live UIKit state back into SwiftUI:
guard let text = searchController.searchBar.text else { return }
self.searchText = text
self.searchTokens = searchController.searchBar.searchTextField.tokens
That means token removals, token edits, and text changes all flow through the same update path.
The final SwiftUI trick is that the search bar does not need visible layout space in the view tree. It only needs to exist so it can attach to the navigation bar.
The article solves that by placing the representable inside an overlay with a zero-sized frame.
The visible search UI lives in the navigation bar, not inside the content layout itself.
struct ContentView: View {
@State private var searchText: String = ""
@State private var searchTokens: [UISearchToken]
init(searchTokens: [UISearchToken]) {
self._searchTokens = .init(initialValue: searchTokens)
}
var body: some View {
Form {
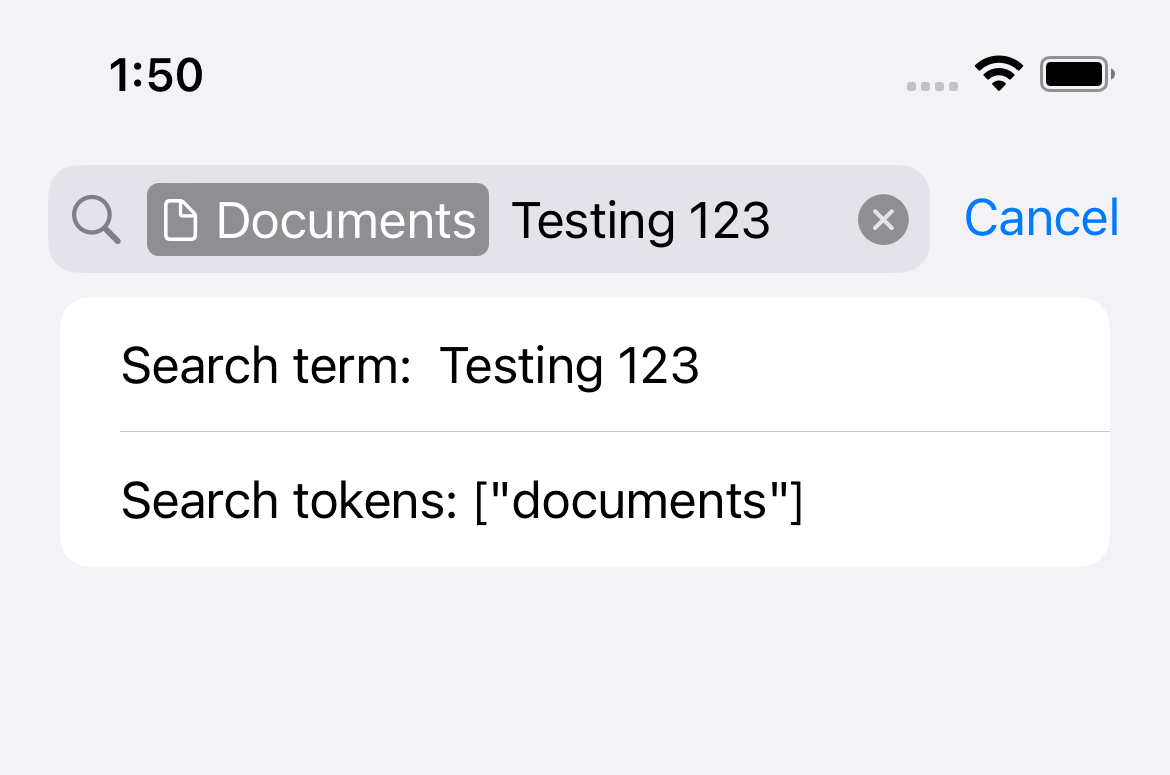
Section {
Text("Search term: \\(searchText)")
Text("Search tokens: \\(searchTokens.getTokenNames().description)")
}
}
.overlay(
SearchBar(searchText: $searchText, searchTokens: $searchTokens)
.frame(width: 0, height: 0)
)
}
}
The sample usage in this article passes different starting tokens into the same screen, such as Movies, Music, and Documents.
That makes the active category visible to the user before they type anything else.
This is a good example of a UIKit-first capability being wrapped cleanly enough that SwiftUI can still own the screen-level state.
The actual token API is small. The harder part is getting the search controller to live in the right place and to keep SwiftUI state synchronized with UIKit changes. This article solves that without much extra machinery.
If you need category chips or structured search filters in an older SwiftUI search flow, this remains a practical pattern:
use UISearchToken for the search field, then bridge the controller into SwiftUI instead of trying to recreate the behavior from scratch.