This article is useful because it shows the exact handoff point between a trained .mlmodel file and runnable app code.
Part 1 of the series trains a small day-and-night classifier. This article answers the next practical question: how do you actually feed a new image into that model and get a label back inside Swift?
The answer on Apple platforms is not to call the model directly in isolation. The
tutorial wraps it in Vision, uses VNCoreMLRequest to define
the job, and then executes that request through a VNImageRequestHandler.
This post sits between training the model and using the result for wallpaper automation.
The original series flows like this:
1. Train a Create ML classifier from labeled images.
2. Run that model against new images through Vision.
3. Use the detected day or night label to change wallpapers by time of day.
Vision is the layer that turns your model into an image-analysis request with a standard Apple-side result format.
The post introduces Vision as a general-purpose computer-vision
framework that can do far more than classification. It is also used for text
detection, rectangles, faces, and QR codes. For this article, the important piece is
that Vision knows how to drive a Core ML image model and
return structured results.
The API shape the article highlights is:
init(model: VNCoreMLModel, completionHandler: VNRequestCompletionHandler?)
That matters because VNCoreMLRequest is not the image container. It is
the request definition plus the completion callback that receives the result.
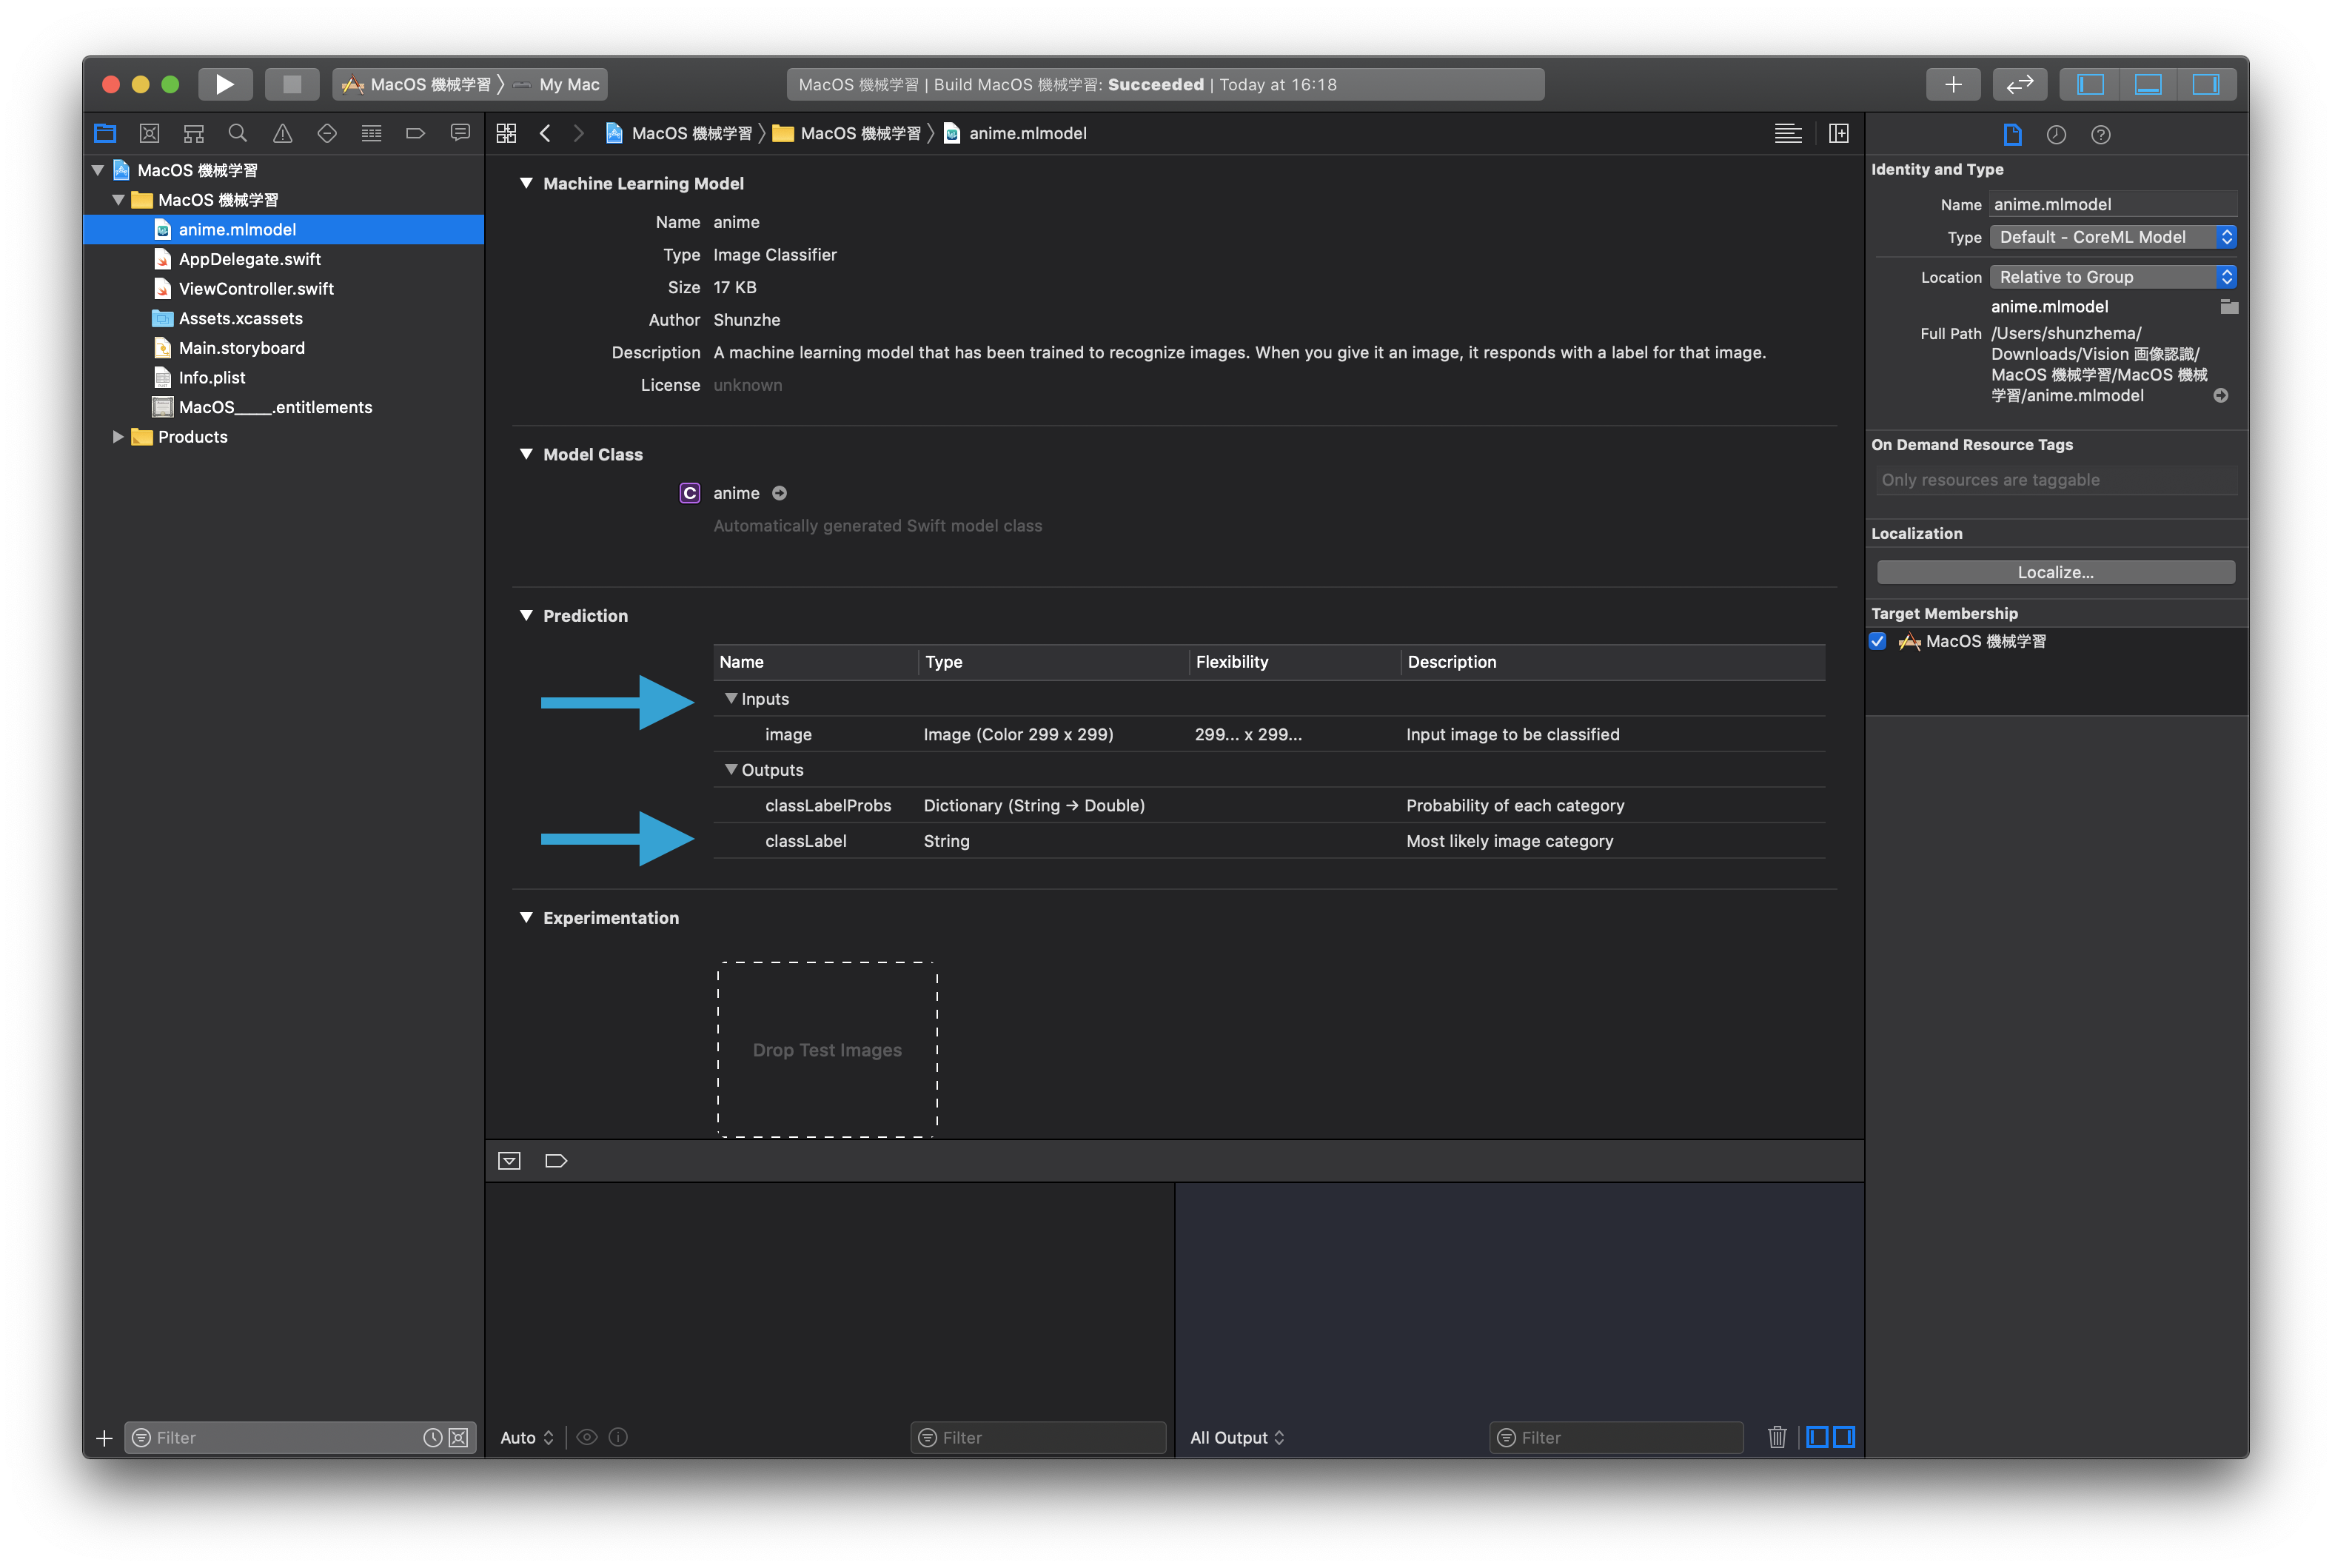
Copy the trained .mlmodel into the app target, then wrap the generated model class in VNCoreMLModel.
Xcode generates a Swift class for the model when the file is part of the target. The
article uses that generated class as the bridge into Vision:
guard let model = try? VNCoreMLModel(for: AnimeDayNight().model) else {
    fatalError("Cannot load the ML model")
}
Replace AnimeDayNight with whatever generated class name your own model
uses. This article uses a Japanese placeholder name here because the tutorial
is explaining the pattern, not hard-coding one exact project name.
Build a VNCoreMLRequest, then read the top VNClassificationObservation in the completion handler.
The request callback is where the prediction becomes useful. The result list is cast
to [VNClassificationObservation], the highest-confidence result is read,
and its identifier becomes the label your app reacts to.
let request = VNCoreMLRequest(model: model) { request, error in
    guard let results = request.results as? [VNClassificationObservation],
          let topResult = results.first else {
        fatalError("No classification result")
    }

    let detectedResult = topResult.identifier

    if detectedResult == "day" {
        // Handle daytime image
    } else if detectedResult == "night" {
        // Handle night image
    }
}Use VNImageRequestHandler to provide the actual image, then perform the request off the main thread.
This is the part this article emphasizes most clearly: the request is not the image. The handler is the object that carries image data into the Vision pipeline.
The article points out three common initializer forms:
init(cgImage: CGImage, options: [VNImageOption: Any])
init(ciImage: CIImage, options: [VNImageOption: Any])
init(cvPixelBuffer: CVPixelBuffer, options: [VNImageOption: Any])
It also notes that orientation can be passed in the options when appropriate. For the
concrete sample, the article shows getting a CIImage from a
UIImage:
let ciImage = UIImage(named: "test.png")!.ciImageThen the request is executed like this:
let handler = VNImageRequestHandler(ciImage: image)
DispatchQueue.global(qos: .userInteractive).async {
    do {
        try handler.perform([request])
    } catch {
        print(error)
    }
}
Once that finishes, the completion handler from the previous step runs and receives the classification result.
If you swap in a different classifier, the biggest code change is usually your result handling.
The article makes a useful point here: once the request pipeline is in place, most of the structure stays the same across models. What changes most often is the shape of the output and the label names you compare against in the completion handler.
Xcode helps by showing the model's input and output details when you click the model file in the project navigator.
This article ends with working iOS and macOS sample projects, plus a warning that the tutorial model itself is intentionally low quality.
The author notes that the example classifier was trained on only about fifteen images, so it is not meant as a serious production model. It is there to demonstrate the mechanics of the Vision pipeline.
The linked sample code from the article:
iOS code file:
ViewController.swift
iOS project:
SwiftVision iOS sample
macOS code file:
ViewController.swift
macOS project:
SwiftVision macOS sample
The practical takeaway is that the pipeline is three steps: wrap the model, define the request, then feed image data through a handler.
That is the durable part of the article. The labels can change, the model can change, and the UI can change, but the Vision integration path stays mostly the same across image-classification apps on Apple platforms.
The next article in the original series takes exactly that output and uses it to change wallpapers by time of day. This page stops one step earlier, at the point where raw images become structured labels.