The value of this article is its narrow goal: do not recognize Japanese text yet, just find where it is on the page.
At the time of this article, VNRecognizeTextRequest was not the
right tool for Japanese text in this workflow. So the article takes one step back
and solves the lower-level problem first: capture a document image, detect the text
regions, and visualize those regions with bounding boxes.
VNTextObservation, which can later be cropped and passed into a custom
recognition model.
VNDetectTextRectanglesRequest is useful when you need text location first and recognition second.
The article frames two reasons to use this request. First, it avoids depending on a recognizer that was not covering the target language in that setup. Second, it gives you a clean bridge into a custom OCR pipeline, because each detected region can be cut out and processed separately.
That makes the request a practical staging tool. Instead of trying to solve scanning, segmentation, and recognition in one jump, it isolates the segmentation layer and lets the rest of the pipeline evolve independently.
Use VNDocumentCameraViewController to capture a clean page image before any Vision request runs.
The first part of this article uses the built-in document scanner from
VisionKit. Present the scanner, clear any old overlay layers from the
previous run, then read the first scanned page inside the delegate callback.
import VisionKit

@IBAction func presentScanner() {
    let scanner = VNDocumentCameraViewController()
    scanner.delegate = self
    present(scanner, animated: true)

    imageView.layer.sublayers?.forEach { $0.removeFromSuperlayer() }
}

extension ViewController: VNDocumentCameraViewControllerDelegate {
    func documentCameraViewController(
        _ controller: VNDocumentCameraViewController,
        didFinishWith scan: VNDocumentCameraScan
    ) {
        if let cgImage = scan.imageOfPage(at: 0).cgImage {
            processImage(input: cgImage)
        }
        controller.dismiss(animated: true)
    }
}
Run VNDetectTextRectanglesRequest and treat the result as a list of VNTextObservation boxes.
Once the image exists, the article switches to Vision. The request does
not return recognized strings here. It returns geometry. Each
VNTextObservation represents one detected text region in normalized
coordinates.
import Vision

func processImage(input: CGImage) {
    let request = VNDetectTextRectanglesRequest { request, error in
        guard error == nil else { return }
        guard let results = request.results as? [VNTextObservation] else { return }

        for result in results {
            DispatchQueue.main.async {
                self.imageView.image = UIImage(cgImage: input)
                self.drawBoundingBox(for: result)
            }
        }
    }

    let handler = VNImageRequestHandler(cgImage: input, options: [:])
    DispatchQueue.global(qos: .userInteractive).async {
        try? handler.perform([request])
    }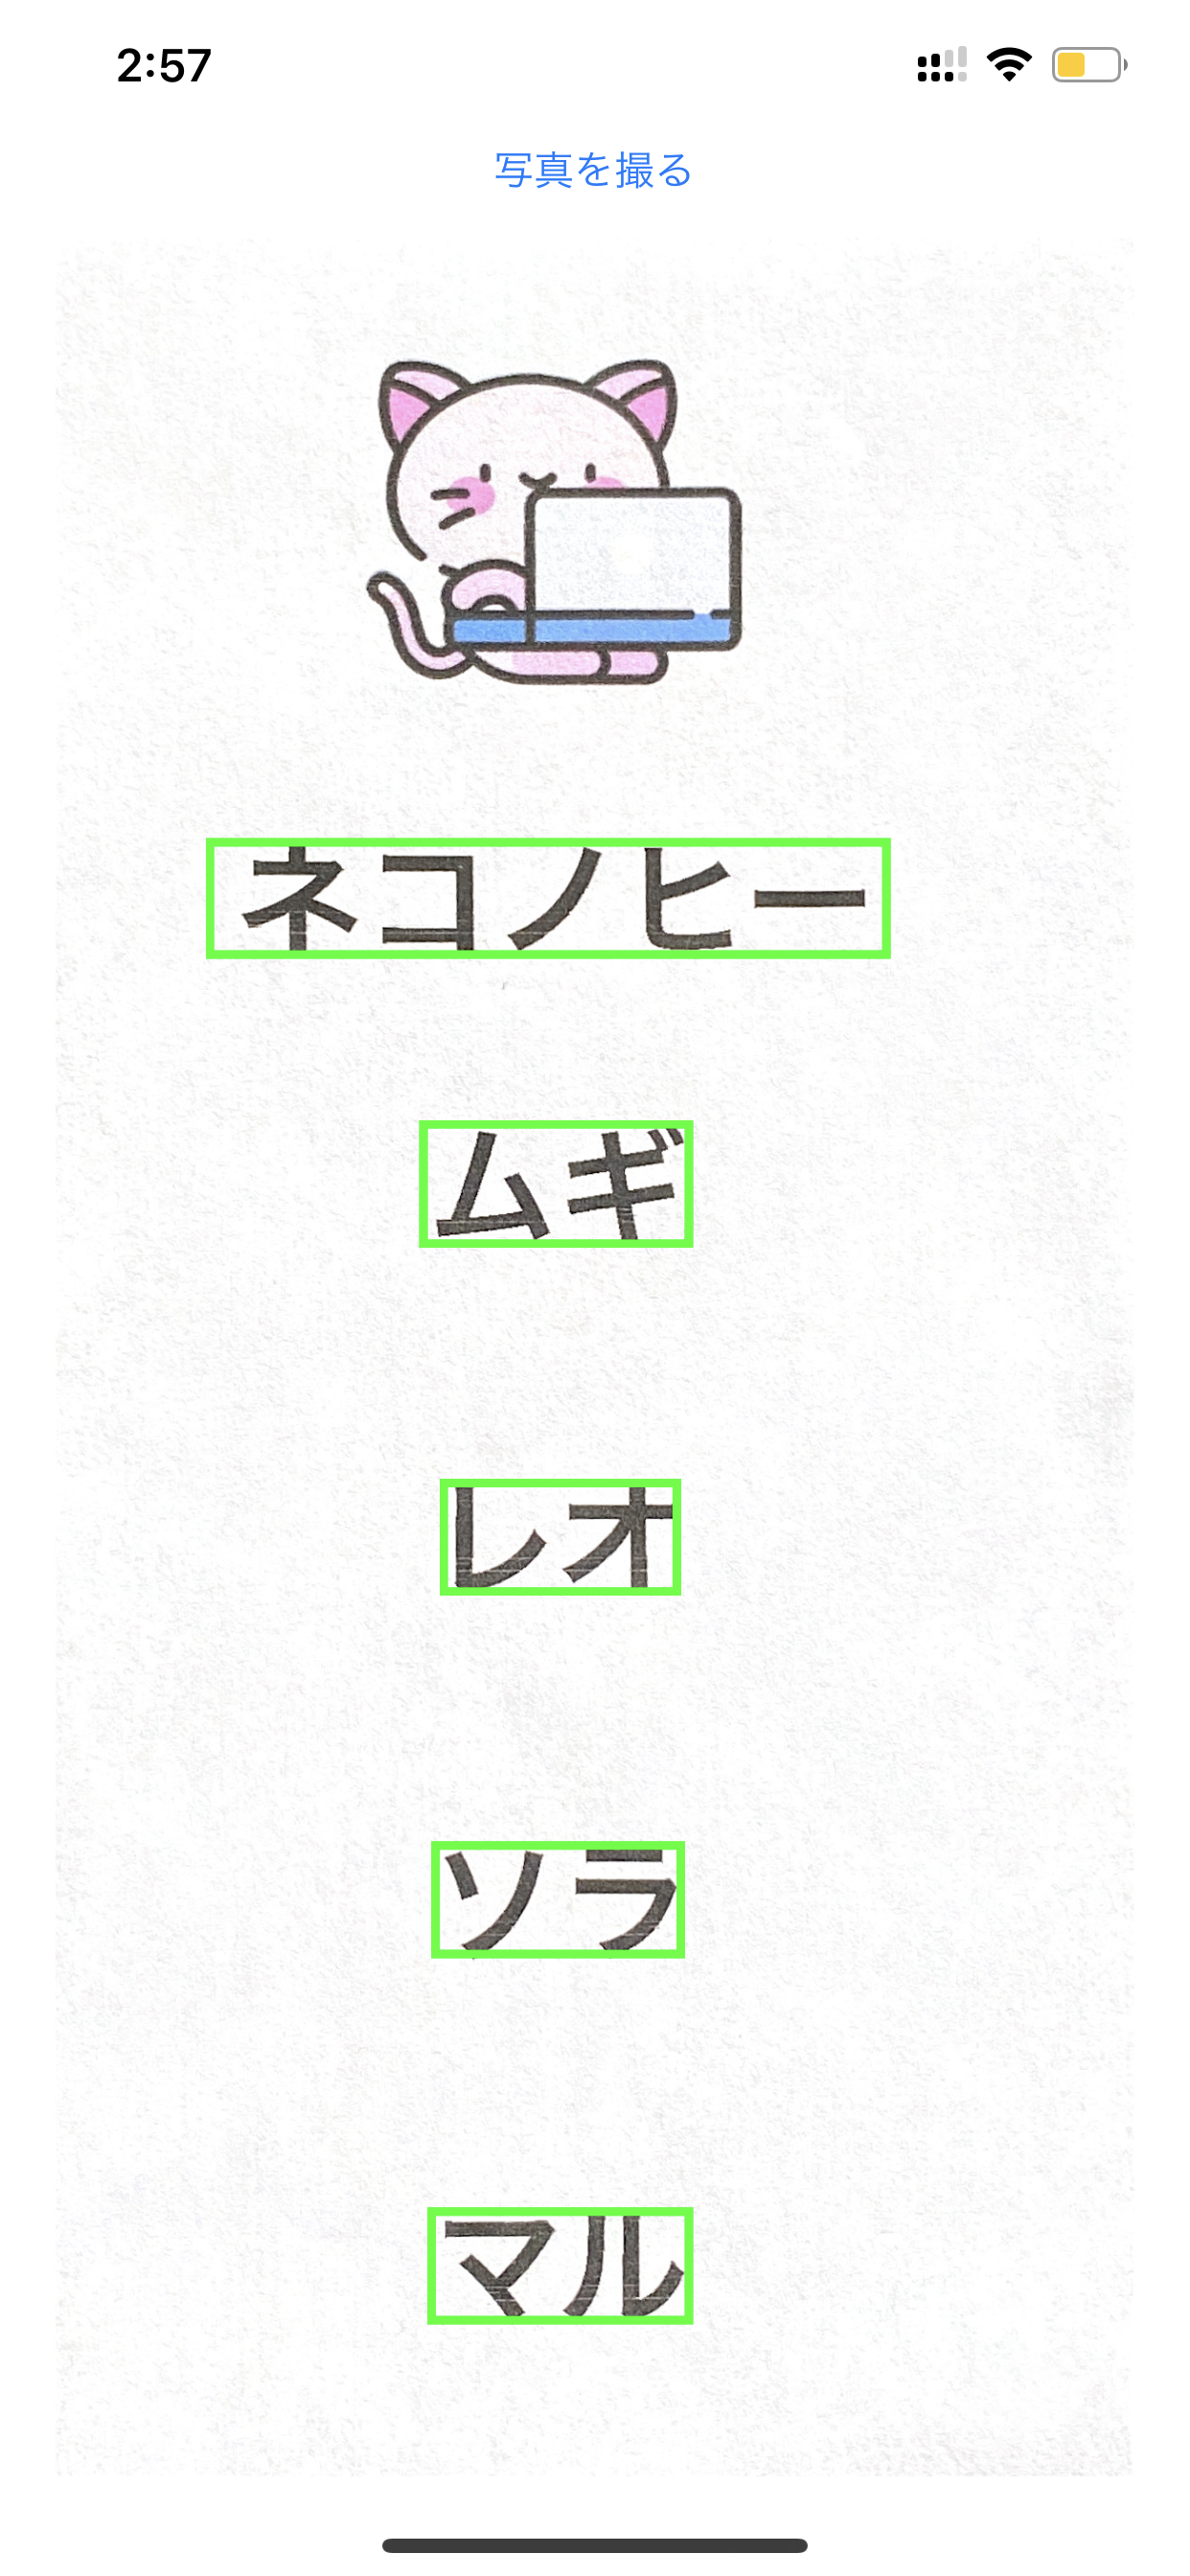
}Convert Vision's normalized coordinates into view coordinates and draw your own overlay layers.
The overlay step is the part that makes the result understandable. Vision gives the
box in normalized image-space coordinates, so the article converts those values into
the UIImageView's frame before drawing a green border layer.
func drawBoundingBox(for result: VNTextObservation) {
    let x = result.topLeft.x * imageView.frame.width
    let y = (1 - result.topLeft.y) * imageView.frame.height
    let width = result.boundingBox.width * imageView.frame.width
    let height = result.boundingBox.height * imageView.frame.height

    let outline = CALayer()
    outline.frame = CGRect(x: x, y: y, width: width, height: height)
    outline.borderColor = UIColor.green.cgColor
    outline.borderWidth = 3
    imageView.layer.addSublayer(outline)
}
This article also points out that you can move from word regions to character-level
regions by working with characterBoxes instead. The drawing logic stays
almost the same. Only the level of granularity changes.
The durable takeaway is to use this request as the front half of a custom Japanese OCR pipeline, while accepting that the boxes will not always be perfect.
This article is direct about the limitation: some boxes may be missed, and lighting or image quality can make the geometry less accurate. That is normal for a machine learning step like this. The goal is not perfection on the first pass. The goal is a usable segmentation stage.
From there, the next logical move is to crop the detected regions or
characterBoxes and feed them into a custom recognition model trained for
Japanese text. That is the handoff point where this article stops and a true OCR
system begins.