WeatherKit gave Apple-platform apps a first-party way to fetch real weather data instead of relying only on third-party APIs.
This article was written right when WeatherKit appeared in the iOS 16 cycle. Its value is still clear: you can fetch current conditions, 10-day hourly forecasts, daily forecasts, precipitation information, wind reports, UV index, and more, all from an official Apple framework designed for Swift apps.
This article keeps the post practical. It covers the capability and entitlement setup, the shared helper object, how to fetch current weather and forecasts, how formatting works for measurements, what the attribution requirement looks like, and where the WeatherKit REST API fits if you need server-side access.
Before writing code, WeatherKit needs to be enabled for the app identifier and added as a capability in Xcode.
This article starts with the account setup path: go to the Apple Developer portal, open
Certificates, Identifiers & Profiles, select the app identifier, enable the WeatherKit
app service, save the change, then wait for Apple to register it. In Xcode, add the WeatherKit capability from the
Signing & Capabilities tab.
The post also warns that account paperwork can block you. If Xcode complains while adding the capability, you may need to log in to the developer portal and accept the latest account agreement before the entitlement becomes usable.
On pricing, the article quotes Apple's June 8, 2022 beta-era note: WeatherKit included an allowance of 500,000 API calls per Apple Developer Program membership per month, with the same monthly allowance planned after beta and paid expansion for heavier usage. Treat that as historical context, not a current billing guarantee.
A shared observable helper is a clean way to keep WeatherService calls and published weather state in one place.
This article wraps WeatherKit access in an ObservableObject so SwiftUI views can react to changing weather data.
That is a sensible pattern because WeatherKit requests are asynchronous, multiple views may need the same data, and measurement-rich
responses are easier to manage from one helper than from scattered view code.
import WeatherKit
import CoreLocation

@MainActor
final class WeatherDataHelper: ObservableObject {
    static let shared = WeatherDataHelper()
    private let service = WeatherService.shared

    @Published var currentWeather: CurrentWeather?
    @Published var hourlyForecast: Forecast<HourWeather>?
    @Published var dailyForecast: Forecast<DayWeather>?
    @Published var attributionInfo: WeatherAttribution?
}
The important part is not the singleton by itself. It is that the helper becomes the place where your WeatherKit requests, published values, and attribution state stay coordinated.
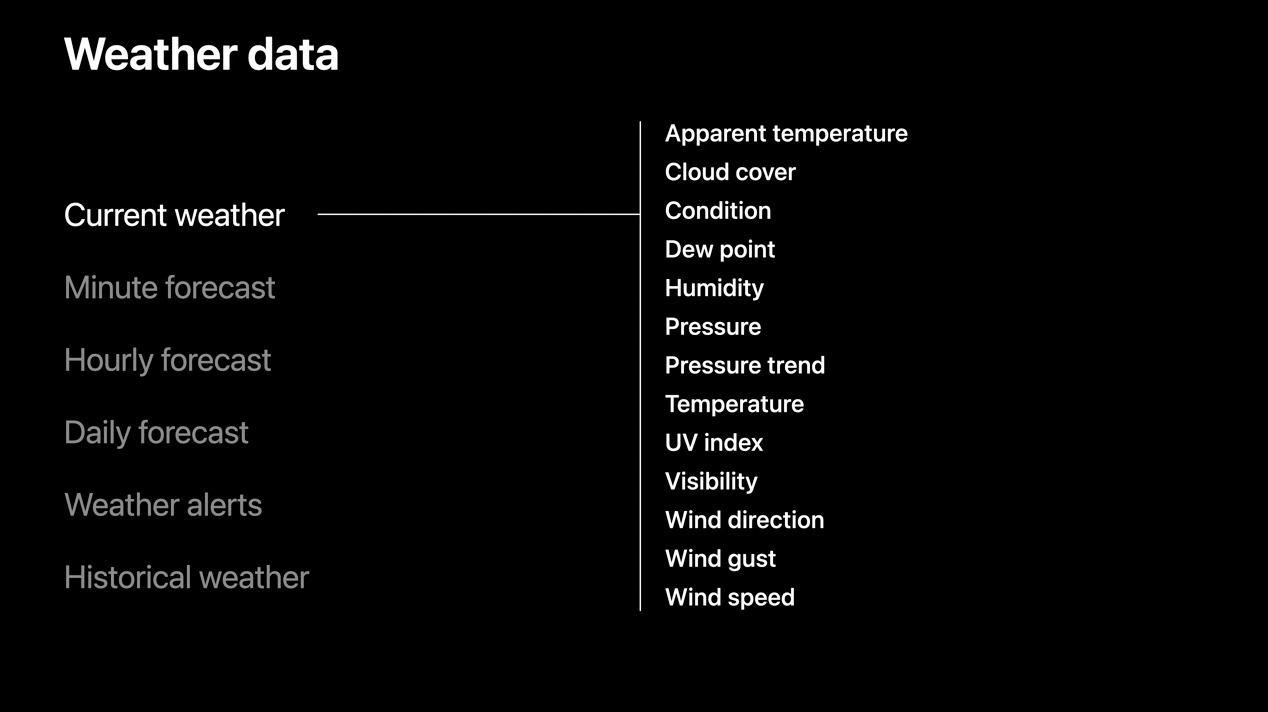
The most direct WeatherKit request asks for the current conditions at a specific CLLocation.
The first concrete fetch in the article uses WeatherService.shared with including: .current.
The result comes back as a CurrentWeather value, which includes fields such as cloud cover, condition,
humidity, pressure, daylight state, temperature, apparent temperature, UV index, visibility, wind, and an SF Symbol name.
func updateCurrentWeather(userLocation: CLLocation) {
    Task.detached(priority: .userInitiated) {
        do {
            let forecast = try await self.service.weather(
                for: userLocation,
                including: .current
            )

            DispatchQueue.main.async {
                self.currentWeather = forecast
            }
        } catch {
            print(error.localizedDescription)
        }
    }
}
The article also points out that many of these values are already designed to format well for the current locale. For example, temperatures and wind speeds can be displayed directly with measurement formatting.
currentWeather.temperature.formatted()
currentWeather.temperature.formatted(
    .measurement(width: .abbreviated, usage: .weather)
)

speed.formatted(.measurement(width: .abbreviated, usage: .general))
In the SwiftUI view, the post uses one observed object for weather data and another for location. Once the current weather exists, the interface can render the system weather symbol, temperature, humidity, and a simple daylight indicator.
struct ContentView: View {
    @ObservedObject var weatherDataHelper = WeatherDataHelper.shared
    @ObservedObject var userLocationHelper = LocationManager.shared

    var body: some View {
        Form {
            if let currentWeather = weatherDataHelper.currentWeather {
                Section {
                    Label(currentWeather.temperature.formatted(), systemImage: "thermometer")
                    Label("\(Int(currentWeather.humidity * 100))%", systemImage: "humidity.fill")
                    Label(
                        currentWeather.isDaylight ? "Daytime" : "Nighttime",
                        systemImage: currentWeather.isDaylight ? "sun.max.fill" : "moon.stars.fill"
                    )
                } header: {
                    HStack {
                        Spacer()
                        Image(systemName: currentWeather.symbolName)
                            .font(.system(size: 60))
                        Spacer()
                    }
                }
            }
        }
    }
}
CurrentWeather already carries a broad set of fields beyond only temperature.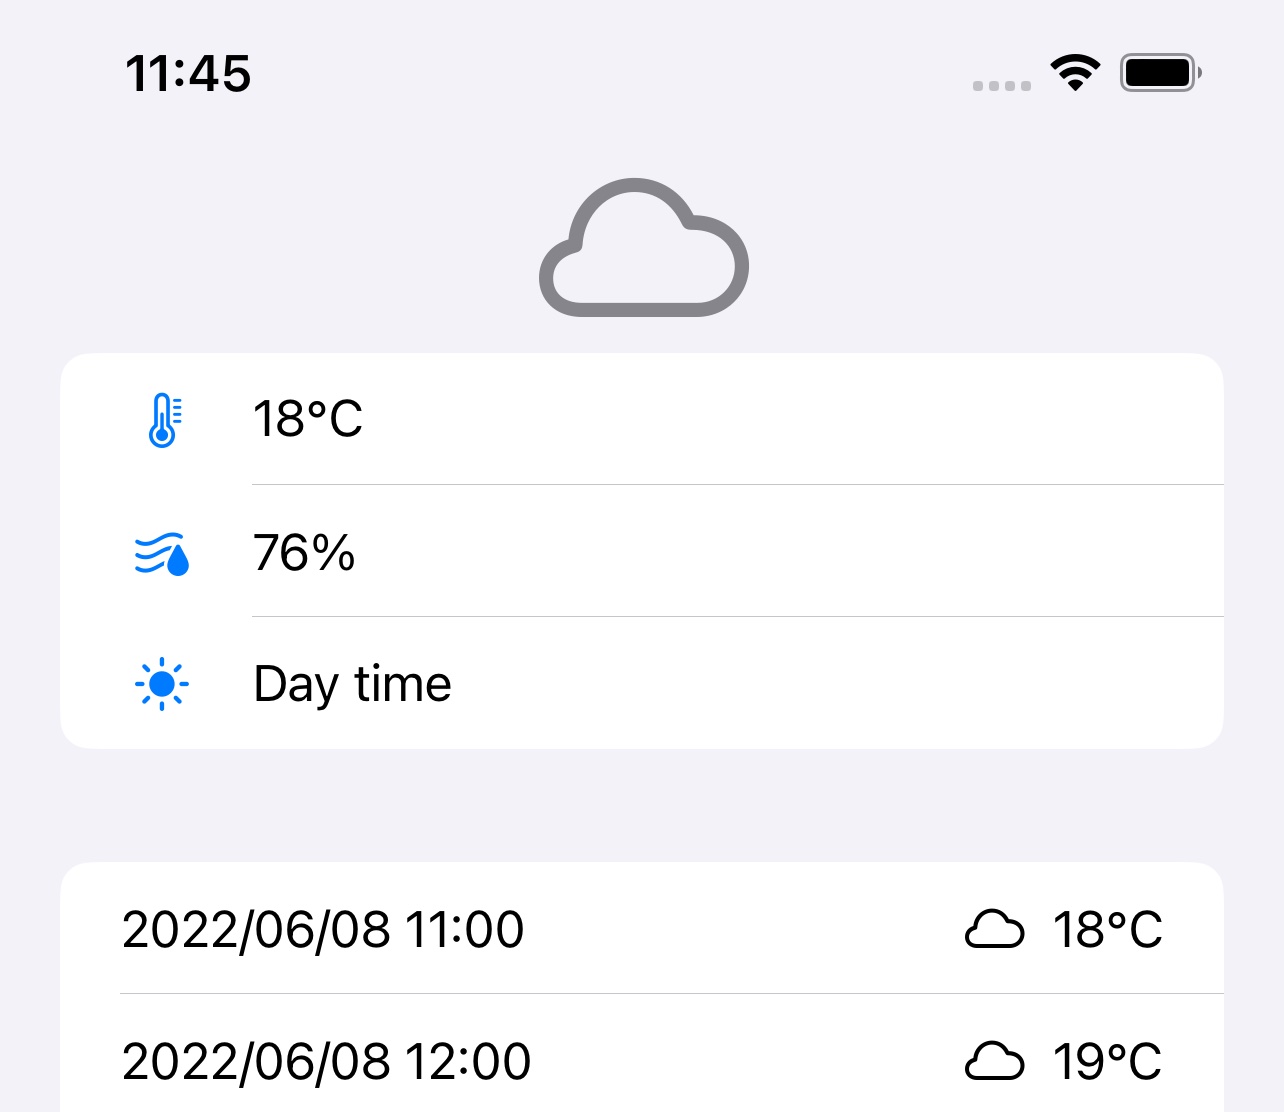
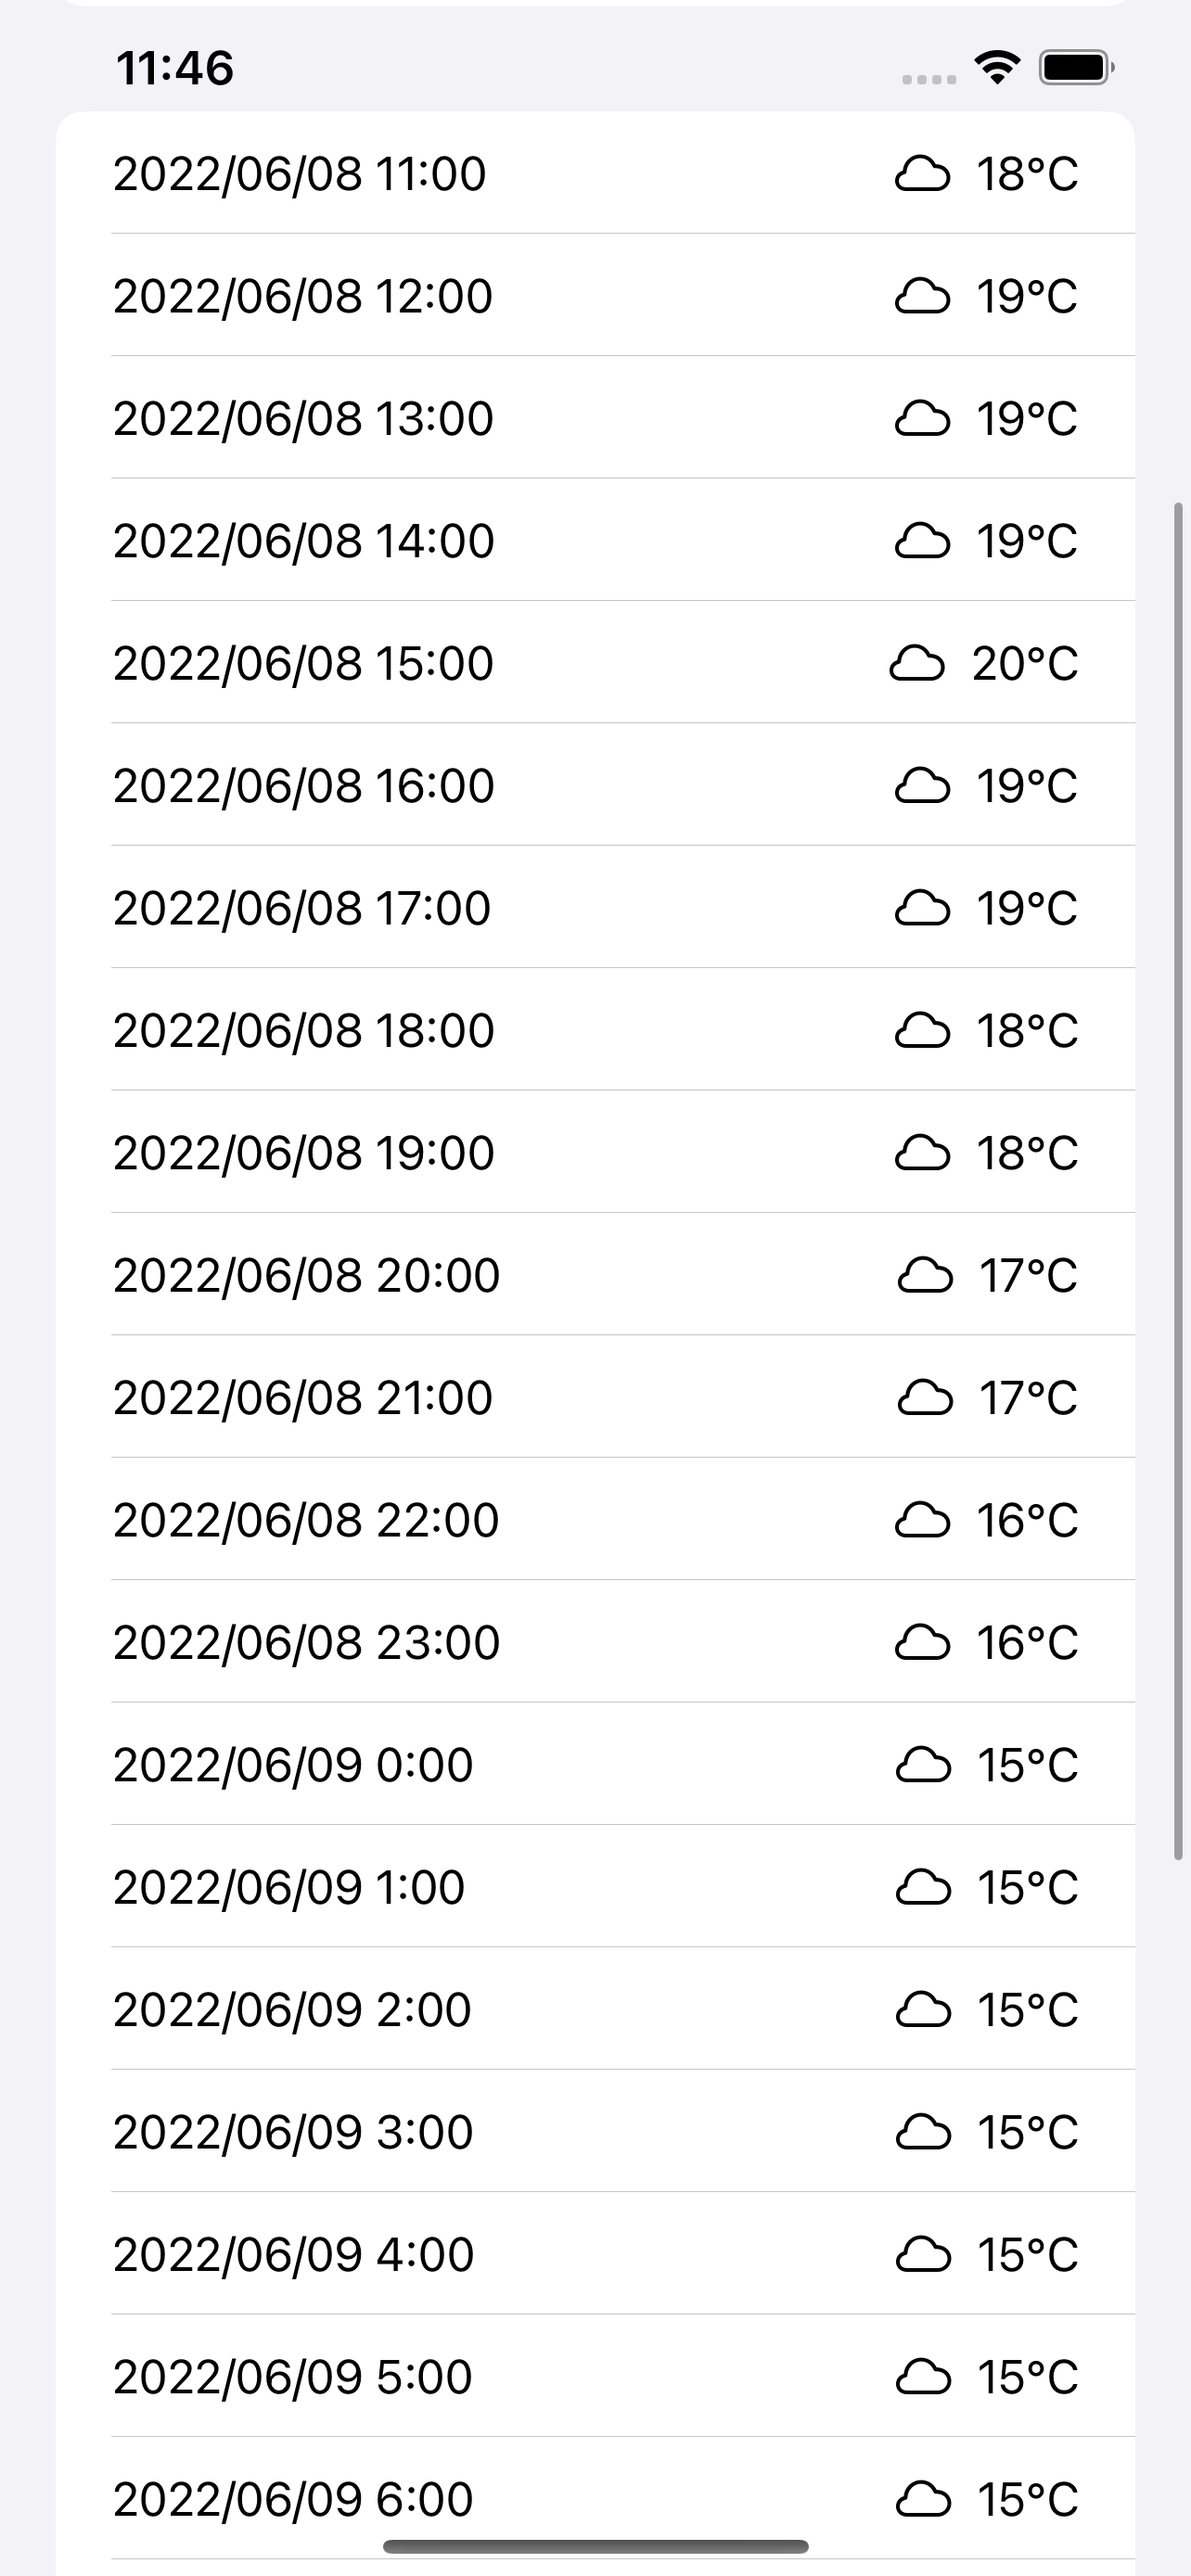
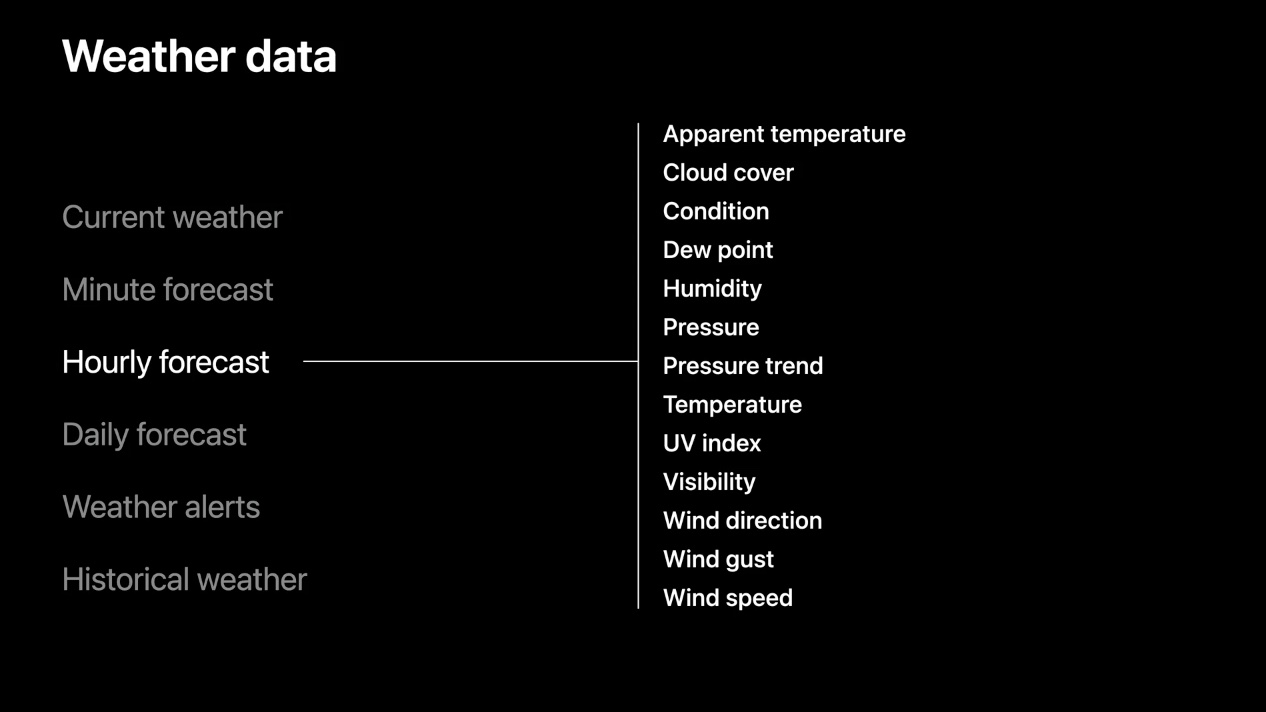
Hourly and daily forecasts follow the same pattern as current weather, but the response becomes a forecast collection you loop through in SwiftUI.
For hourly weather, the only real change in the request is including: .hourly. The result can be displayed with
a ForEach, showing the date, system symbol, and formatted temperature for each hour.
func updateHourlyWeather(userLocation: CLLocation) {
    Task.detached(priority: .userInitiated) {
        do {
            let forecast = try await self.service.weather(
                for: userLocation,
                including: .hourly
            )

            DispatchQueue.main.async {
                self.hourlyForecast = forecast
            }
        } catch {
            print(error.localizedDescription)
        }
    }
}
if let hourlyWeather = weatherDataHelper.hourlyForecast {
ForEach(hourlyWeather, id: \.self.date) { weatherEntry in
HStack {
Text(DateFormatter.localizedString(
from: weatherEntry.date,
dateStyle: .short,
timeStyle: .short
))
Spacer()
Image(systemName: weatherEntry.symbolName)
Text(
weatherEntry.temperature.formatted(
.measurement(width: .abbreviated, usage: .weather)
)
)
}
}
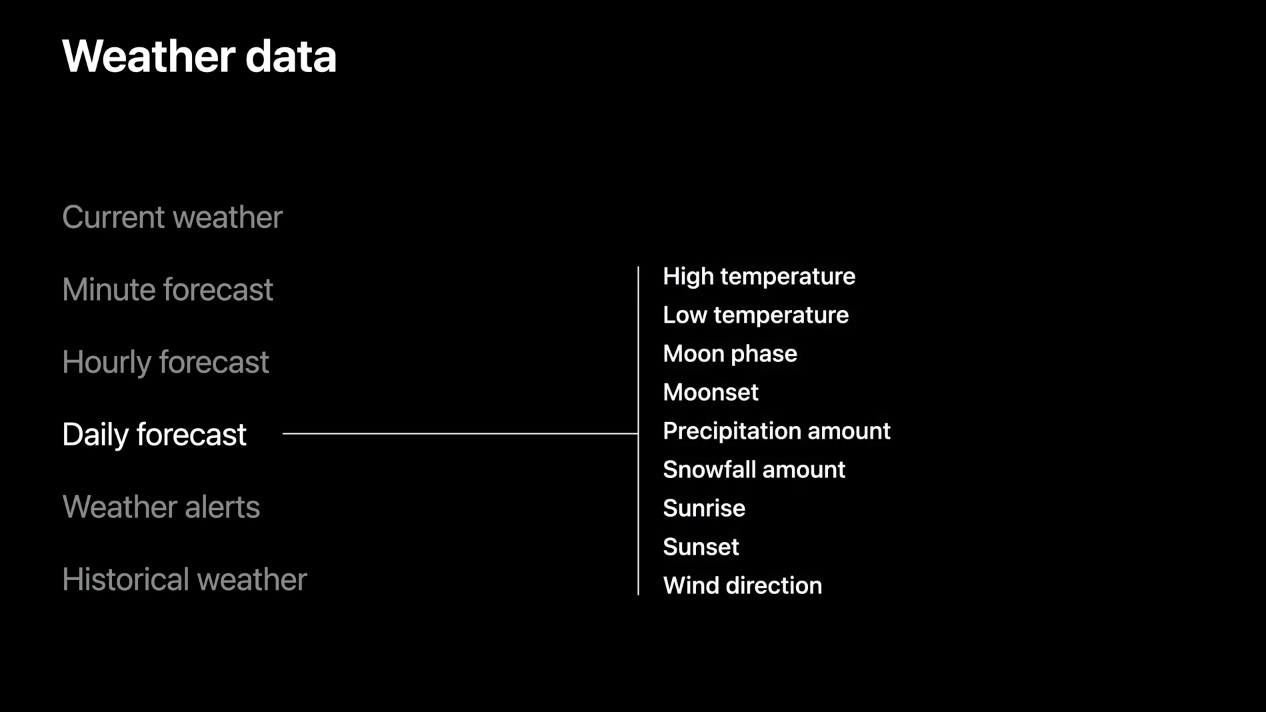
}Daily forecasts are similar, but the data is richer in a different way. The daily entry includes items such as high and low temperature, precipitation chance, sun information like sunrise and sunset, moon information, and UV index.
WeatherKit can also return other dataset types, and it can bundle several dataset requests into one call.
The article briefly lists the wider surface area beyond current, hourly, and daily weather. Examples include .minute,
weather alerts, and .availability so the app can check whether a forecast is available for a location.
It also highlights a useful capability: requesting multiple datasets in one call. If you ask for hourly, daily, and current data together, the result tuple contains them in the same order you requested them.
let forecast = try await self.service.weather(
    for: userLocation,
    including: .hourly, .daily, .current
)
func updateAllWeather(userLocation: CLLocation) {
Task.detached(priority: .userInitiated) {
do {
let forecast = try await self.service.weather(
for: userLocation,
including: .hourly, .daily, .current
)
DispatchQueue.main.async {
self.hourlyForecast = forecast.0
self.dailyForecast = forecast.1
self.currentWeather = forecast.2
}
} catch {
print(error.localizedDescription)
}
}
}Displaying weather data is not only about fetching it. WeatherKit also expects attribution to be shown in the app.
This is one of the most useful parts of this article. The requirement is not optional decoration. If your app uses Apple Weather data, you need to show the attribution image and the legal link. WeatherKit exposes that information directly from the service.
func updateAttributionInfo() {
    Task.detached(priority: .background) {
        let attribution = try await self.service.attribution
        DispatchQueue.main.async {
            self.attributionInfo = attribution
        }
    }
}
The article notes that the image URLs depend on color scheme: use combinedMarkLightURL for dark UI and
combinedMarkDarkURL for light UI. The legal destination comes from legalPageURL.
if let attribution = weatherDataHelper.attributionInfo {
    AsyncImage(
        url: colorScheme == .dark
            ? attribution.combinedMarkLightURL
            : attribution.combinedMarkDarkURL
    ) { image in
        image
            .resizable()
            .scaledToFit()
            .frame(height: 20)
    } placeholder: {
        ProgressView()
    }

    Text("[Other data sources](\(attribution.legalPageURL))")
}The WeatherKit REST API covers the same general feature set and can go further for server-side or date-range requests.
The final technical section in the article points out that the REST API exposes everything the Swift framework does and also includes some broader endpoint flexibility, such as specifying start and end dates for a forecast request. That matters more for servers, backends, or workflows that need data outside the immediate device request pattern.
To use the REST API, you first create an access token in the Apple Developer account. This article still recommends the Swift framework when you are already inside an iOS app, which is the right default. The REST API is better treated as the sibling interface for non-app or server-side work.
The most important part of this early WeatherKit article is that it treats weather data as a full product flow, not only a single request.
That means capability setup, location handling, current conditions, forecasts, formatting, attribution, and the fallback path for the REST API. The code is simple enough to follow, but it already shows the shape of a real weather feature rather than a one-off API demo.
That is why the post still holds up: it captures the moment Apple turned weather access into a first-party platform tool, and it does so in a way that is directly usable in SwiftUI apps.