Xcode 13 turns localization into a more direct project workflow: prepare the languages, let the compiler extract strings, export them, edit the translated copy, then import it back.
This article starts by contrasting this flow with the older one. Xcode had export and import support before, but a separate editor was often part of the process. In Xcode 13, Apple added a built-in editor for localization packages, which makes the loop much easier for smaller teams and solo developers.
This post is focused on the Swift project path: SwiftUI strings, UIKit strings written in code, Xcode build
settings, and the .xcloc package you edit before importing translations back into the app.
Before exporting anything, make sure the project is configured with the right development language and the target languages you want to ship.
This article treats this as prerequisite setup and links out to a related post for the exact project configuration steps. That is the right order: if the app's language configuration is incomplete, the rest of the localization workflow will be frustrating or misleading.
SwiftUI gives you a head start, but code-defined UIKit strings still need to be wrapped so Xcode knows they belong in localization extraction.
The article notes that many common SwiftUI text-based views already participate in localization automatically.
Typical examples include Text, TextField, and Button.
For UIKit or any code path that builds visible strings manually, the safe pattern is still
NSLocalizedString:
let alert = UIAlertController(
    title: NSLocalizedString("Test title", comment: ""),
    message: NSLocalizedString("Message body", comment: ""),
    preferredStyle: .alert
)
The source also calls out custom SwiftUI views. If a custom component does not use the standard localized text
path automatically, you may still need to feed it strings that came through NSLocalizedString.

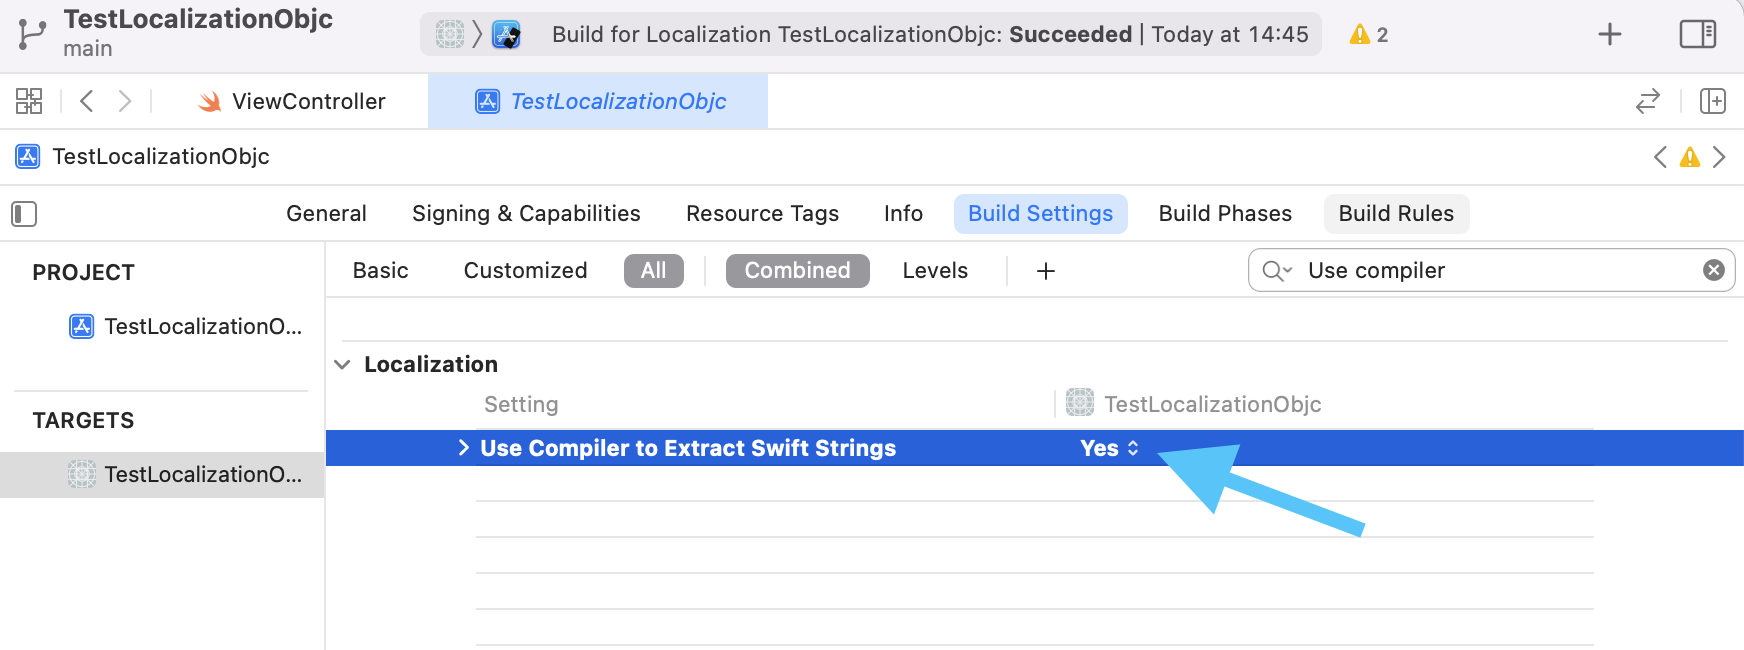
Turn on compiler extraction so Xcode can pull Swift strings into the localization workflow.
After selecting the project, go to Build Settings and enable
Use Compiler to Extract Swift Strings. The article presents this as the switch that lets the
compiler gather localizable strings from Swift source instead of relying on more manual bookkeeping.
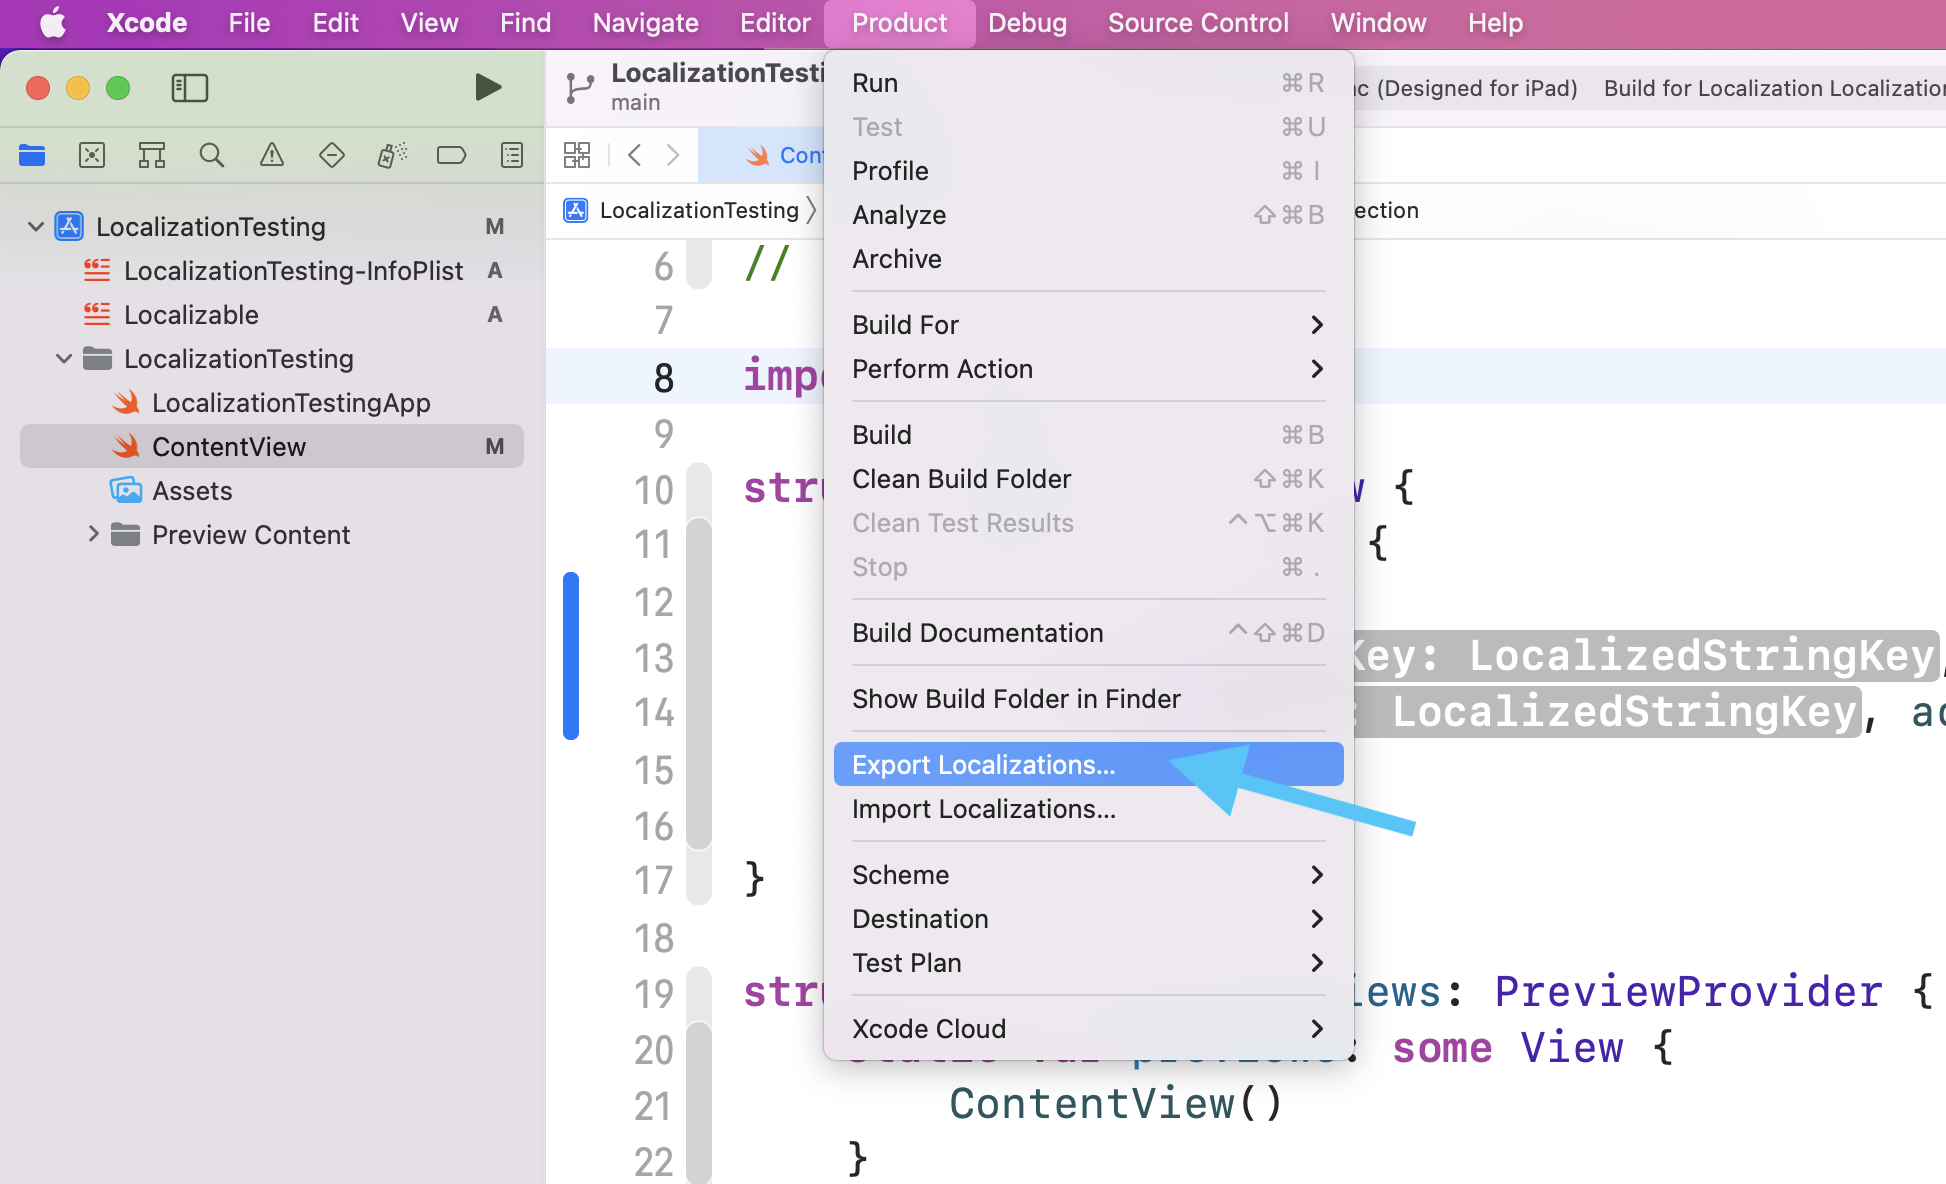
Once the project is ready, export the localization package from Xcode's Product menu.
The workflow here is intentionally simple: open Product, then choose
Export Localizations. Xcode generates a localization package for the selected language targets.
That exported package is what you hand to a translator or edit yourself in Xcode's built-in interface.
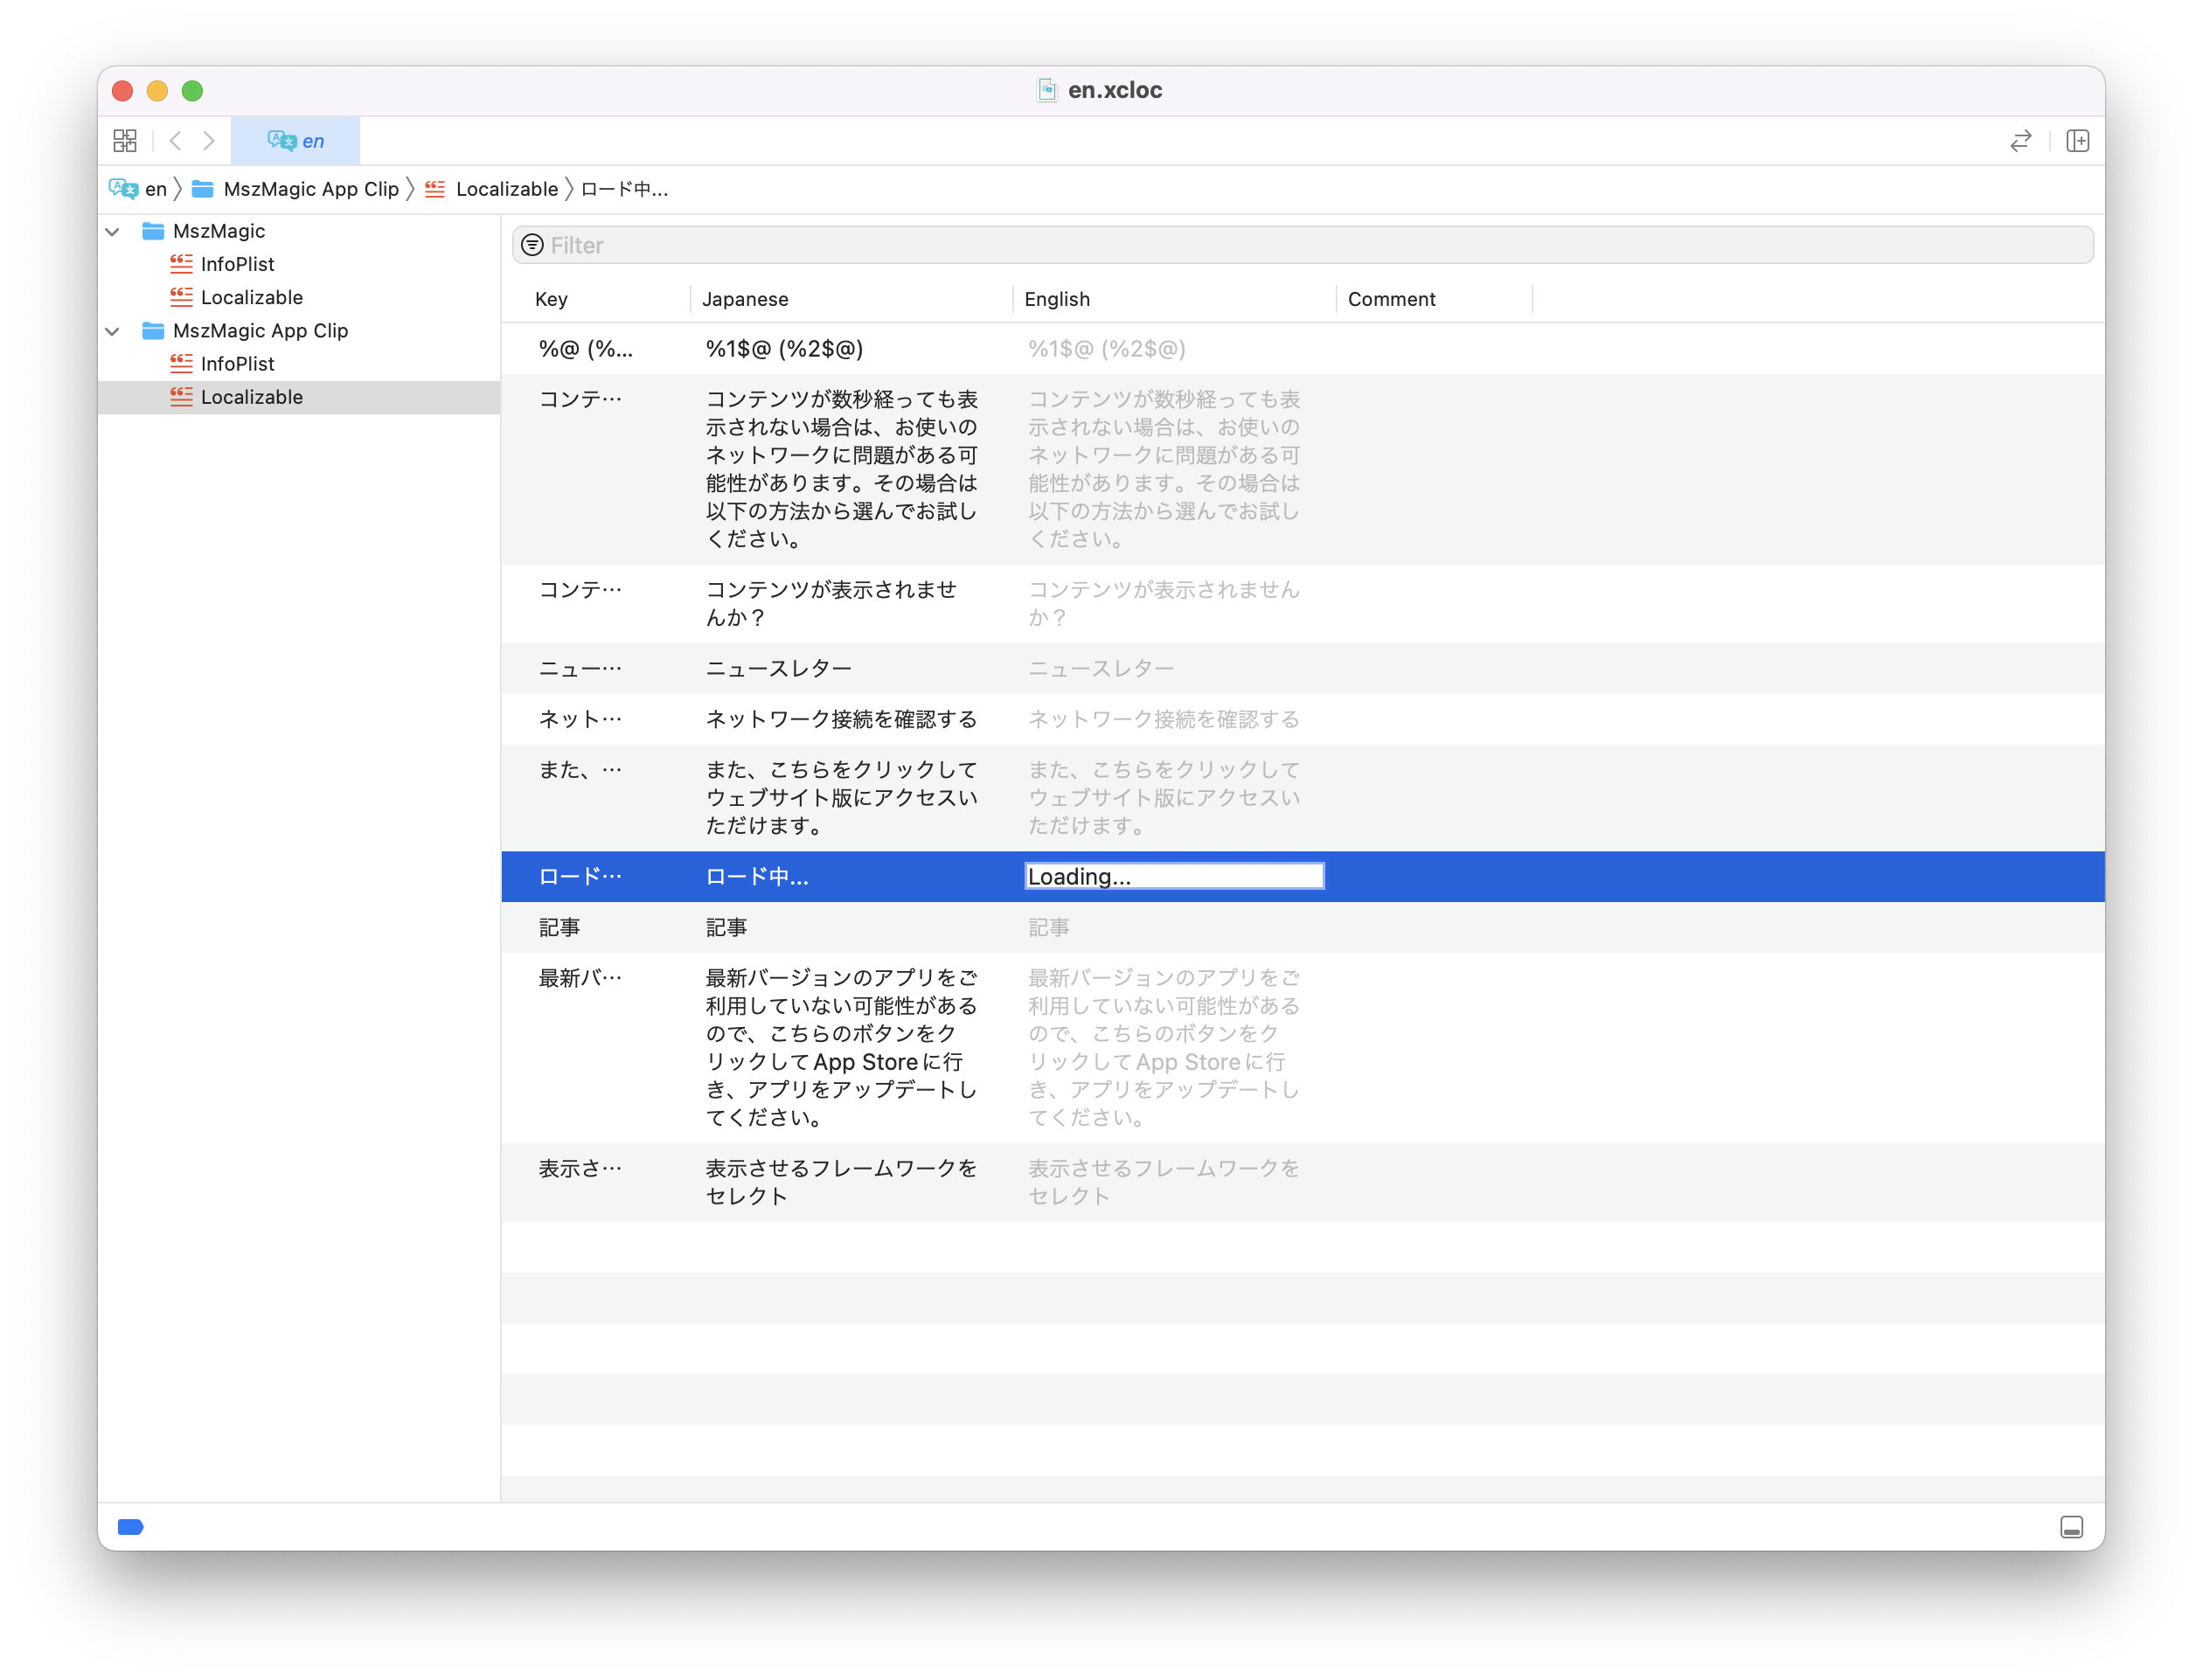
Open the generated .xcloc package, then edit the target-language column directly in Xcode's localization editor.
The article's next step is to open the generated folder and double-click the .xcloc file.
If the package contains multiple targets, select the right target folder and then one of the files to open the editor view.
From there, translation is a spreadsheet-like process: find the source string and edit the text in the destination-language column on the right.
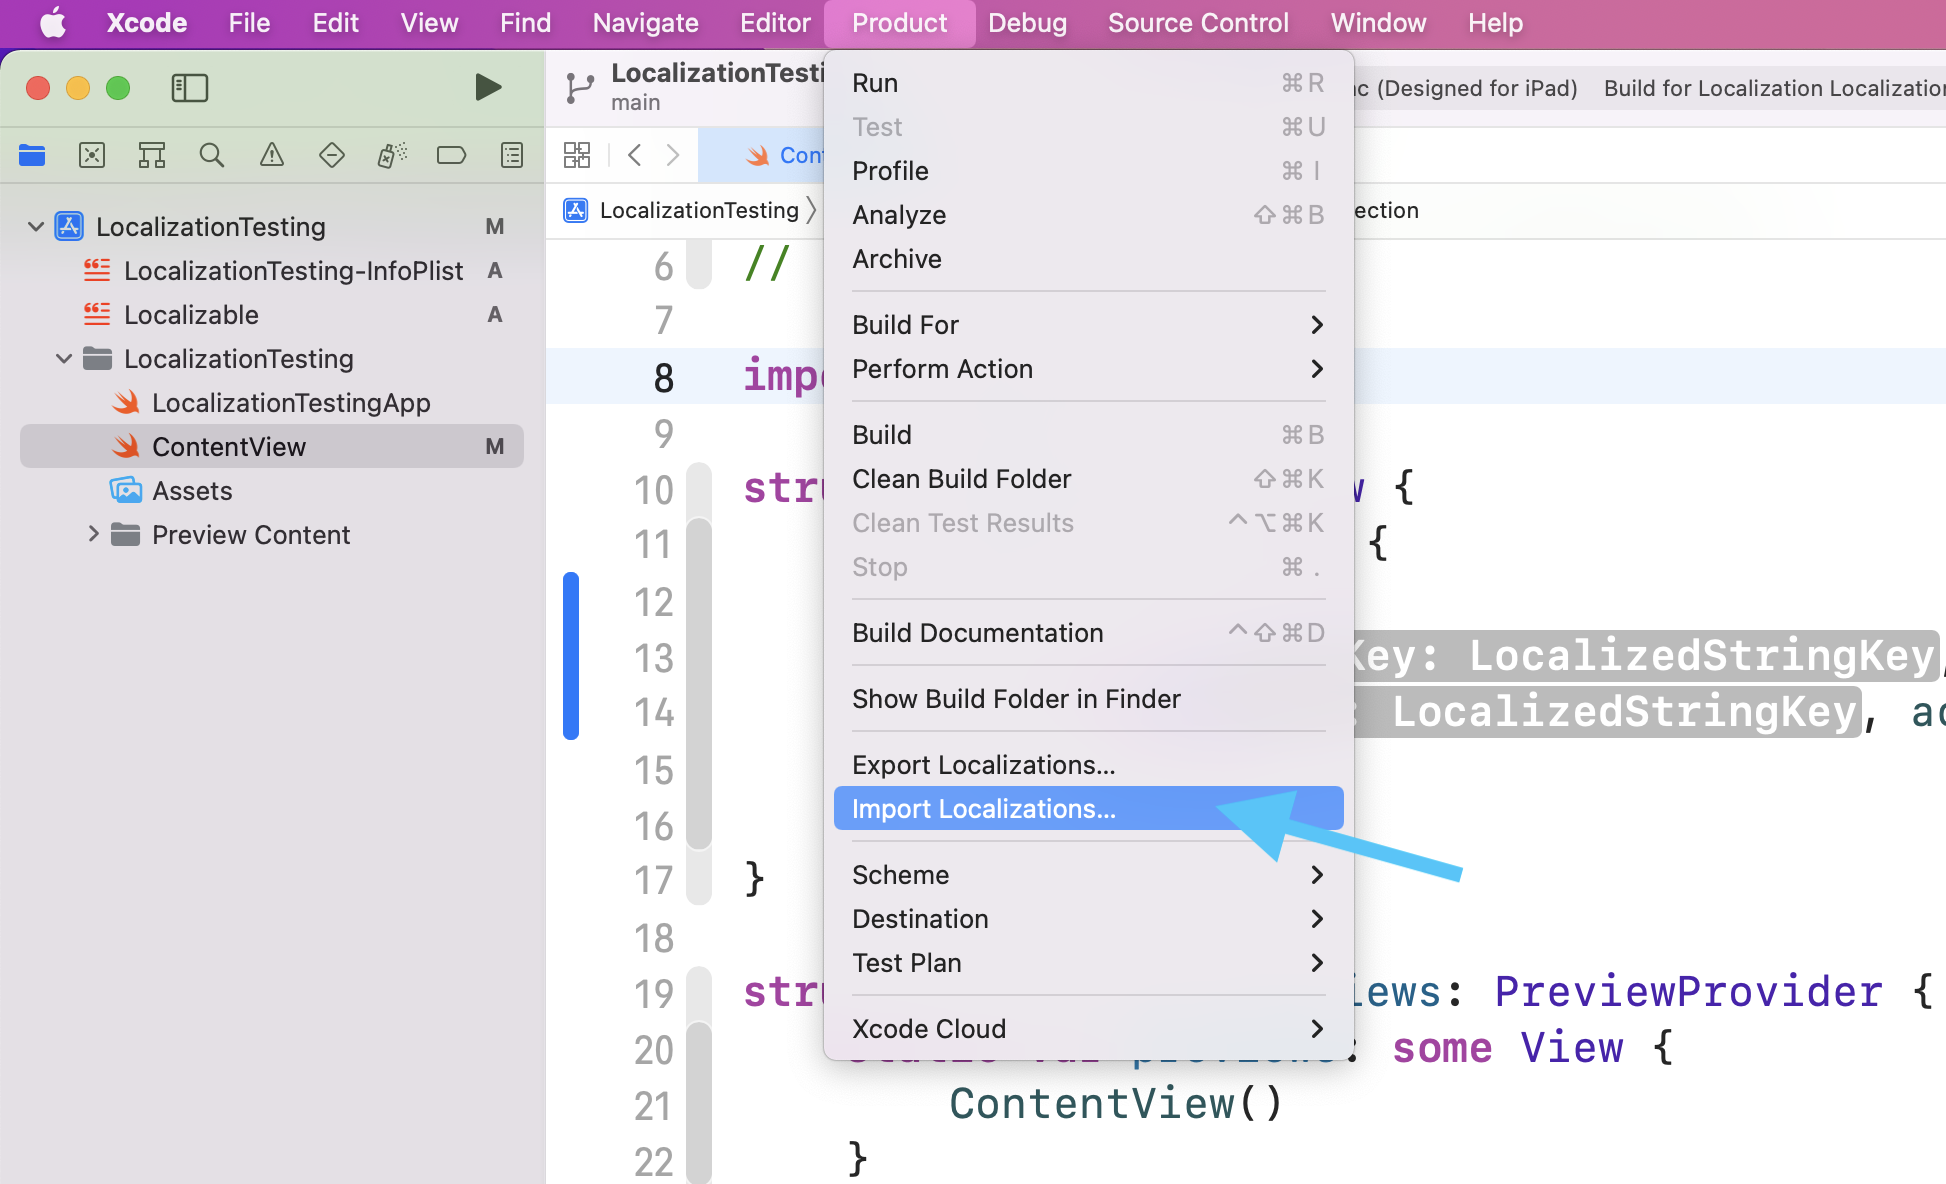
After saving the translated package, bring it back through Xcode's import command.
Return to Xcode, open Product, choose Import Localizations, and select the edited
.xcloc package. That applies the translated content back into the project.
At that point, the project is ready for verification in the target language build.
The value of this workflow is not only that Xcode can export and import strings. It is that the whole path is finally coherent inside the tool most iOS developers are already using.
For many teams, that is enough to make localization feel routine instead of special-case tooling work. Mark strings correctly, let the compiler extract them, export, translate, import, and test.
That is the entire story this article is trying to make practical.