Large (6.6MB)
Medium (1.8 MB)
Small (772 kb)
Large (6.6MB)
Medium (1.8 MB)
Small (772 kb)
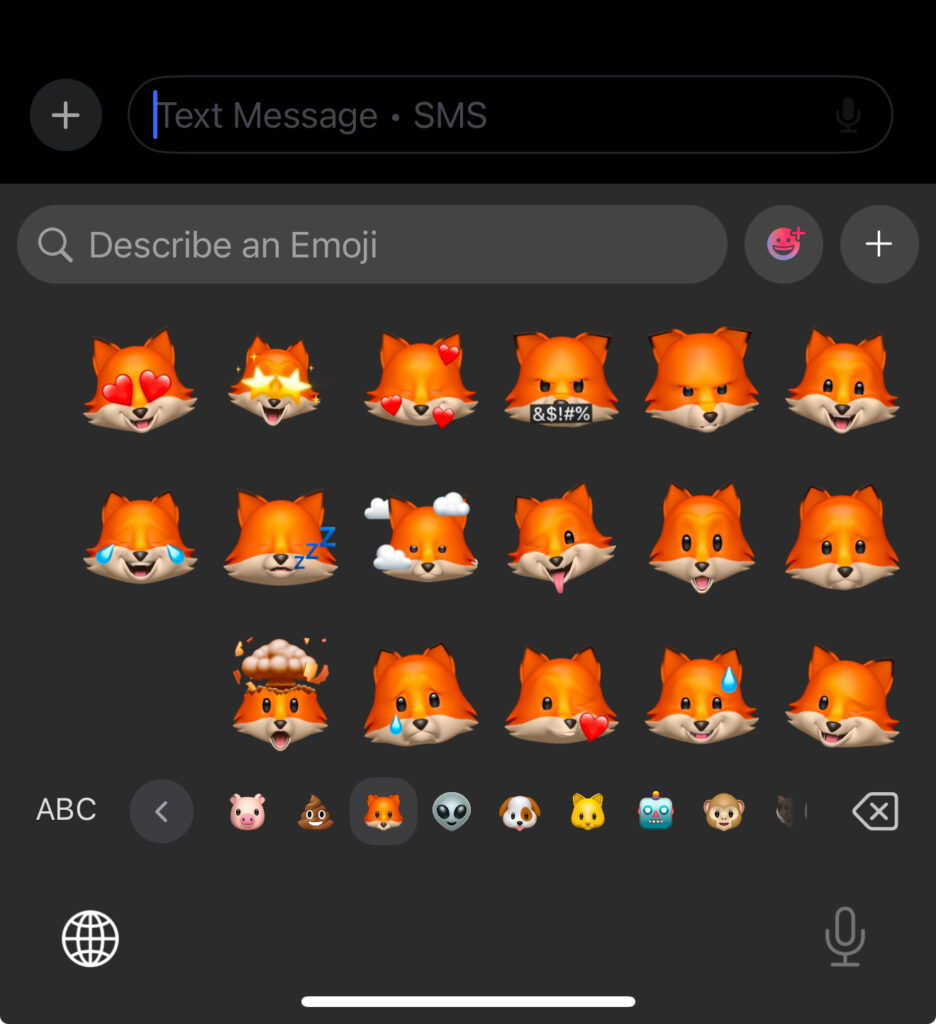
Sometimes, you might want to allow the user to pick their Memoji and stickers and upload them within your own app.
To do that, you can present a keyboard and show Memojis and stickers. They will show on the keyboard if you have set the following properties for your UITextView:
textView.supportsAdaptiveImageGlyph = true
textView.allowsEditingTextAttributes = true
Then, you will set a UITextView delegate UITextViewDelegate to receive a call whenever the content changed.
textView.delegate = self
Conform the view controller to UITextViewDelegate. Then implement the textViewDidChange function
func textViewDidChange(_ textView: UITextView) {
if let attachment = findFirstAttachment(in: textView.attributedText) {
handleMemoji(attachment: attachment)
textView.text = ""
return
}
}
First, we try to find the attachment object that has Memoji within. We first check by type adaptiveImageGlyph (only available for iOS 18 and up), which is usually the case when you pick a sticker within iOS 18 system. And we check for attachment too.
private func findFirstAttachment(in attributedText: NSAttributedString?) -> NSTextAttachment? {
guard let attributedText else { return nil }
// First try to find NSAdaptiveImageGlyph
var foundGlyph: NSTextAttachment?
attributedText.enumerateAttribute(.adaptiveImageGlyph,
in: NSRange(location: 0, length: attributedText.length),
options: []) { value, range, stop in
if let glyph = value as? NSAdaptiveImageGlyph {
let attachment = NSTextAttachment()
attachment.image = UIImage(data: glyph.imageContent)
foundGlyph = attachment
stop.pointee = true
}
}
if let foundGlyph { return foundGlyph }
// Fallback to regular attachment
var foundAttachment: NSTextAttachment?
attributedText.enumerateAttribute(.attachment,
in: NSRange(location: 0, length: attributedText.length),
options: []) { value, range, stop in
if let attachment = value as? NSTextAttachment {
foundAttachment = attachment
stop.pointee = true
}
}
return foundAttachment
}
Then, if we have found such an text attachment, we extract the image:
private func handleMemoji(attachment: NSTextAttachment) {
if let image = attachment.image {
self.pickedImage = image
} else if let image = attachment.image(forBounds: attachment.bounds,
textContainer: nil,
characterIndex: 0) {
self.pickedImage = image
} else if let imageData = attachment.fileWrapper?.regularFileContents,
let image = UIImage(data: imageData) {
self.pickedImage = image
}
#if DEBUG
print("Memoji attachment handled: \(String(describing: self.pickedImage))")
#endif
}
The below shows an example of a SwiftUI compatible view. If you are using UIKit, simple implement the delegate for your UITextView.
// MARK: - StickerPickingTextView
@available(iOS 18.0, *)
struct StickerPickingTextView: UIViewRepresentable {
@Binding var pickedImage: UIImage?
@Binding var pickedEmoji: String
func makeUIView(context: Context) -> AdaptiveEmojiTextView {
let textView = UITextView()
textView.supportsAdaptiveImageGlyph = true
textView.allowsEditingTextAttributes = true
textView.delegate = context.coordinator
return textView
}
func updateUIView(_ uiView: UITextView, context: Context) { return }
func makeCoordinator() -> Coordinator {
Coordinator(pickedImage: $pickedImage, pickedEmoji: $pickedEmoji)
}
class Coordinator: NSObject, UITextViewDelegate {
@Binding var pickedImage: UIImage?
@Binding var pickedEmoji: String
init(pickedImage: Binding<UIImage?>, pickedEmoji: Binding<String>) {
self._pickedImage = pickedImage
self._pickedEmoji = pickedEmoji
}
func textView(_ textView: UITextView,
shouldChangeTextIn range: NSRange,
replacementText text: String) -> Bool {
let newLength = (textView.text?.count ?? 0) + text.count - range.length
return newLength <= 1
}
func textViewDidChange(_ textView: UITextView) {
// Handle Memoji and adaptive image glyphs
if let attachment = findFirstAttachment(in: textView.attributedText) {
handleMemoji(attachment: attachment)
textView.text = ""
return
}
// Handle regular emoji
if let text = textView.text, !text.isEmpty {
handleEmoji(text)
textView.text = ""
}
}
private func findFirstAttachment(in attributedText: NSAttributedString?) -> NSTextAttachment? {
guard let attributedText else { return nil }
// First try to find NSAdaptiveImageGlyph
var foundGlyph: NSTextAttachment?
attributedText.enumerateAttribute(.adaptiveImageGlyph,
in: NSRange(location: 0, length: attributedText.length),
options: []) { value, range, stop in
if let glyph = value as? NSAdaptiveImageGlyph {
let attachment = NSTextAttachment()
attachment.image = UIImage(data: glyph.imageContent)
foundGlyph = attachment
stop.pointee = true
}
}
if let foundGlyph { return foundGlyph }
// Fallback to regular attachment
var foundAttachment: NSTextAttachment?
attributedText.enumerateAttribute(.attachment,
in: NSRange(location: 0, length: attributedText.length),
options: []) { value, range, stop in
if let attachment = value as? NSTextAttachment {
foundAttachment = attachment
stop.pointee = true
}
}
return foundAttachment
}
private func handleMemoji(attachment: NSTextAttachment) {
if let image = attachment.image {
self.pickedImage = image
} else if let image = attachment.image(forBounds: attachment.bounds,
textContainer: nil,
characterIndex: 0) {
self.pickedImage = image
} else if let imageData = attachment.fileWrapper?.regularFileContents,
let image = UIImage(data: imageData) {
self.pickedImage = image
}
#if DEBUG
print("Memoji attachment handled: \(String(describing: self.pickedImage))")
#endif
}
private func handleEmoji(_ text: String) {
self.pickedEmoji = text
UIApplication.shared.sendAction(#selector(UIResponder.resignFirstResponder),
to: nil,
from: nil,
for: nil)
}
}
}
“MIXIが提供する「繋がった人、繋がりたい人との関係性を深められる」ことを目指した新しいSNSです。”
招待コード:
一緒にはじめよう!🚀
https://mixi.social/invitations/@mszpro/YbHJh9E4wF8kKaY8hARm6w
mszproからの #mixi2 招待🎟️
一緒にはじめよう!🚀
https://mixi.social/invitations/@mszpro/YbHJh9E4wF8kKaY8hARm6w
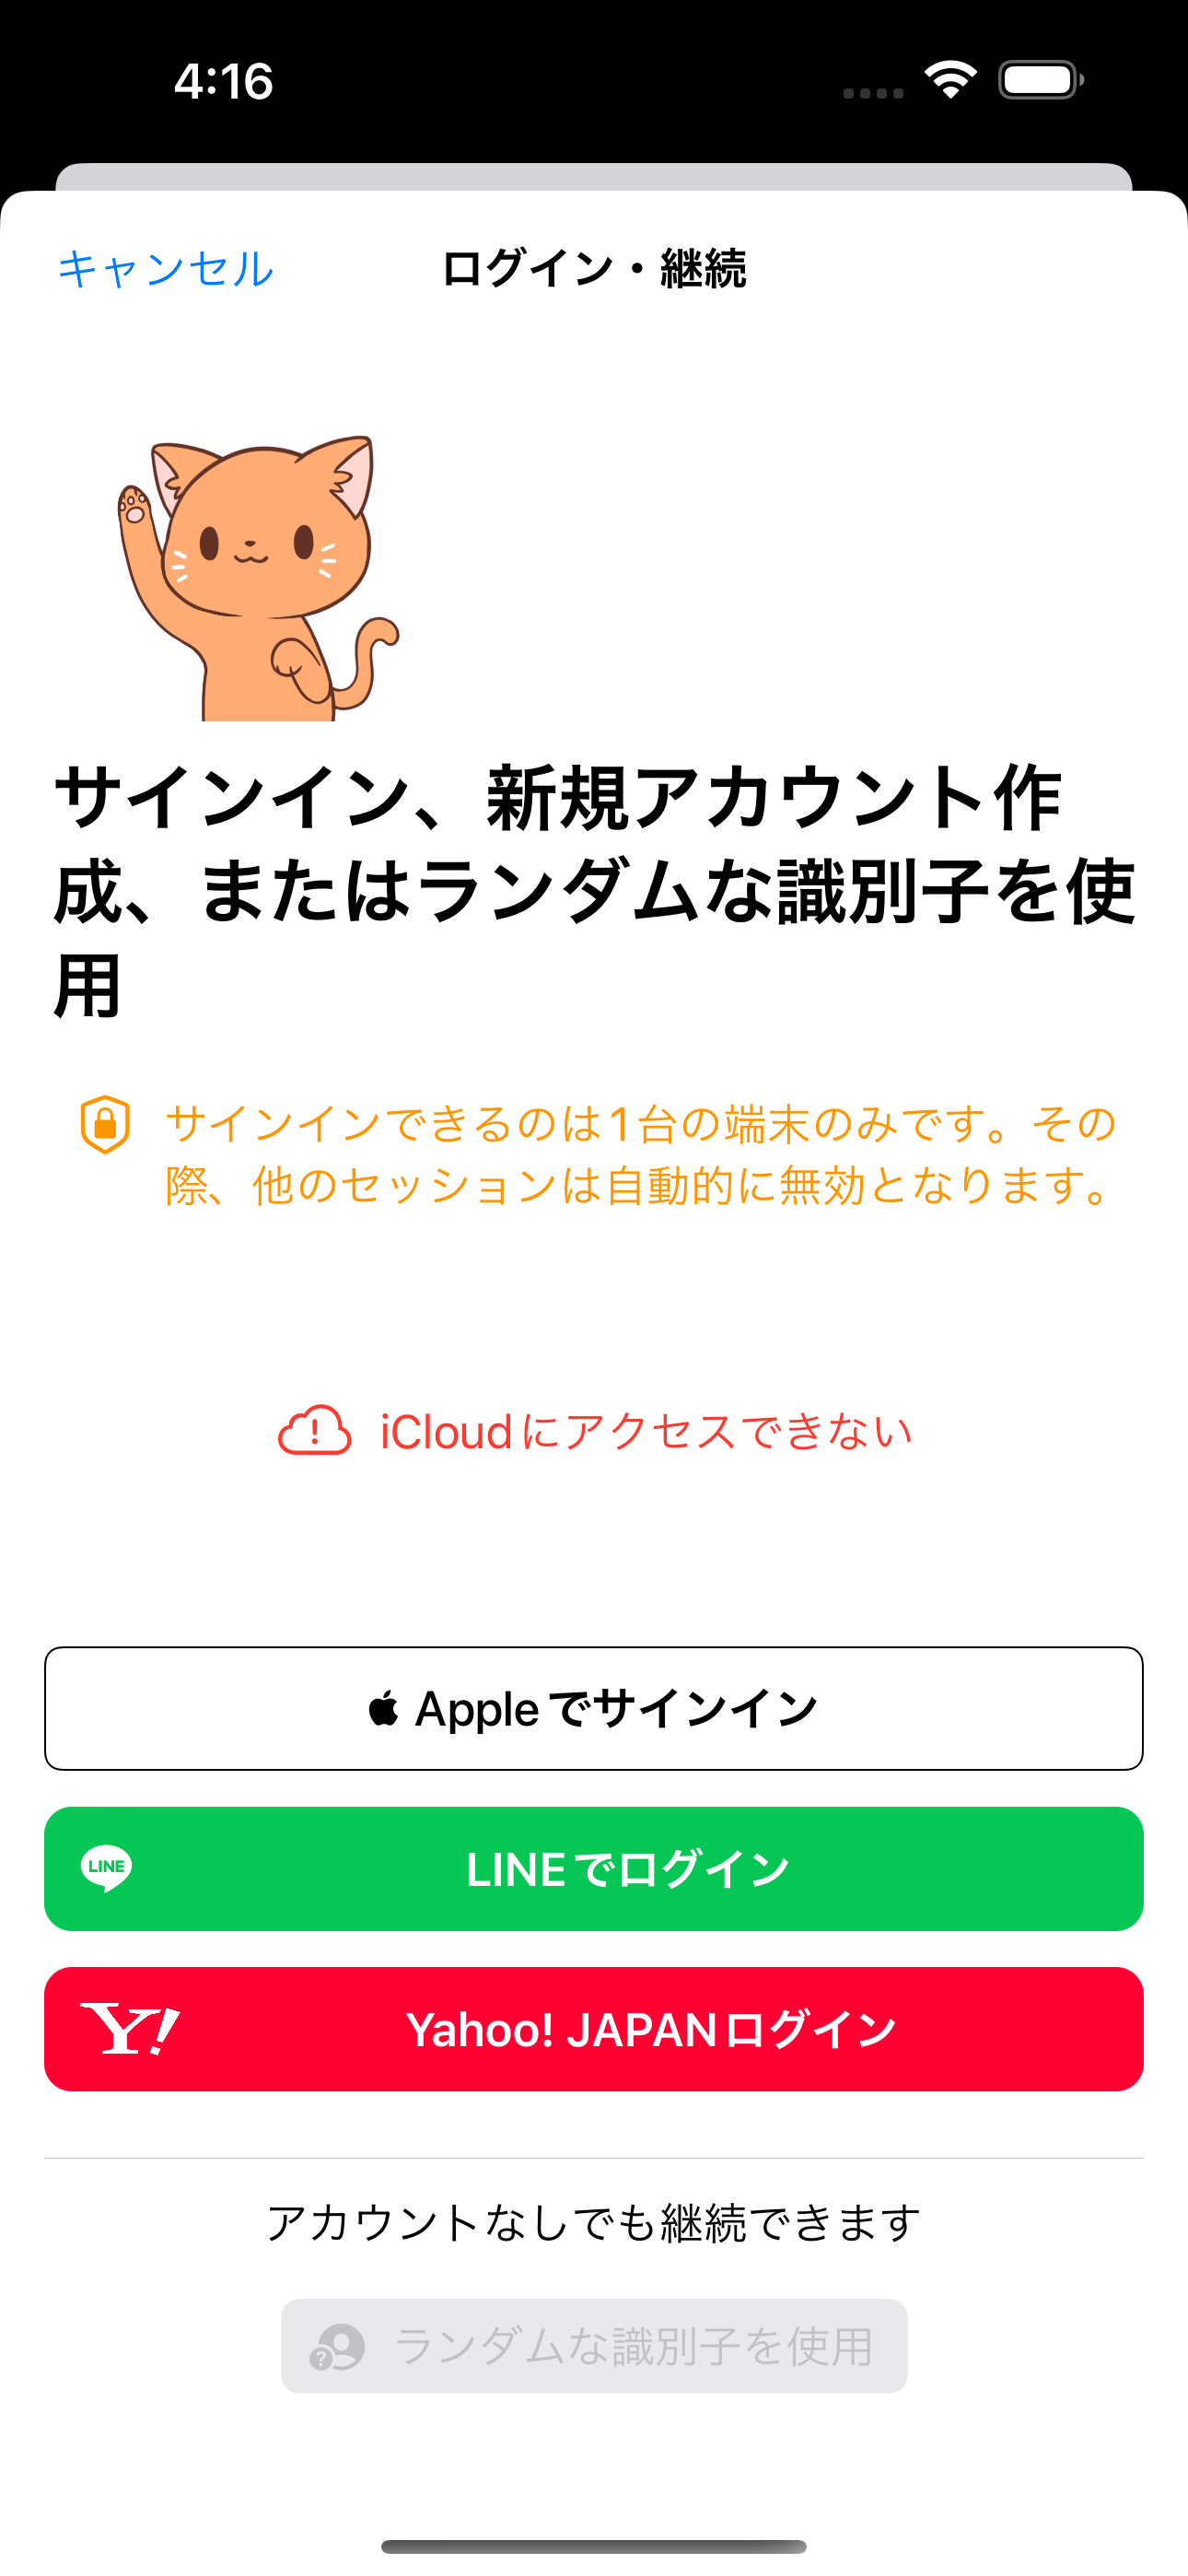
この記事では、SwiftUIアプリでLineログインを統合し、ログイン成功時にユーザーのプロファイル情報を取得することについて説明します。
SwiftUIアプリはApp
構造体のみを持ち、AppDelegate
ファイルや SceneDelegate
ファイルは持っていません。
import SwiftUI
@main
struct TestApp: App {
var body: some Scene {
WindowGroup {
ContentView()
}
}
}
認証に成功した後、
LineはアプリのカスタムURLスキーマを呼び出し、
認証トークンの情報を提供します。
SwiftUIアプリでは、onOpenURL
モディファイアがあり、
ユーザーがLineで認証した後のログイン結果を処理するために使用することができます。
まず、LINEのデベロッパーサイトにアクセスし、アプリケーションを登録します。
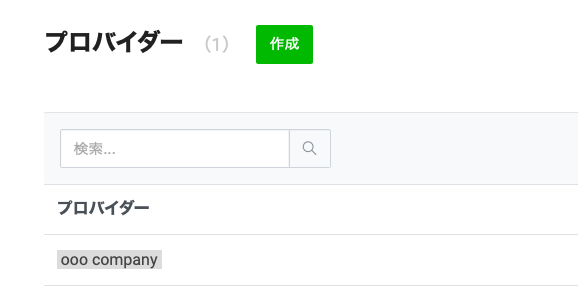
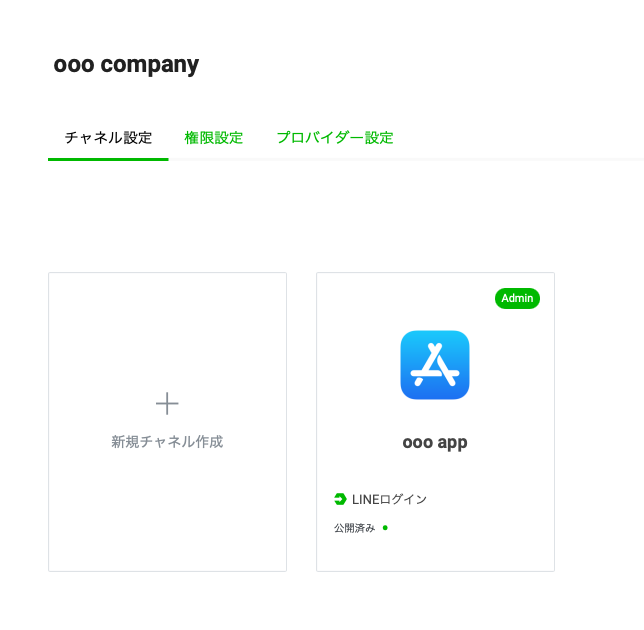
まず、プロバイダを作成します。
これは会社名でも自分の名前でもかまいません。
プロバイダーは複数のチャンネル(アプリケーション)を含むことができます。
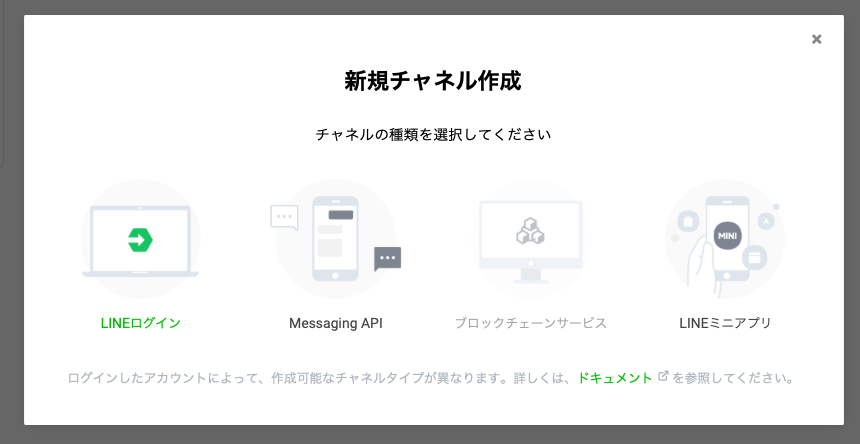
次に、作成したプロバイダーをクリックし、アプリケーション(チャネル)を作成します。
種類は、”LINEログイン”を選択します。
新しいチャンネルのフォームで、
情報を入力します。
“アプリの種類”で、”ネイティブアプリ “をトグルします。
リストに自分のチャンネルが表示されるので、クリックして開きます。
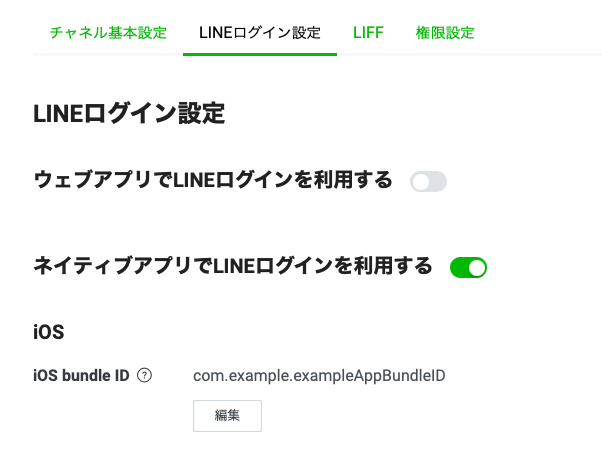
「LINEログイン設定」にて、iOSアプリケーションのバンドルIDを入力します。
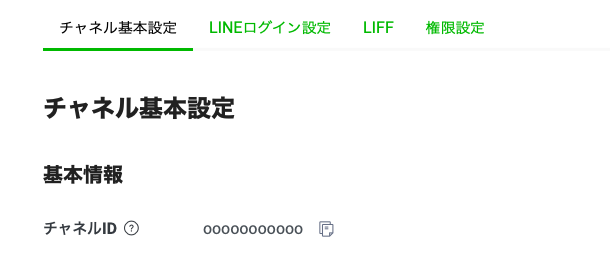
ここで、「チャンネル基本設定」タブにある チャンネルID
を覚えておきましょう
また、チャンネルを公開とマークすることを確認してください。
LineSDK
はSwift Packageを使用しても配布されています。
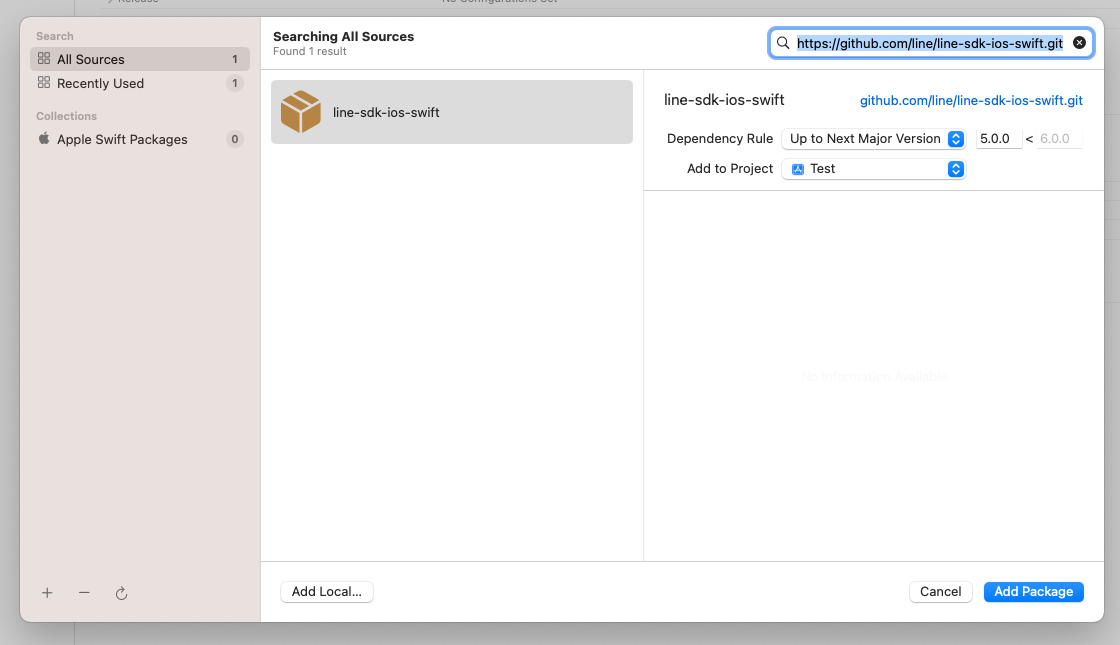
プロジェクトに追加するには、Xcodeの「File」メニューをタップし、「Add Packages」をクリックしてください。以下のURLを入力します:
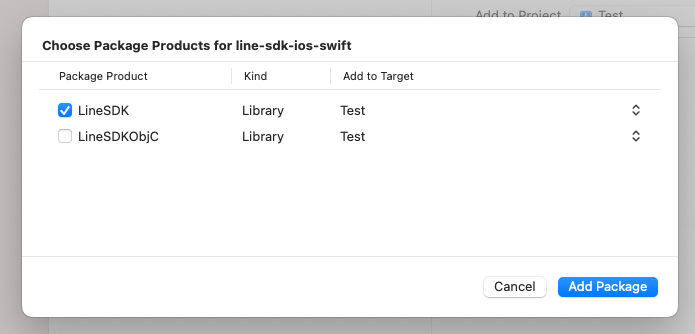
そして、「LineSDK」にチェックを入れ、メインとなるiOSターゲットを選択し、フレームワークを追加します。
ユーザーがLINEで認証されると、LINEはURLスキーマを使ってあなたのアプリを呼び出します。そのURLスキーマを定義する必要があります。
プロジェクトファイルを開き、iOSアプリのターゲットを選択し、Info
タブで、以下のURLスキーマを追加します。
line3rdp.$(PRODUCT_BUNDLE_IDENTIFIER)
:
SwiftUIアプリのファイル(@main`があるファイル)内で、
SDKをインポートし、
アプリ起動時にLine SDKを初期化するためのAppDelegateアダプタを追加します。
import SwiftUI
+import LineSDK
@main
struct LearnEnglishGPTApp: App {
+ @UIApplicationDelegateAdaptor(AppDelegate.self) var appDelegate
var body: some Scene {
WindowGroup {
ContentView()
}
}
}
+class AppDelegate: UIResponder, UIApplicationDelegate, UIWindowSceneDelegate {
+ func application(_ application: UIApplication, didFinishLaunchingWithOptions launchOptions: [UIApplication.LaunchOptionsKey : Any]? = nil) -> Bool {
+ LineSDK.LoginManager.shared.setup(channelID: "ooooooooo", universalLinkURL: nil)
+ return true
+ }
+}
channelID
には、チャンネルページのチャンネルIDです。
SwiftUIアプリの場合、
認証結果を処理するためにonOpenURL
を使用する必要があります。
SwiftUIアプリのファイルに、
ログインを処理するコードを追加します:
import SwiftUI
import LineSDK
@main
struct LearnEnglishGPTApp: App {
@UIApplicationDelegateAdaptor(AppDelegate.self) var appDelegate
var body: some Scene {
WindowGroup {
ContentView()
+ .onOpenURL { openedURL in
+ if openedURL.absoluteString.contains("line3rdp") {
+ _ = LineSDK.LoginManager.shared.application(UIApplication.shared, open: openedURL)
+ }
}
}
}
}
class AppDelegate: UIResponder, UIApplicationDelegate, UIWindowSceneDelegate {
func application(_ application: UIApplication, didFinishLaunchingWithOptions launchOptions: [UIApplication.LaunchOptionsKey : Any]? = nil) -> Bool {
LineSDK.LoginManager.shared.setup(channelID: "ooooooooo", universalLinkURL: nil)
return true
}
}
ログインの状態を監視するために、observed
オブジェクトを使用することにします。
ここでの値は、ログインボタンを表示するビューに伝え返されます。
また、より多くの情報を含むカスタム構造体を使用することもできます。
class LineLoginStatus: NSObject, ObservableObject {
@Published var isLoggingIn: Bool = false
@Published var signInSuccessful_userID: String?
@Published var errorMessage: String?
}
まず、SwiftUIでUIKit Lineログインボタンを表示するための互換ビューを作成する必要があります:
import SwiftUI
import LineSDK
struct LineLoginButtonCompatibleView: UIViewRepresentable {
@ObservedObject var stateManager: LineLoginStatus
func makeUIView(context: Context) -> UIView {
let containerView = UIView()
let loginButton = LoginButton()
loginButton.delegate = context.coordinator
loginButton.permissions = [.profile, .openID]
containerView.addSubview(loginButton)
// auto layout
loginButton.translatesAutoresizingMaskIntoConstraints = false
let centerX = loginButton.centerXAnchor.constraint(equalTo: containerView.centerXAnchor)
let centerY = loginButton.centerYAnchor.constraint(equalTo: containerView.centerYAnchor)
NSLayoutConstraint.activate([centerX, centerY])
return containerView
}
func updateUIView(_ view: UIView, context: Context) { }
func makeCoordinator() -> Coordinator {
Coordinator(self)
}
class Coordinator: NSObject, LoginButtonDelegate {
var parent: LineLoginButtonCompatibleView
init(_ parentView: LineLoginButtonCompatibleView) {
self.parent = parentView
}
func loginButton(_ button: LoginButton, didSucceedLogin loginResult: LoginResult) {
print("Line login success! \(loginResult.userProfile?.userID) \(loginResult.userProfile?.displayName) \(loginResult.accessToken.value)")
parent.stateManager.signInSuccessful_userID = loginResult.userProfile?.userID
parent.stateManager.isLoggingIn = false
}
func loginButton(_ button: LoginButton, didFailLogin error: LineSDKError) {
print("Line Login Error \(error.localizedDescription)")
parent.stateManager.isLoggingIn = false
parent.stateManager.errorMessage = error.localizedDescription
}
func loginButtonDidStartLogin(_ button: LoginButton) {
print("Line login started")
parent.stateManager.isLoggingIn = true
}
}
}
ログインボタンを表示するビューにログインの状態を報告するために、LineLoginStatus
を使用しています。
その中で、@Published
変数を使用し、
これらの変数値の変更によってビューを更新します
(そして.onChangeビューモディファイアを呼び出します)。
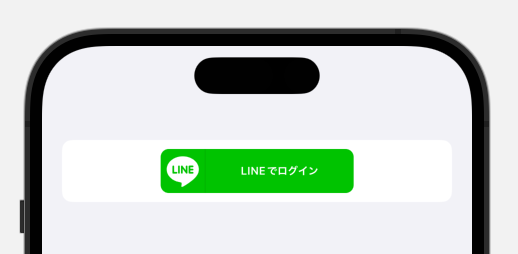
##SwiftUIビューにLINEのログインボタンを追加する
さて、SwiftUIのビューにボタンを追加することができます:
struct SignInSheet: View {
@ObservedObject var lineLoginStatus: LineLoginStatus = .init()
@State private var loggedInUserID: String?
@State private var errorMessage: String?
@State private var isProcessingLogin: Bool = false
var body: some View {
Form {
Section("Button") {
LineLoginButton(stateManager: self.lineLoginStatus)
.onChange(of: self.lineLoginStatus.signInSuccessful_userID) { newValue in
if let newValue {
DispatchQueue.main.async {
self.loggedInUserID = newValue
}
}
}
.onChange(of: self.lineLoginStatus.errorMessage) { newValue in
if let newValue {
DispatchQueue.main.async {
self.errorMessage = newValue
}
}
}
.onChange(of: self.lineLoginStatus.isLoggingIn) { newValue in
DispatchQueue.main.async {
self.isProcessingLogin = newValue
}
}
.frame(height: 45)
.padding(.top, 5)
}
Section("Result") {
if isProcessingLogin {
ProgressView()
}
if let loggedInUserID {
Label(loggedInUserID, systemImage: "checkmark.circle")
}
if let errorMessage {
Label(errorMessage, systemImage: "xmark")
}
}
}
}
}
onChange`ビューモディファイアを使って、ユーザーIDの変更(サインイン成功時)とエラーメッセージ(エラー時)を監視しています。
これで、このアプリを実行し、ユーザーがログインに成功したときにユーザーIDを確認することができます。
お読みいただきありがとうございました。
☺️ サイト https://MszPro.com
Written by MszPro~
この記事では、カメラからのビデオストリームを表示し、
QRコード(または他のタイプのコード)を検出し、
その周りに矩形を表示することによってコードを強調するビューを作成することについて話します。
また、SwiftUI互換のビューを作成し、SwiftUIのビュー内で使用できるようにします。
まず、スキャンした結果とカメラプレビューレイヤーを保存するために、以下の変数を追加します。
viewSize
はカメラプレビューレイヤーのサイズを表します。
ビデオプレビューレイヤーを初期化し、サイズを設定します。
qrCodeFrameView
は、検出されたQRコードに重ねて表示される (オーバーレイ) ビューです。
現在はフレームを持ちません。
しかし、QRコードを検出したときに、そのビューの位置とサイズを設定することになります。
ビデオキャプチャーのためのデフォルトのカメラデバイスを取得します。
そして、ビデオキャプチャセッションにカメラ入力を追加します。
** do
と catch
ブロックの使い分けを忘れないように。
バーコードや物体検出にもVisionフレームワークを利用することができます。
https://qiita.com/MaShunzhe/items/d2f82bd920eeb2e82167
しかし、この機能はすでにAVFoundationフレームワークの中で提供されているので、代わりにAVCaptureMetadataOutput
を使用することにします。
AVCaptureMetadataOutput
を使用すると、検出されたメタデータオブジェクトは setMetadataObjectsDelegate
関数で定義されたデリゲートに報告されます。
metadataObjectTypes
は、QRコードを探すためのコードを定義していますが、
バーコードや他の多くの種類を検出するように設定することも可能です。
ビデオのプレビューをレイヤーとしてビューに追加します(ユーザーは何がスキャンされているのか見ることができます)。
その後、ビデオセッションの実行を開始します。
また、qrCodeFrameView
をビューに追加します。
また、他のビューの上にオーバーレイビューを表示 (bringSubviewToFront
) しています
この時点では、サイズを持たないので、qrCodeFrameView
が画面には表示されません。
QRコードのメタデータが検出されたら、qrCodeFrameView
のフレームを検出されたバーコードオブジェクトのバウンドに設定し、
ビューの境界の色を緑に設定することができます。
コードが検出されない場合は、
フレームを0に設定してビューを非表示にすることができます。
** ここで、デバイスの向きの変更も検知し、それを利用してプレビューの向きを変更する必要の場合があります。
SwiftUIでUIKitの UIView
を互換性のあるものにするために、
UIViewRepresentableを使用することにします。
初期化するために func makeUIView(context: Context) -> UIView
関数が必要です。
デリゲート関数は Coordinator
クラス内に配置されることになる。 class Coordinator: NSObject, AVCaptureMetadataOutputObjectsDelegate
そして、func makeCoordinator() -> QRCodeScanner.Coordinator
関数内で Coordinator
を初期化します。
また、変数の更新に基xづいてUIKitビューを更新する関数 func updateUIView(_ view: UIView, context: Context)
を用意する必要があります。
ここでは、スキャンしたQRコードの値を更新しているので、その関数内では何もする必要がありません。
完成したSwiftUI互換のビューはこちらです。
このコードをSwiftUIで使用するために
また、Info.plistファイル内にカメラの使用の説明テキストを追加することを忘れないでください。
お読みいただきありがとうございました。
☺️ サイト https://MszPro.com
Are you using a third party database to keep user’s information? If you are only developing for the iOS platform, you can consider to use iCloud CloudKit with Sign in with Apple.
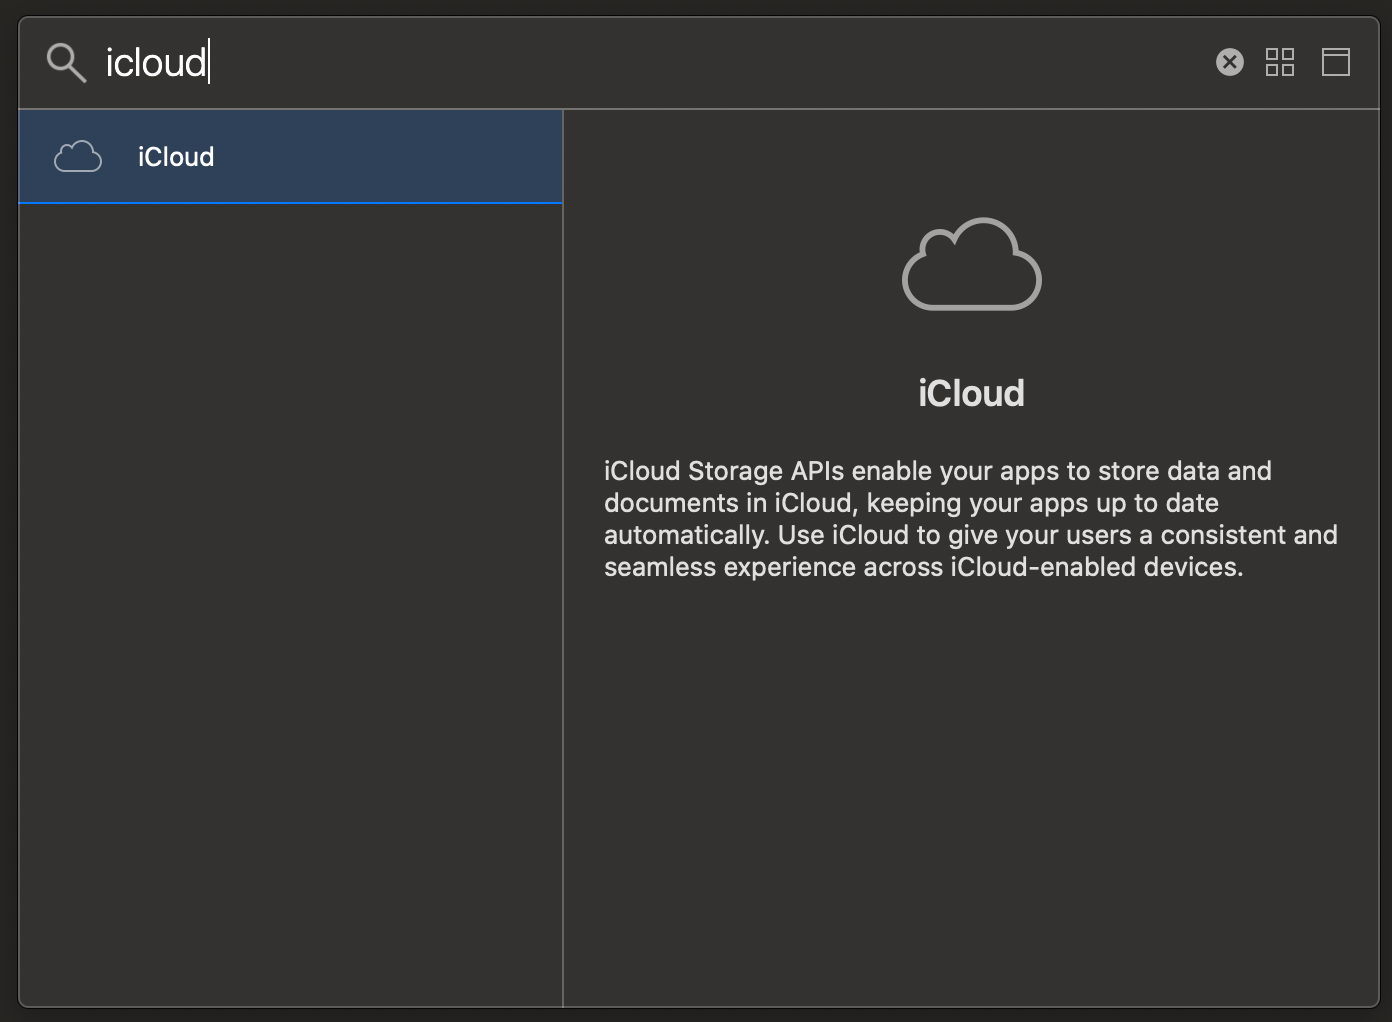
Step 1. Turn on the required capabilities in Xcode project settings. Turn on “CloudKit” in “iCloud”
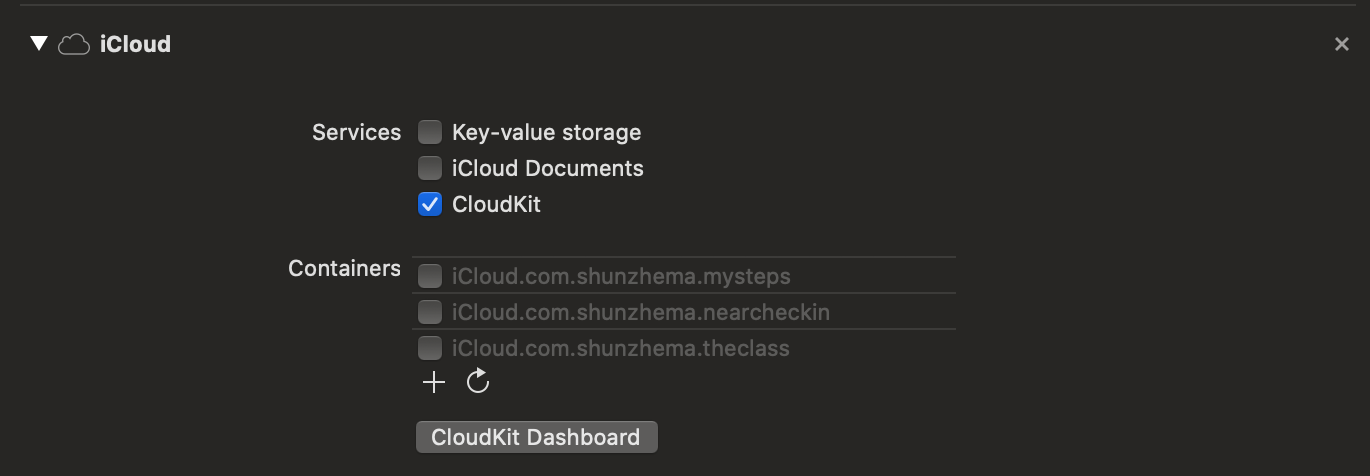
Now turn on “CloudKit”
Click to toggle one of the existing “Containers” or click the plus icon to add a new one.
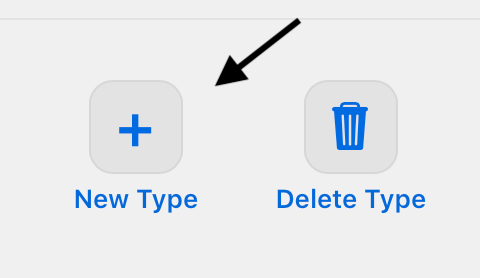
Step 2. Set up the CloudKit data structure for storing the user information
Name the type “UserInfo” (same as the type you write in your code), select the type you just created.
Click on “Add field button” on the right and add the following new fields:
“emailAddress” and “name” are both “String”
Step 3. Add the capability “Sign in with Apple”
Now your “Capabilities” tab should contain at least these two:
If you are lazy, the below codes can also be obtained here: https://github.com/mszopensource/CloudKitAppleSignInExample/blob/master/loginViewController.swift
Step 4. Create a new login view controller (skip if you already did that)
import Foundation
import UIKit
class loginViewController: UIViewController {
override func viewDidLoad() {
super.viewDidLoad()
}
}
Import the necessary frameworks
import AuthenticationServices
import CloudKit
Add a reference to the “Sign in with Apple button”
@IBOutlet weak var signInBtnView: UIView!
var authorizationButton: ASAuthorizationAppleIDButton!
At here, I am adding thhe sign in button to an existing view called `signInBtnView`. `signInBtnView` has been added using UIStoryBoard here.
Add that button to your view
override func viewDidLoad() {
super.viewDidLoad()
authorizationButton = ASAuthorizationAppleIDButton(type: .default, style: .whiteOutline)
authorizationButton.frame = CGRect(origin: .zero, size: signInBtnView.frame.size)
authorizationButton.addTarget(self, action: #selector(handleAppleIdRequest), for: .touchUpInside)
signInBtnView.addSubview(authorizationButton)
}
Handle button click action
@objc func handleAppleIdRequest(){
let appleIDProvider = ASAuthorizationAppleIDProvider()
let request = appleIDProvider.createRequest()
request.requestedScopes = [.fullName, .email]
let authorizationController = ASAuthorizationController(authorizationRequests: [request])
authorizationController.delegate = self
authorizationController.performRequests()
}
Set up the delegate to receive the result / error
extension loginViewController: ASAuthorizationControllerDelegate {
func authorizationController(controller: ASAuthorizationController, didCompleteWithAuthorization authorization: ASAuthorization) {
//Success
}
func authorizationController(controller: ASAuthorizationController, didCompleteWithError error: Error) {
//Failed
print(error.localizedDescription)
}
Now you should have Sign in with Apple up and running. Test it now in your simulator!
However, we still need to: 1. Obtain user information from the sign-in; 2. Keep or fetch from iCloud
Fetch information from the sign-in
func authorizationController(controller: ASAuthorizationController, didCompleteWithAuthorization authorization: ASAuthorization) {
if let appleIDCredential = authorization.credential as? ASAuthorizationAppleIDCredential {
let userID = appleIDCredential.user
let name = appleIDCredential.fullName?.givenName
let emailAddr = appleIDCredential.email
}
}
Now here’s an important information:
Check if user is signing up (new user) or signing in
func authorizationController(controller: ASAuthorizationController, didCompleteWithAuthorization authorization: ASAuthorization) {
if let appleIDCredential = authorization.credential as? ASAuthorizationAppleIDCredential {
let userID = appleIDCredential.user
if let name = appleIDCredential.fullName?.givenName,
let emailAddr = appleIDCredential.email {
//New user (Signing up).
//Save this information to CloudKit
} else {
//Returning user (signing in)
//Fetch the user name/ email address
//from private CloudKit
}
}
}
If there is a name and email provided (in other words, user is signing up), we can create a new CloudKit record:
Note that we assign the ‘recordID’ to be the same as ‘userID’ we obtained from “Sign in with Apple” so that we can fetch user’s CloudKit record later.
//New user (Signing up).
//Save this information to CloudKit
let record = CKRecord(recordType: "UserInfo", recordID: CKRecord.ID(recordName: userID))
record["name"] = name
record["emailAddress"] = emailAddr
privateDatabase.save(record) { (_, _) in
UserDefaults.standard.set(record.recordID.recordName, forKey: "userProfileID")
If returning user, we will fetch the name and email:
//Returning user (signing in)
//Fetch the user name/ email address
//from private CloudKit
privateDatabase.fetch(withRecordID: CKRecord.ID(recordName: userID)) { (record, error) in
if let fetchedInfo = record {
let name = fetchedInfo["name"] as? String
let userEmailAddr = fetchedInfo["emailAddress"] as? String
//You can now use the user name and email address (like save it to local)
UserDefaults.standard.set(name, forKey: "userName")
UserDefaults.standard.set(userID, forKey: "userProfileID")
}
Completed code:
mszopensource/CloudKitAppleSignInExample
Also note that you’ll need to deploy the iCloud CloudKit database to production be you publish your app.
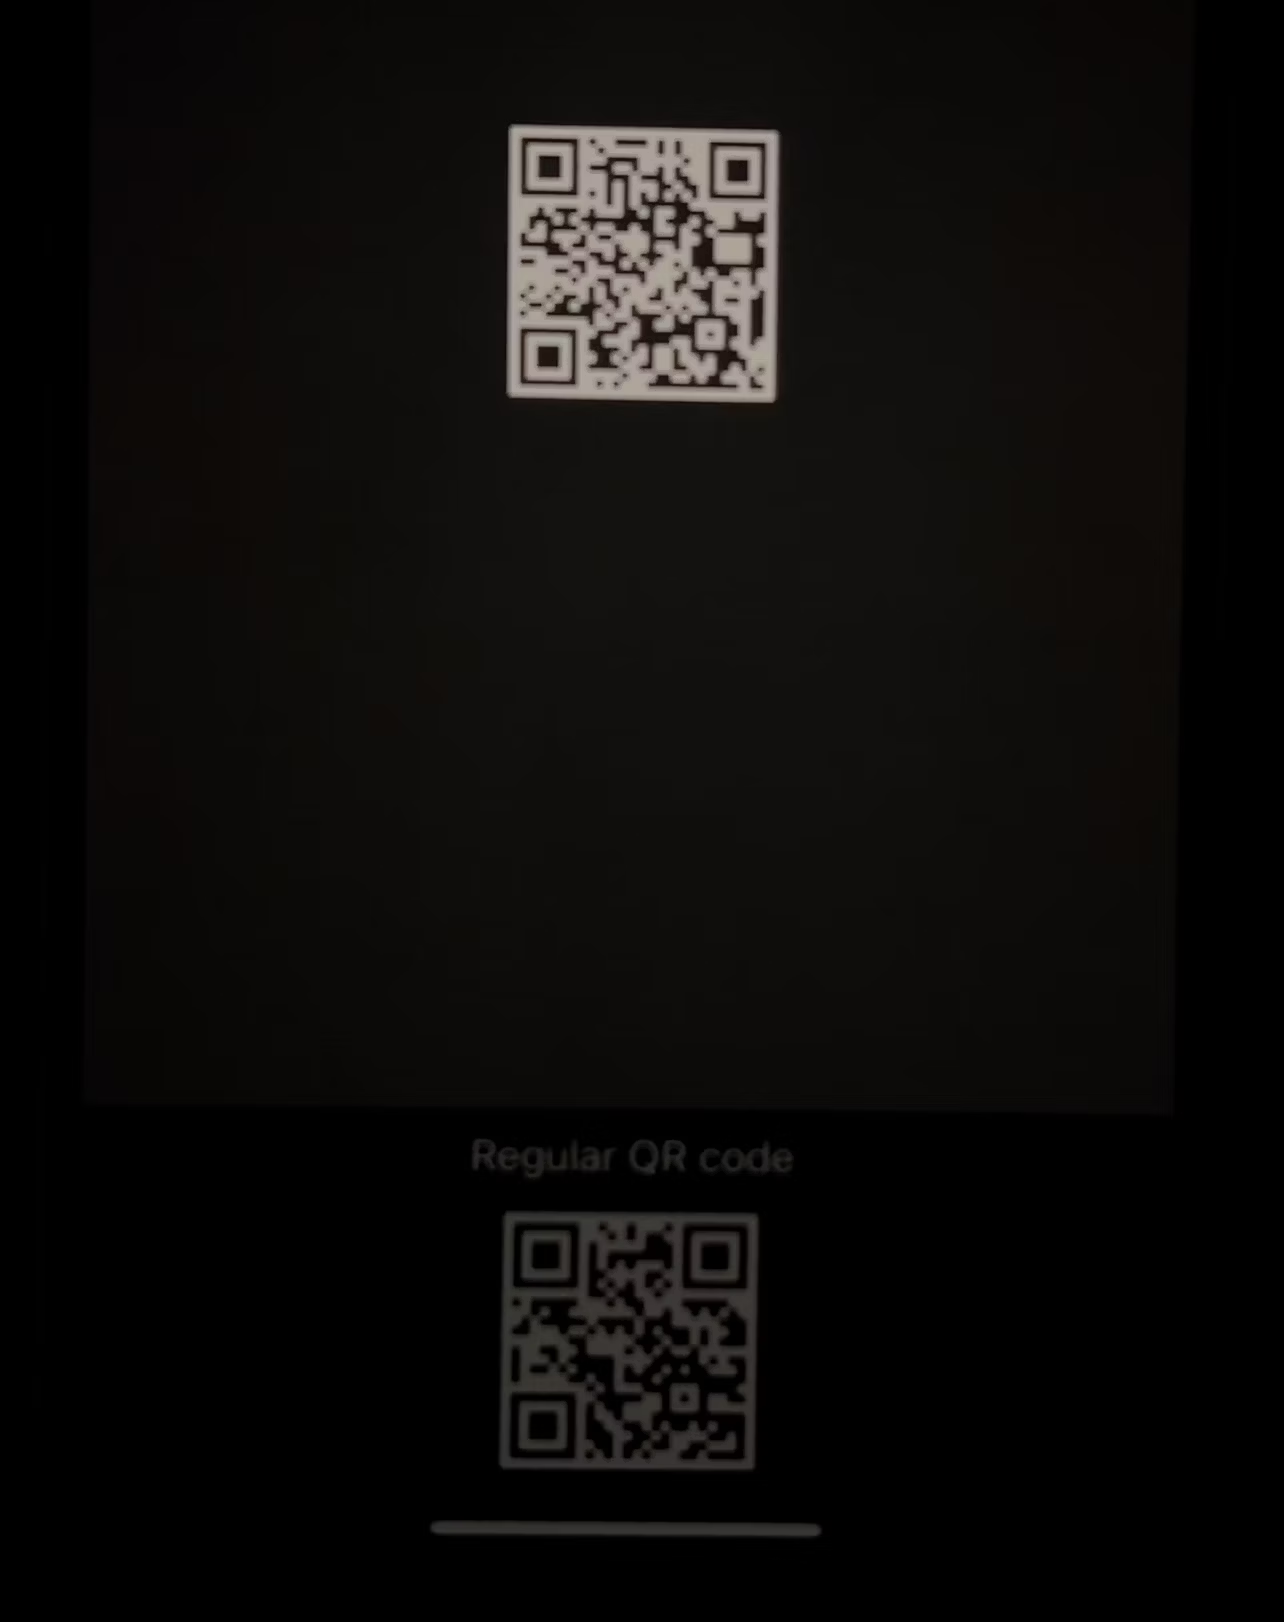
WWDC 2022で発表されたMetalの新機能では、EDRを使って画面画像の一部分だけを明るく(現在設定されている画面の明るさ以上)することができます。
部屋の明かりを消して最小限の明るさの画面
QRコード決済画面を表示する場合、通常、画面全体の輝度が高くなり(夜間に開くと気分が悪くなることがある。。。)
また、アプリ側で輝度の設定と復元を手動で行う必要があります。
Metalフレームワークの新しいダイナミックEDR(Extended Dynamic Range)レンダリングサポートを使用すると、
この記事では、この新機能をUIKitとSwiftUIの両方で使用することについて説明します。
EDRはHDRと似ています。画像に保存されている輝度値を利用して、特定の画素を他の画素よりも明るくするものです。iPhoneの場合、輝度値が1より大きいと、現在設定されている画面の明るさよりも明るく表示されます。
QRコードの CIImage
は、明るさの値を画面がサポートする最大値に設定して作成することができます。
そして、この画像をMetalフレームワークを使ってレンダリングし、iPhoneの画面のEDR機能を利用できるようにします。
まずは試してみたいという方は、以下のソースコードをiPhoneで実行してみてください。
効果をよりよく確認するために iPhoneの画面の明るさを最低にし、アプリを実行してください。
シミュレータでは、EDRはサポートされていません。
https://github.com/mszpro/QR-Code-EDR?ref=mszpro.com
上記のように、EDRは画像上の特定のピクセルを、現在設定されている画面の明るさよりも明るく表示することができます。
デバイスがそれをサポートしているかどうかは、UIScreen.main.currentEDRHeadroom
または view.window?.screen.currentEDRHeadroom
を使用してテストする必要があります。値が>1である場合、その端末はEDRをサポートしています。
まず、CIFilter
の一種である CIQRCodeGenerator
を用いてQRを作成する。
inputMessage
でQRコードの文字列内容を指定します。
// ここでのコードは、ステップ6で使用されます
guard let qrFilter = CIFilter(name: "CIQRCodeGenerator") else {
return nil
}
let qrCodeContent = "testing-highlighted-qr"
let inputData = qrCodeContent.data(using: .utf8)
qrFilter.setValue(inputData, forKey: "inputMessage")
qrFilter.setValue("H", forKey: "inputCorrectionLevel")
guard let image = qrFilter.outputImage else {
return nil
}
let sizeTransform = CGAffineTransform(scaleX: 10, y: 10)
let qrImage = image.transformed(by: sizeTransform)
iPhoneは、それぞれ最大輝度の値が異なります。
また、環境やバッテリー残量によって変化することもあります。
ヘッドルーム headroom
と呼ばれる、iPhoneの最大輝度値を取得する
// ここでのコードは、ステップ6で使用されます
let screen = view.window?.screen
var headroom = CGFloat(1.0)
if #available(iOS 16.0, *) {
headroom = screen?.currentEDRHeadroom ?? 1.0
}
コンテンツが明るすぎるのが嫌な場合は、min
で現在のヘッドルームと固定値(8など)の間の最小値を取得することができます。
ここで、上記で算出した明るさの最大値で塗りつぶしレイヤーを生成します。
ここでの色は通常の色とは異なり、明るさを表すもので、1.0より大きくすることができますので、ご注意ください。
// ここでのコードは、ステップ6で使用されます
let maxRGB = headroom
guard let EDR_colorSpace = CGColorSpace(name: CGColorSpace.extendedLinearSRGB),
let maxFillColor = CIColor(red: maxRGB, green: maxRGB, blue: maxRGB,
colorSpace: EDR_colorSpace) else {
return nil
}
let fillImage = CIImage(color: maxFillColor)
ここで、生成されたQRコードに明るさの値を与えて、最終的な画像を生成します。
これを行うには、QR画像 qrImage
をマスクとして使用し、塗りつぶしレイヤー fillImage
(最大輝度のレイヤー)を切り取ります。
// ここでのコードは、ステップ6で使用されます
let maskFilter = CIFilter.blendWithMask()
maskFilter.maskImage = qrImage
maskFilter.inputImage = fillImage
guard let combinedImage = maskFilter.outputImage else {
return nil
}
return combinedImage.cropped(to: CGRect(x: 0, y: 0,
width: 300 * scaleFactor,
height: 300 * scaleFactor))
さて、CIImage
をレンダリングするレンダラーを作る必要があります。
そして、レンダラーの設定で、EDRを使用するように指示します。
まず、MTKViewDelegate
型に準拠した Renderer
クラスを作成する。
この Renderer
クラスは、Metalビュー MTKView
のデリゲートになります
また、Metal で画像をレンダリングし、CIImage
で作業するための適切なフレームワークをインポートする必要があります。
import Metal
import MetalKit
import CoreImage
class Renderer: NSObject, MTKViewDelegate, ObservableObject {
let imageProvider: (_ contentScaleFactor: CGFloat, _ headroom: CGFloat) -> CIImage? // 画像データを提供する呼び出し側デリゲート関数
public let device: MTLDevice? = MTLCreateSystemDefaultDevice()
let commandQueue: MTLCommandQueue?
let renderContext: CIContext? // 名前、キャッシュ環境設定、低電力設定の設定
let renderQueue = DispatchSemaphore(value: 3) // 新しいフレームを描画する前に、前のレンダリングが完了するのを待つために使用される
init(imageProvider: @escaping (_ contentScaleFactor: CGFloat, _ headroom: CGFloat) -> CIImage?) {
self.imageProvider = imageProvider
self.commandQueue = self.device?.makeCommandQueue()
if let commandQueue {
self.renderContext = CIContext(mtlCommandQueue: commandQueue,
options: [.name: "QR-Code-Renderer",
.cacheIntermediates: true,
.allowLowPower: true])
} else {
self.renderContext = nil
}
super.init()
}
func draw(in view: MTKView) {
// ToDo
}
func mtkView(_ view: MTKView, drawableSizeWillChange size: CGSize) {
// 描画可能なサイズや向きの変更に対応する。
}
}
renderContext
変数には、ログでのデバッグを容易にするため、レンダラーの名前を設定します。renderQueue
変数には、最大値 3 の DispatchSemaphore
を設定します。
DispatchSemaphore
の使用これは、プログラムが次のレンダリングを開始する前に、前のレンダリングが完了するのを待つためのツールです。
前のコマンドが終了するのを待つには、次のようにします。
_ = renderQueue.wait(timeout: DispatchTime.distantFuture)
は、前のタスクが終了するまで、プログラムは次のコードの行の実行を停止します。
前のコマンドが終了したことをシステムに知らせるには、self.renderQueue.signal()
を実行します。
draw
関数を完成させる次に、コンテンツを描画する func draw(in view: MTKView)
関数に取り組みます。
class Renderer: NSObject, MTKViewDelegate, ObservableObject {
// ... 上記のコードは、変数とinit関数です。 //
func draw(in view: MTKView) {
guard let commandQueue else { return }
// wait for previous render to complete
_ = renderQueue.wait(timeout: DispatchTime.distantFuture)
if let commandBuffer = commandQueue.makeCommandBuffer() {
// コマンドが完了したら、次のフレームをレンダリングできるようにキューに通知する。
commandBuffer.addCompletedHandler { (_ commandBuffer)-> Swift.Void in
self.renderQueue.signal()
}
if let drawable = view.currentDrawable {
let drawSize = view.drawableSize
let contentScaleFactor = view.contentScaleFactor
let destination = CIRenderDestination(width: Int(drawSize.width),
height: Int(drawSize.height),
pixelFormat: view.colorPixelFormat,
commandBuffer: commandBuffer,
mtlTextureProvider: { () -> MTLTexture in
return drawable.texture
})
// サポートされる最大EDR値(ヘッドルーム)を計算する
var headroom = CGFloat(1.0)
if #available(iOS 16.0, *) {
headroom = view.window?.screen.currentEDRHeadroom ?? 1.0
}
// デリゲート関数から表示するCI画像を取得します。
guard var image = self.imageProvider(contentScaleFactor, headroom) else {
return
}
// ビューの可視領域で画像を中央に配置します。
let iRect = image.extent
let backBounds = CGRect(x: 0,
y: 0,
width: drawSize.width,
height: drawSize.height)
let shiftX = round((backBounds.size.width + iRect.origin.x - iRect.size.width) * 0.5)
let shiftY = round((backBounds.size.height + iRect.origin.y - iRect.size.height) * 0.5)
image = image.transformed(by: CGAffineTransform(translationX: shiftX, y: shiftY))
// 画像が透明の場合、背景を指定する
image = image.composited(over: .gray)
// テクスチャーデスティネーションにレンダリングするタスクを開始します。
guard let renderContext else { return }
_ = try? renderContext.startTask(toRender: image, from: backBounds,
to: destination, at: CGPoint.zero)
// レンダリング結果を表示し、レンダリングタスクをコミットする
commandBuffer.present(drawable)
commandBuffer.commit()
}
}
}
func mtkView(_ view: MTKView, drawableSizeWillChange size: CGSize) {
// 描画可能なサイズや向きの変更に対応する。
}
}
上記のコードでは、
まず renderQueue.wait
関数を使用して、前のレンダリングが完了するのを待ちます。
次に、コマンドバッファを取得し、描画のサイズを指定します。
HDRで提供できる最大の明るさ(ヘッドルーム)を計算します。
そして、CI画像オブジェクトをメタルビュー内でレンダリングし、レンダリング画像を中央に配置する。
さて、QRコードと輝度値を含む生成したCIImage(手順1~手順4のコード)と、Rendererクラス(手順5)を元に、レンダラーを初期化します。
let renderer = Renderer(imageProvider: { (scaleFactor: CGFloat, headroom: CGFloat) -> CIImage? in
// QRコード画像を生成する
guard let qrFilter = CIFilter(name: "CIQRCodeGenerator") else {
return nil
}
let qrCodeContent = "testing-highlighted-qr"
let inputData = qrCodeContent.data(using: .utf8)
qrFilter.setValue(inputData, forKey: "inputMessage")
qrFilter.setValue("H", forKey: "inputCorrectionLevel")
guard let image = qrFilter.outputImage else {
return nil
}
let sizeTransform = CGAffineTransform(scaleX: 10, y: 10)
let qrImage = image.transformed(by: sizeTransform)
// 空白の塗りつぶし画像を生成する
let maxRGB = headroom
let maxFillColor = CIColor(red: maxRGB, green: maxRGB, blue: maxRGB,
colorSpace: CGColorSpace(name: CGColorSpace.extendedLinearSRGB)!)!
let fillImage = CIImage(color: maxFillColor)
// マスクフィルターを使って、最終的なQRコード画像を作成します。
let maskFilter = CIFilter.blendWithMask()
maskFilter.maskImage = qrImage
maskFilter.inputImage = fillImage
// ハイライトレイヤーとQR画像を合成する
guard let combinedImage = maskFilter.outputImage else {
return nil
}
return combinedImage.cropped(to: CGRect(x: 0, y: 0,
width: 512.0 * scaleFactor,
height: 384.0 * scaleFactor))
})
それでは、メタルビューにQRコードを表示してみましょう。
@StateObject var renderer: Renderer // 変数
let metalView = MTKView(frame: .zero, device: renderer.device)
// MetalKitを通じてCore Animationに、ビューの再描画頻度を提案する。
metalView.preferredFramesPerSecond = 10
// Core Imageがメタルコンピュートパイプラインを使用してビューにレンダリングできるようにします。
metalView.framebufferOnly = false
metalView.delegate = renderer
if let layer = metalView.layer as? CAMetalLayer {
// SDRより大きな値をサポートする色空間でEDRを有効にする。
if #available(iOS 16.0, *) {
layer.wantsExtendedDynamicRangeContent = true
}
layer.colorspace = CGColorSpace(name: CGColorSpace.extendedLinearDisplayP3)
// レンダービューがEDRのピクセル値をサポートしていることを確認する。
metalView.colorPixelFormat = MTLPixelFormat.rgba16Float
}
上記のコードでは、
新しいMetalビュー MTKView を初期化し、
リフレッシュレート(フレーム毎秒)を10に設定し、
Renderer インスタンスに delegate を設定し、
EDR(Extended Dynamic Range)を使用するように設定しています。
UIKitを使用している場合は、このビューをそのままUIKitのビューに追加することができます view.addSubview(metalView)
アダプターを使うことで、SwiftUIと互換性のあるメタルビューを作ることもできます。
import SwiftUI
import MetalKit
struct MetalView: ViewRepresentable {
@StateObject var renderer: Renderer
/// - Tag: MakeView
func makeView(context: Context) -> MTKView {
let view = MTKView(frame: .zero, device: renderer.device)
// MetalKitを通じてCore Animationに、ビューの再描画頻度を提案する。
view.preferredFramesPerSecond = 10
// Core Imageがメタルコンピュートパイプラインを使用してビューにレンダリングできるようにします。
view.framebufferOnly = false
view.delegate = renderer
if let layer = view.layer as? CAMetalLayer {
// SDRより大きな値をサポートする色空間でEDRを有効にする。
if #available(iOS 16.0, *) {
layer.wantsExtendedDynamicRangeContent = true
}
layer.colorspace = CGColorSpace(name: CGColorSpace.extendedLinearDisplayP3)
// レンダービューがEDRのピクセル値をサポートしていることを確認する。
view.colorPixelFormat = MTLPixelFormat.rgba16Float
}
return view
}
func updateView(_ view: MTKView, context: Context) {
configure(view: view, using: renderer)
}
private func configure(view: MTKView, using renderer: Renderer) {
view.delegate = renderer
}
}
さて、初期化されたレンダラーのインスタンスと、上で作成した互換性のあるビューアダプターの両方を使用して、ハイライトされたQRコード画像を表示する単一のSwiftUIビューを作成することができます。
import SwiftUI
import CoreImage.CIFilterBuiltins
/// - Tag: ContentView
struct ContentView: View {
var body: some View {
// 独自のレンダラーを持つメタルビューを作成します。
let renderer = Renderer(imageProvider: { (scaleFactor: CGFloat, headroom: CGFloat) -> CIImage? in
// QRコード画像を生成する
guard let qrFilter = CIFilter(name: "CIQRCodeGenerator") else {
return nil
}
let qrCodeContent = "testing-highlighted-qr"
let inputData = qrCodeContent.data(using: .utf8)
qrFilter.setValue(inputData, forKey: "inputMessage")
qrFilter.setValue("H", forKey: "inputCorrectionLevel")
guard let image = qrFilter.outputImage else {
return nil
}
let sizeTransform = CGAffineTransform(scaleX: 10, y: 10)
let qrImage = image.transformed(by: sizeTransform)
// 空白の塗りつぶし画像を生成する
let maxRGB = headroom
let maxFillColor = CIColor(red: maxRGB, green: maxRGB, blue: maxRGB,
colorSpace: CGColorSpace(name: CGColorSpace.extendedLinearSRGB)!)!
let fillImage = CIImage(color: maxFillColor)
// マスクフィルターを使って、最終的なQRコード画像を作成します。
let maskFilter = CIFilter.blendWithMask()
maskFilter.maskImage = qrImage
maskFilter.inputImage = fillImage
// ハイライトレイヤーとQR画像を合成する
guard let combinedImage = maskFilter.outputImage else {
return nil
}
return combinedImage.cropped(to: CGRect(x: 0, y: 0,
width: 512.0 * scaleFactor,
height: 384.0 * scaleFactor))
})
MetalView(renderer: renderer)
}
}
struct ContentView_Previews: PreviewProvider {
static var previews: some View {
ContentView()
}
}
ここで、iPhoneで実行すると、QRコードだけがハイライトされるのが見えます。
また、異なる塗りつぶしレイヤーを生成することで、画像の異なる部分を強調することができます。また、明るさの値を1より小さくすることで、特定の部分をより暗くすることができます。
お読みいただきありがとうございました。