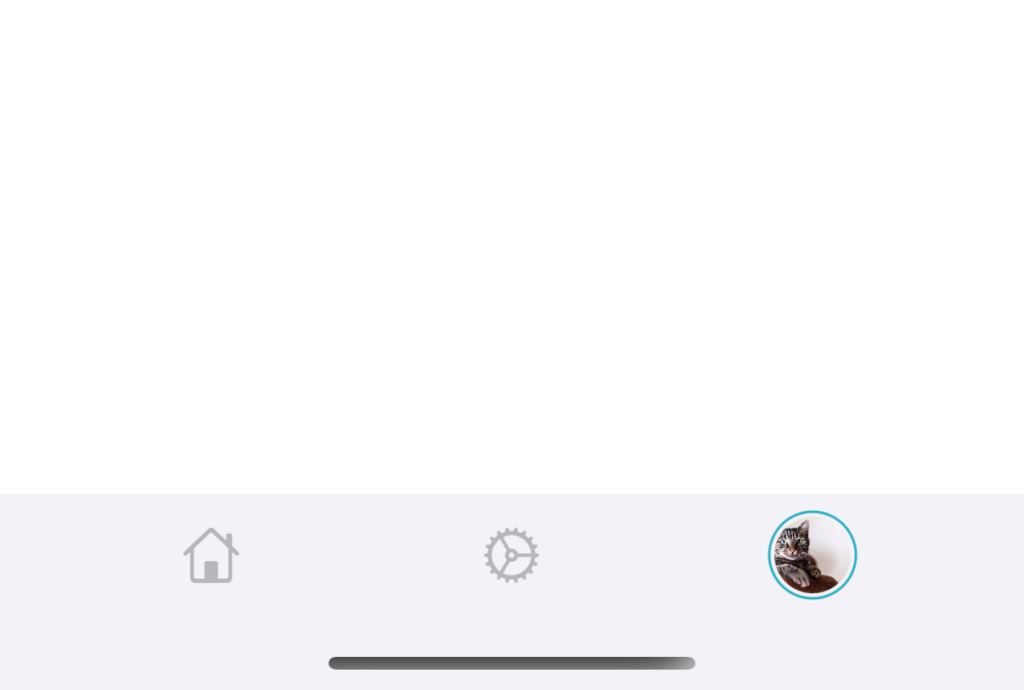
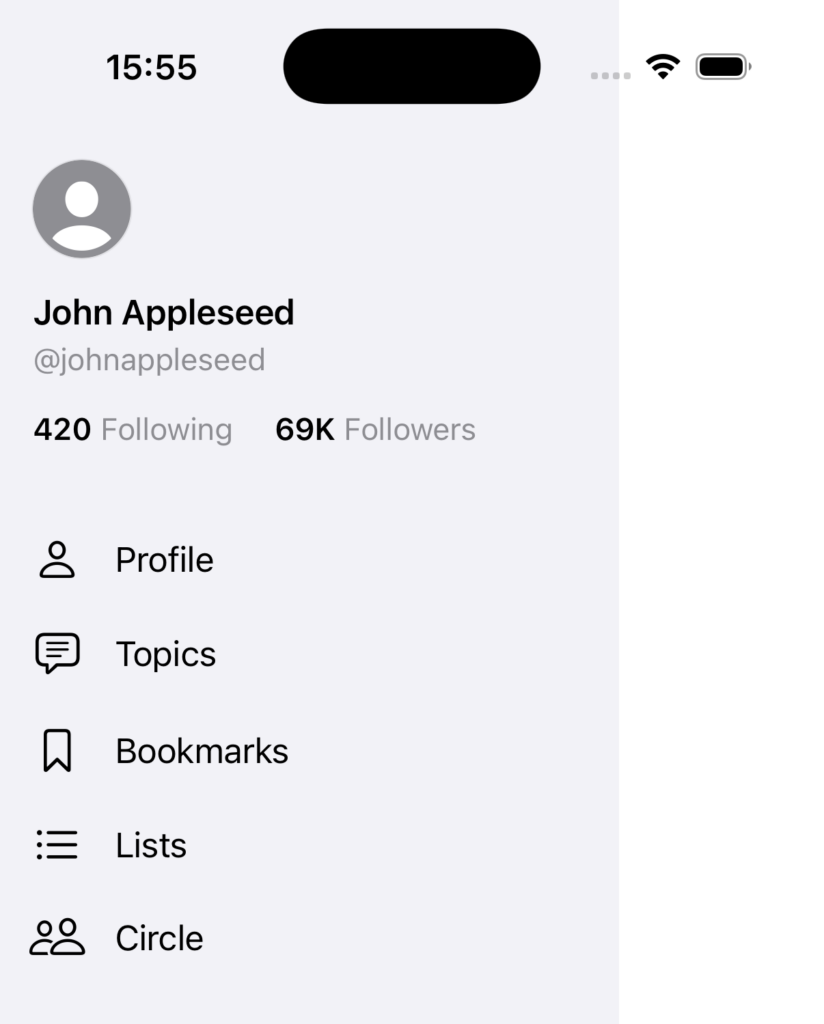
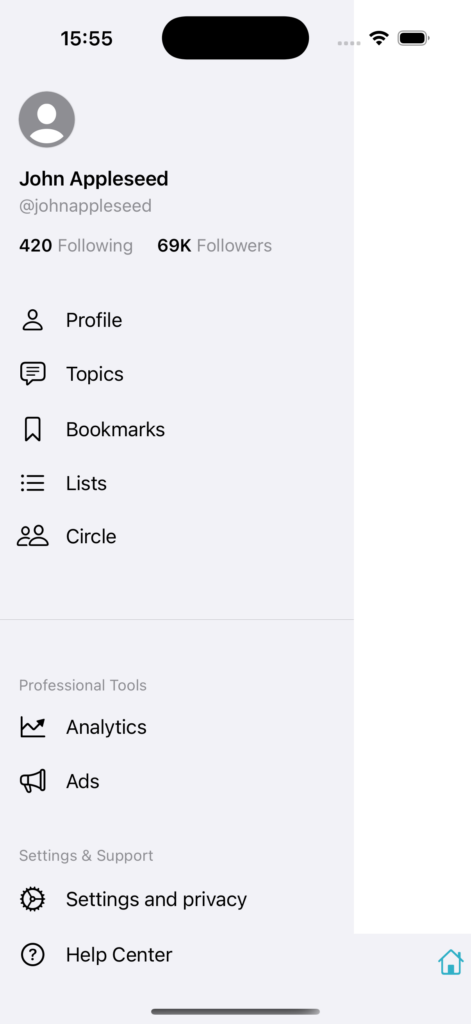
In this article, we will implement a tab bar that has a user avatar (custom tab bar), and a slide to open side-bar within our SwiftUI application.

Custom tab bar
The benefit of using a custom tab bar is that you can add images, or menus (for example, allow the user to quickly switch to another account).

First, we will define which tab we have using an enum:
enum CurrentTab {
    case home
    case settings
    case profile
}
We will create a variable to store and control which tab is currently selected:
@State private var currentTab: CurrentTab = .homeFor custom tab bar, we will still use a TabView , however, we will not provide the .tabItem for each of the view inside. This way, the system will not display the default tab bar.
TabView(selection: $currentTab) {

    Text("Home page")
        .tag(CurrentTab.home)

    Text("Settings page")
        .tag(CurrentTab.settings)

    Text("Profile page")
        .tag(CurrentTab.profile)

}
Then, we use a ZStack aligned to the bottom of the screen to add our custom tab bar on top of the current view.
var body: some View {

    ZStack(alignment: .bottom) {
        TabView(selection: $currentTab) {

            Text("Home page")
                .tag(CurrentTab.home)

            Text("Settings page")
                .tag(CurrentTab.settings)

            Text("Profile page")
                .tag(CurrentTab.profile)

        }

        floatingToolBar

    }

}
Now, I need to implement my tab bar. I first write a custom structure that stores the view of a single tab item within that tab bar:
func CustomTabItem(symbolName: String, isActive: Bool) -> some View{
    HStack {
        Image(systemName: symbolName)
            .resizable()
            .foregroundColor(isActive ? .teal : .gray)
            .opacity(isActive ? 1 : 0.6)
            .frame(width: 22, height: 22)
    }
    .frame(maxWidth: .infinity)
    .frame(height: 38)
}
Here, I am just showing an image, but you can use a VStack and put a text label at the bottom.
Now, I will implement my floating tab bar:
var floatingToolBar: some View {
    HStack {

        Spacer()

        Button {
            self.currentTab = .home
        } label: {
            CustomTabItem(
                symbolName: "house",
                isActive: self.currentTab == .home)
        }

        Spacer()

        Button {
            self.currentTab = .settings
        } label: {
            CustomTabItem(
                symbolName: "gear",
                isActive: self.currentTab == .settings)
        }

        Spacer()

        Button {
            self.currentTab = .profile
        } label: {
            AsyncImage(url: URL(string: "https://cdn.pixabay.com/photo/2024/03/07/10/38/simba-8618301_640.jpg")!) { loadedImage in
                loadedImage
                    .resizable()
                    .scaledToFit()
                    .clipShape(Circle())
                    .frame(maxWidth: .infinity)
                    .frame(height: 30)
                    .padding(2)
                    .background {
                        if self.currentTab == .profile {
                            Circle()
                                .stroke(.teal, lineWidth: 1)
                        }
                    }
            } placeholder: {
                ProgressView()
            }
            .frame(maxWidth: .infinity)
            .frame(height: 30)
        }

        Spacer()

    }
    .frame(maxWidth: .infinity)
    .padding(.top, 5)
    .padding(.horizontal, 20)
    .background(Color(uiColor: .systemGroupedBackground))
}
When the button is activated, it will have a blue color, otherwise, it will be gray.
Also, you can see, the benefit of the custom tab bar is that you can put any view components. For example, I can add a menu or an image (to show the user’s avatar image for example).
You can also enable customization of the tab bar by allowing the user to turn on or off certain tabs.
Now we have completed the custom tab bar. Let’s move on to the custom side bar.
Custom side bar

To implement the custom side bar, we will use a HStack to put a menu on the left side of our main content.
We will use a GeometryReader on the outside to read the size of the screen. We will then calculate the width of the side bar.
var body: some View {
    GeometryReader { geometry in
        let sideBarWidth = geometry.size.width - 100

    }
 }
Then, we set the width of the side bar as the `sideBarWidth` and the width of the main content view the same as the screen width:
var body: some View {
    GeometryReader { geometry in
        let sideBarWidth = geometry.size.width - 100

        HStack(spacing: 0) {
            // Side Menu
            SideMenuView()
                .frame(width: sideBarWidth)

            // Main Content, which is the TabView from the above section
            MainContentView()
                .frame(width: geometry.size.width)
        }
    }
}
But if we set the frame that way, the view will overflow the screen. So when the view is initially shown, we will set the offset on x axis, so the view initially only shows the content, and only if user scrolls that it will show the menu.
In the below code, initially, the navigationState.offset value is 0, so the initial offset is set to just hide the menu. When the user starts drag gesture from left to right, it will update the offset x so it shows part of the side menu.
var body: some View {
    GeometryReader { geometry in
        let sideBarWidth = geometry.size.width - 100

        HStack(spacing: 0) {
            // Side Menu
            SideMenuView()
                .frame(width: sideBarWidth)

            // Main Content, which is the TabView from the above section
            MainContentView()
                .frame(width: geometry.size.width)
        }
+        .offset(x: -sideBarWidth + navigationState.offset)
    }
}
Notice that it is important to define the frame .frame(width: geometry.size.width) for your main content view as well, so it fills the entire screen width.
Then, we add the additional code for handling user’s gesture.
Here is the completed code:
struct ContentView: View {
    @StateObject private var navigationState = NavigationState()
    @GestureState private var gestureOffset: CGFloat = 0

    var body: some View {
        GeometryReader { geometry in
            let sideBarWidth = geometry.size.width - 100

            HStack(spacing: 0) {
                // Side Menu
                SideMenuView()
                    .frame(width: sideBarWidth)

                // Main Content, which is the TabView from the above section
                VStack {
                    HStack {
                        Rectangle().foregroundColor(.blue)
                    }
                }
                .frame(width: geometry.size.width)
            }
            .offset(x: -sideBarWidth + navigationState.offset)
            .gesture(
                DragGesture()
                    .updating($gestureOffset) { value, state, _ in  // Use the local gestureOffset
                        state = value.translation.width
                    }
                    .onEnded { value in
                        navigationState.handleGestureEnd(value: value, sideBarWidth: sideBarWidth)
                    }
            )
            .animation(.linear(duration: 0.15), value: navigationState.offset == 0)
            .onChange(of: navigationState.showMenu) { newValue in
                handleMenuVisibilityChange(sideBarWidth: sideBarWidth)
            }
            .onChange(of: gestureOffset) { newValue in  // Use the local gestureOffset
                handleGestureOffsetChange(sideBarWidth: sideBarWidth, gestureOffset: newValue)
            }
        }
    }

    private func handleMenuVisibilityChange(sideBarWidth: CGFloat) {
        if navigationState.showMenu && navigationState.offset == 0 {
            navigationState.offset = sideBarWidth
            navigationState.lastStoredOffset = navigationState.offset
        }

        if !navigationState.showMenu && navigationState.offset == sideBarWidth {
            navigationState.offset = 0
            navigationState.lastStoredOffset = 0
        }
    }

    private func handleGestureOffsetChange(sideBarWidth: CGFloat, gestureOffset: CGFloat) {
        if gestureOffset != 0 {
            let potentialOffset = navigationState.lastStoredOffset + gestureOffset
            if potentialOffset < sideBarWidth && potentialOffset > 0 {
                navigationState.offset = potentialOffset
            } else if potentialOffset < 0 {
                navigationState.offset = 0
            }
        }
    }
}

// MARK: - Navigation State
class NavigationState: ObservableObject {
    @Published var showMenu: Bool = false
    @Published var offset: CGFloat = 0
    @Published var lastStoredOffset: CGFloat = 0

    func handleGestureEnd(value: DragGesture.Value, sideBarWidth: CGFloat) {
        withAnimation(.spring(duration: 0.15)) {
            if value.translation.width > 0 {
                // Handle opening gesture
                if value.translation.width > sideBarWidth / 2 {
                    openMenu(sideBarWidth: sideBarWidth)
                } else if value.velocity.width > 800 {
                    openMenu(sideBarWidth: sideBarWidth)
                } else if !showMenu {
                    closeMenu()
                }
            } else {
                // Handle closing gesture
                if -value.translation.width > sideBarWidth / 2 {
                    closeMenu()
                } else {
                    guard showMenu else { return }

                    if -value.velocity.width > 800 {
                        closeMenu()
                    } else {
                        openMenu(sideBarWidth: sideBarWidth)
                    }
                }
            }
        }
        lastStoredOffset = offset
    }

    private func openMenu(sideBarWidth: CGFloat) {
        offset = sideBarWidth
        lastStoredOffset = sideBarWidth
        showMenu = true
    }

    private func closeMenu() {
        offset = 0
        showMenu = false
    }
}
We use the handleGestureOffsetChange function to check if the offset is valid (from zero up to the width of the menu). If the offset is valid, we update it to the navigationState.offset , which will then affect the above offset of the view.
In the handleGestureEnd function, we are running multiple checks to decide whether to open a menu if the user is swiping from left side to right side:
if value.translation.width > sideBarWidth / 2 this code means the user has slide the menu open.
else if value.velocity.width > 800 this means the user has not yet slide to the required width to open the menu, but the user is sliding the screen very fast, so we open the menu as well.
The logic for closing the menu is the same, which works by checking the distance user has swiped, and check the velocity.
Now, you have a side bar menu that can be open and close like a drawer.
Complete code for side menu and custom tool bar
//
//  ContentView.swift
//  TabBarSideBarDemo
//
//  Created by msz on 2024/12/09.
//

import SwiftUI

enum CurrentTab {
    case home
    case settings
    case profile
}

struct ContentView: View {
    @StateObject private var navigationState = NavigationState()
    @GestureState private var gestureOffset: CGFloat = 0
    @State private var currentTab: CurrentTab = .home

    var body: some View {
        GeometryReader { geometry in
            let sideBarWidth = geometry.size.width - 100

            HStack(spacing: 0) {
                // Side Menu
                SideMenuView()
                    .frame(width: sideBarWidth)

                // Main Content, which is the TabView from the above section
                ZStack(alignment: .bottom) {
                    TabView(selection: $currentTab) {

                        Text("Home page")
                            .tag(CurrentTab.home)

                        Text("Settings page")
                            .tag(CurrentTab.settings)

                        Text("Profile page")
                            .tag(CurrentTab.profile)

                    }

                    floatingToolBar
                }
                .frame(width: geometry.size.width)
            }
            .offset(x: -sideBarWidth + navigationState.offset)
            .gesture(
                DragGesture()
                    .updating($gestureOffset) { value, state, _ in  // Use the local gestureOffset
                        state = value.translation.width
                    }
                    .onEnded { value in
                        navigationState.handleGestureEnd(value: value, sideBarWidth: sideBarWidth)
                    }
            )
            .animation(.linear(duration: 0.15), value: navigationState.offset == 0)
            .onChange(of: navigationState.showMenu) { newValue in
                handleMenuVisibilityChange(sideBarWidth: sideBarWidth)
            }
            .onChange(of: gestureOffset) { newValue in  // Use the local gestureOffset
                handleGestureOffsetChange(sideBarWidth: sideBarWidth, gestureOffset: newValue)
            }
        }
    }

    // MARK: Custom side menu

    private func handleMenuVisibilityChange(sideBarWidth: CGFloat) {
        if navigationState.showMenu && navigationState.offset == 0 {
            navigationState.offset = sideBarWidth
            navigationState.lastStoredOffset = navigationState.offset
        }

        if !navigationState.showMenu && navigationState.offset == sideBarWidth {
            navigationState.offset = 0
            navigationState.lastStoredOffset = 0
        }
    }

    private func handleGestureOffsetChange(sideBarWidth: CGFloat, gestureOffset: CGFloat) {
        if gestureOffset != 0 {
            let potentialOffset = navigationState.lastStoredOffset + gestureOffset
            if potentialOffset < sideBarWidth && potentialOffset > 0 {
                navigationState.offset = potentialOffset
            } else if potentialOffset < 0 {
                navigationState.offset = 0
            }
        }
    }

    // MARK: Custom tab bar

    var floatingToolBar: some View {
        HStack {

            Spacer()

            Button {
                self.currentTab = .home
            } label: {
                CustomTabItem(
                    symbolName: "house",
                    isActive: self.currentTab == .home)
            }

            Spacer()

            Button {
                self.currentTab = .settings
            } label: {
                CustomTabItem(
                    symbolName: "gear",
                    isActive: self.currentTab == .settings)
            }

            Spacer()

            Button {
                self.currentTab = .profile
            } label: {
                AsyncImage(url: URL(string: "https://cdn.pixabay.com/photo/2024/03/07/10/38/simba-8618301_640.jpg")!) { loadedImage in
                    loadedImage
                        .resizable()
                        .scaledToFit()
                        .clipShape(Circle())
                        .frame(maxWidth: .infinity)
                        .frame(height: 30)
                        .padding(2)
                        .background {
                            if self.currentTab == .profile {
                                Circle()
                                    .stroke(.teal, lineWidth: 1)
                            }
                        }
                } placeholder: {
                    ProgressView()
                }
                .frame(maxWidth: .infinity)
                .frame(height: 30)
            }

            Spacer()

        }
        .frame(maxWidth: .infinity)
        .padding(.top, 5)
        .padding(.horizontal, 20)
        .background(Color(uiColor: .systemGroupedBackground))
    }

    func CustomTabItem(symbolName: String, isActive: Bool) -> some View{
        HStack {
            Image(systemName: symbolName)
                .resizable()
                .foregroundColor(isActive ? .teal : .gray)
                .opacity(isActive ? 1 : 0.6)
                .frame(width: 22, height: 22)
        }
        .frame(maxWidth: .infinity)
        .frame(height: 38)
    }
}

// MARK: - Navigation State
class NavigationState: ObservableObject {
    @Published var showMenu: Bool = false
    @Published var offset: CGFloat = 0
    @Published var lastStoredOffset: CGFloat = 0

    func handleGestureEnd(value: DragGesture.Value, sideBarWidth: CGFloat) {
        withAnimation(.spring(duration: 0.15)) {
            if value.translation.width > 0 {
                // Handle opening gesture
                if value.translation.width > sideBarWidth / 2 {
                    openMenu(sideBarWidth: sideBarWidth)
                } else if value.velocity.width > 800 {
                    openMenu(sideBarWidth: sideBarWidth)
                } else if !showMenu {
                    closeMenu()
                }
            } else {
                // Handle closing gesture
                if -value.translation.width > sideBarWidth / 2 {
                    closeMenu()
                } else {
                    guard showMenu else { return }

                    if -value.velocity.width > 800 {
                        closeMenu()
                    } else {
                        openMenu(sideBarWidth: sideBarWidth)
                    }
                }
            }
        }
        lastStoredOffset = offset
    }

    private func openMenu(sideBarWidth: CGFloat) {
        offset = sideBarWidth
        lastStoredOffset = sideBarWidth
        showMenu = true
    }

    private func closeMenu() {
        offset = 0
        showMenu = false
    }

}

// MARK: - Preview
#Preview {
    ContentView()
        .environmentObject(NavigationState())
}
Thank you for reading!
The code in this article is available at: https://github.com/mszpro/Custom-Side-Tab-Bar
Japanese version: https://qiita.com/mashunzhe/items/17fa31267e69e2fd8cd8

Follow me on Twitter: https://twitter.com/mszpro
Subscribe on Youtube: https://www.youtube.com/@MszPro6
Mastodon, Misskey: @[email protected]
Bluesky: @mszpro.com
Website: https://mszpro.com
SoraSNS for Mastodon, Misskey, Bluesky, Nostr all in one: https://mszpro.com/sorasns


