
Can you make the same view as shown in the header thumbnail?
If you can, save your time by skipping this article. Otherwise, let’s go!
Different default font size
We will start off with the basics like font size.
You can use the .font(.title3) to set a preset font size:
If you want to use system style but a custom size, you can use .font(.system(size: 60))
For using a custom font file (like .ttf) you can refer to here: https://developer.apple.com/documentation/swiftui/applying-custom-fonts-to-text/
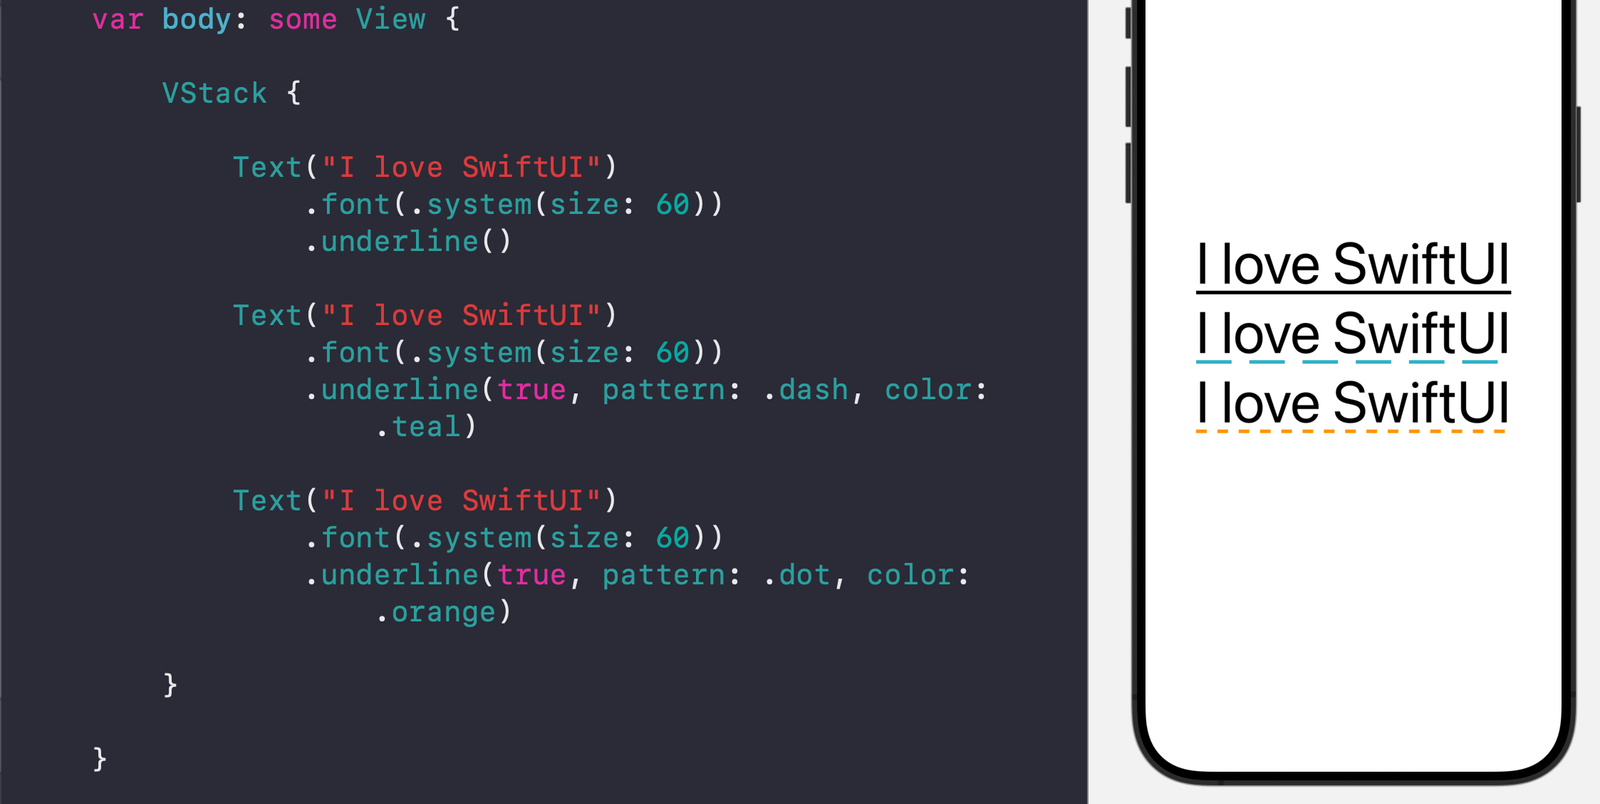
Underline
You can add an underline with many styles like dashed, dotted.
If you do not provide any parameters for the .underline() view modifier, it will draw a solid line with the same color as text.
You can also supply a Bool variable to control whether the underline is active, specify a pattern (dash or dot or both), and specify a color.
struct TextModifiers: View {

    var body: some View {

        VStack {

            Text("I love SwiftUI")
                .font(.system(size: 60))
                .underline()

            Text("I love SwiftUI")
                .font(.system(size: 60))
                .underline(true, pattern: .dash, color: .teal)

            Text("I love SwiftUI")
                .font(.system(size: 60))
                .underline(true, pattern: .dot, color: .orange)

        }

    }

}
Strikethrough
You can set strike through to use a line to cross the text.
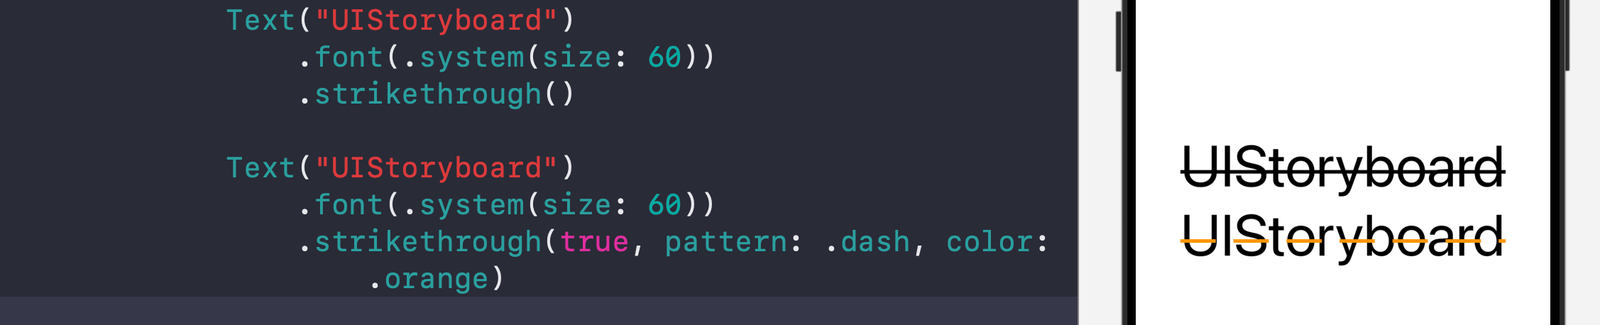
Similar to the above underline view modifier, you can provide no parameters, or the parameter to control whether to activate the strikethrough, the pattern, or the color.
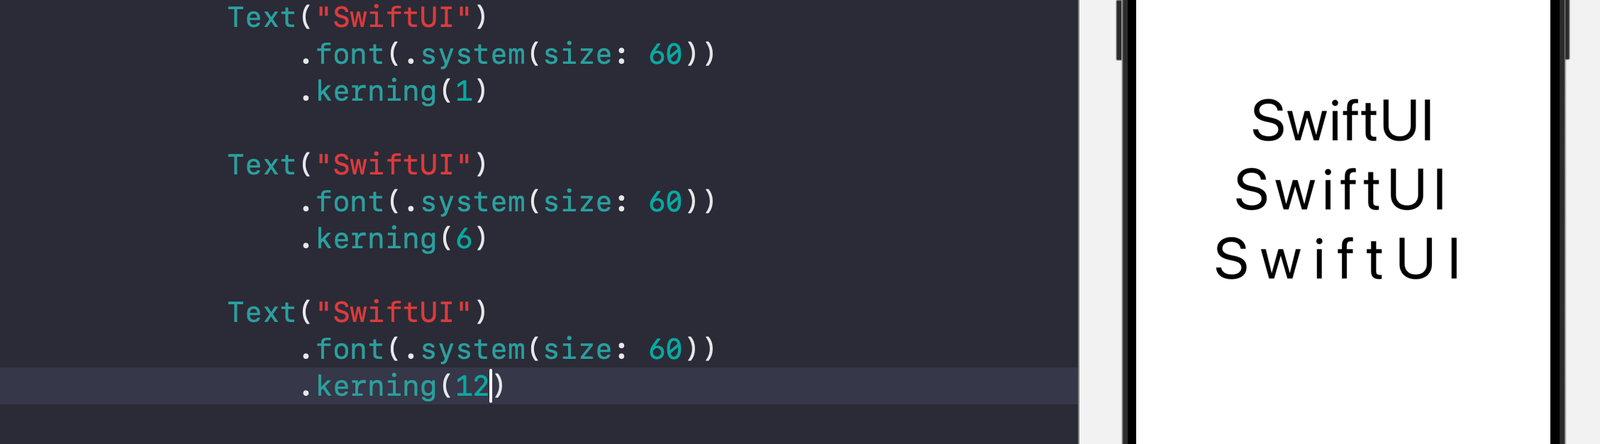
Kerning
This view modifier controls the spacing between each character.
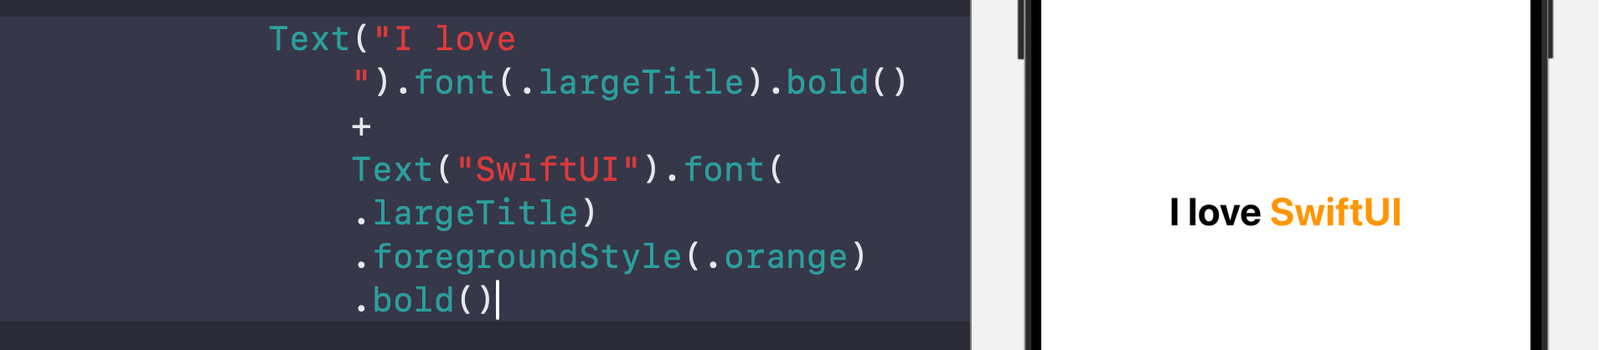
Combining multiple text with different styles
You can join Text views by using the + operator.
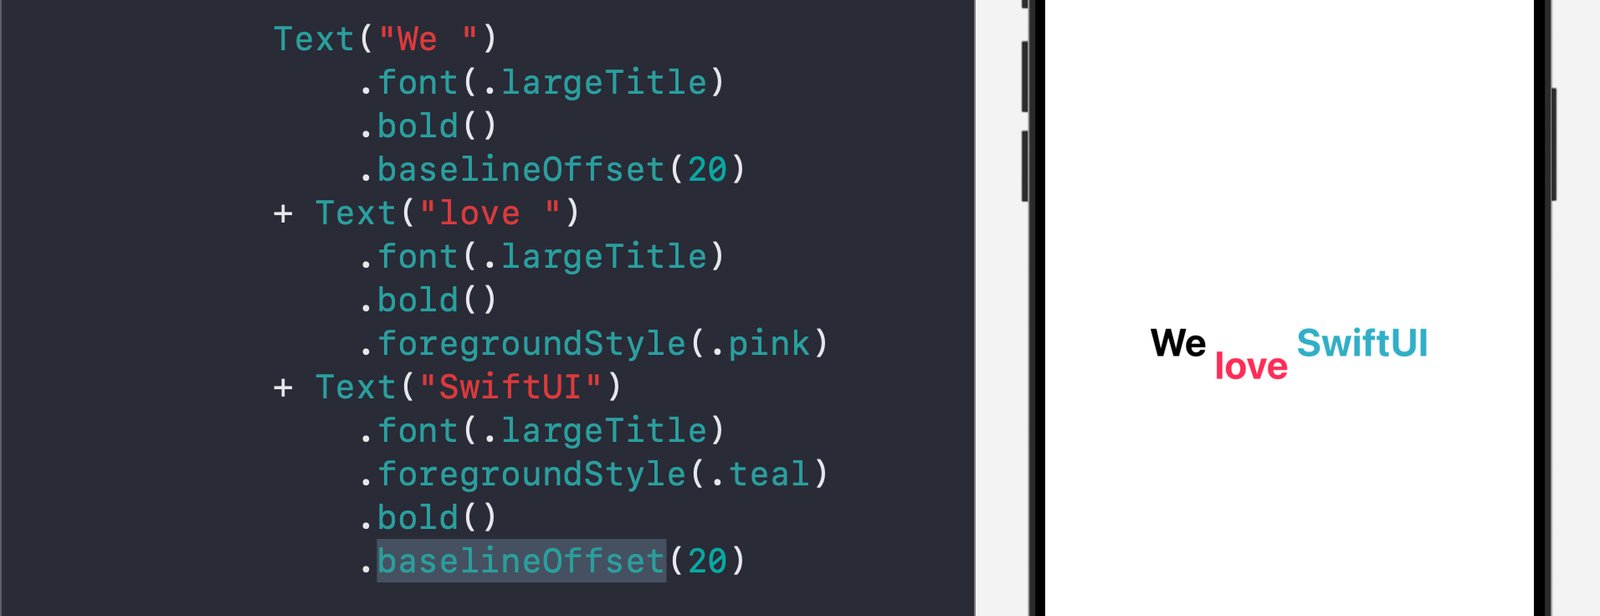
Adjust the offset (on vertical axis)
You can use the baselineOffset view modifier to adjust the vertical offset of the text. You can also use the above method to create an artistic looking text:
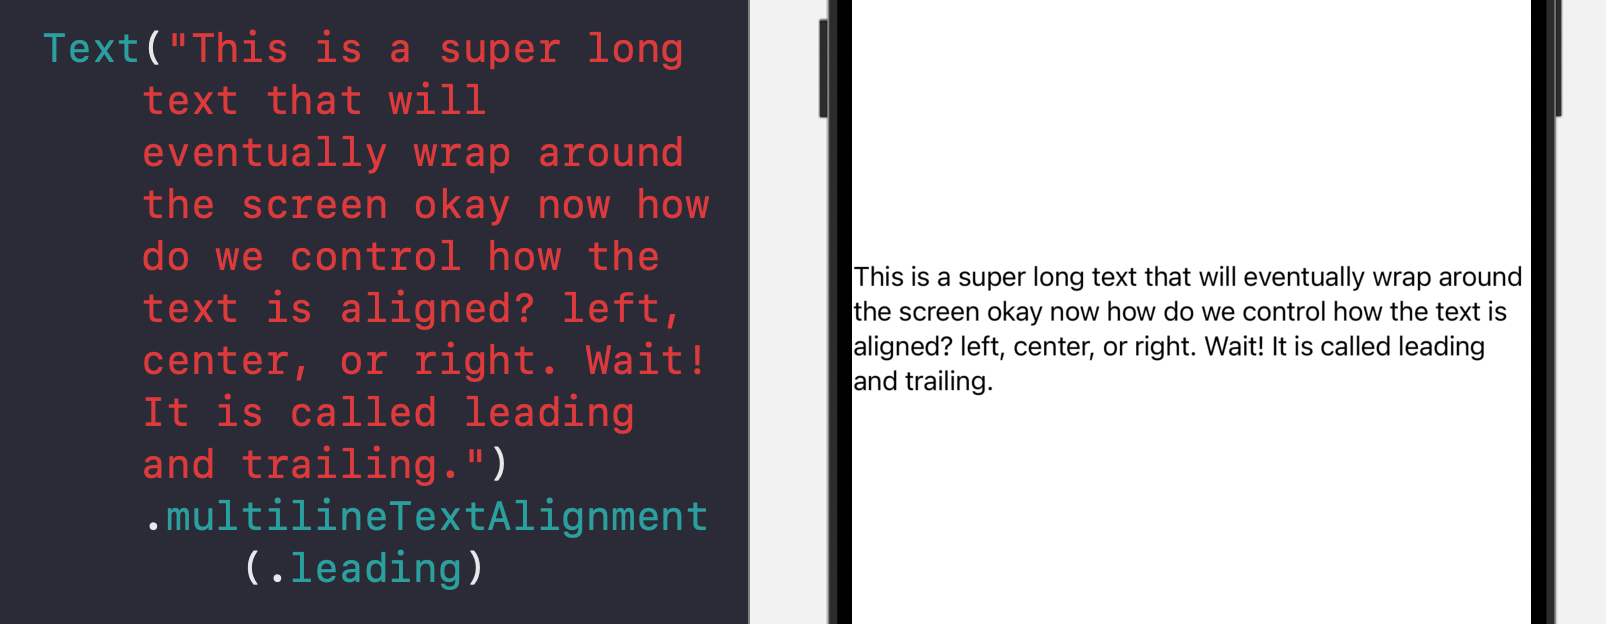
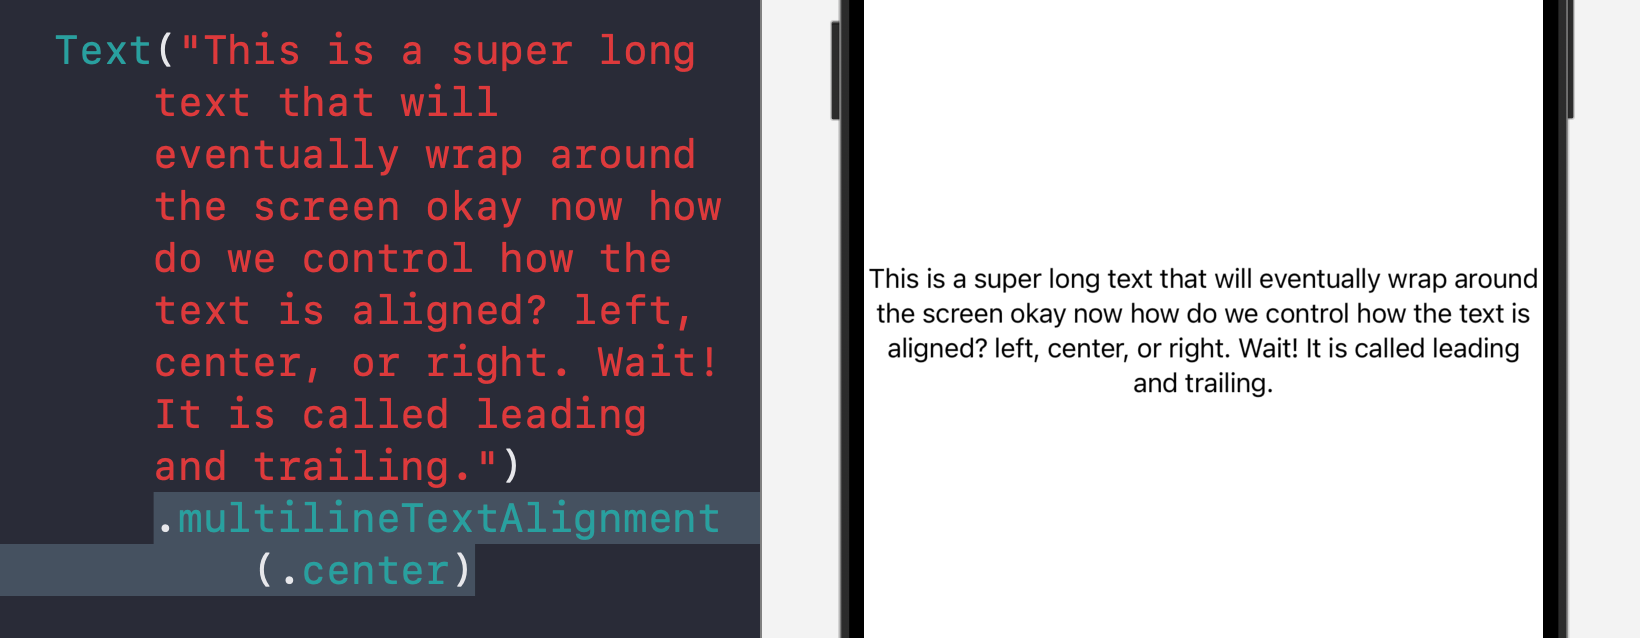
Control where text is aligned for multiple lines
You can use the multilineTextAlignment to control multi-line text alignment, whether all aligned to the left (leading) edge, the center, or the right (trailing edge)

Font design
You can change the font design to fit the looking of your overall view:
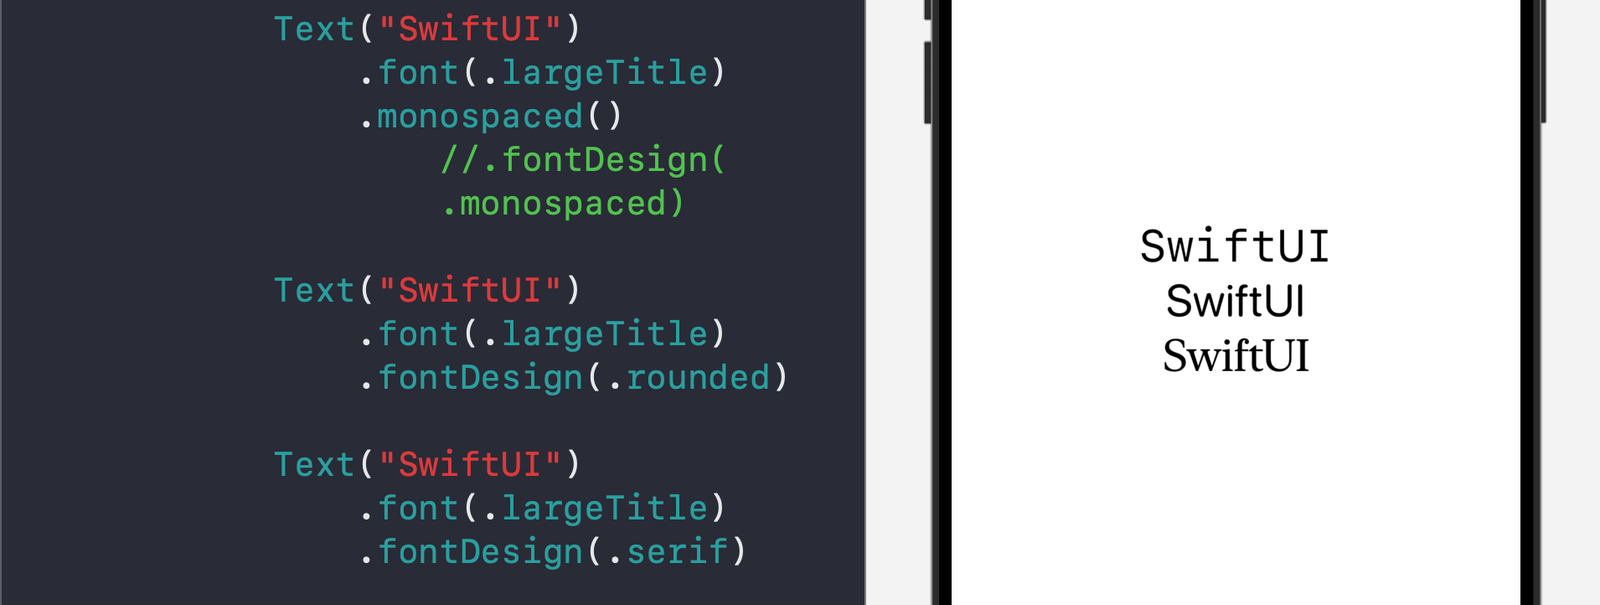
For example, you can use monospaced design to help the user see each character of the text clearly (for example, when displaying a username or password).
Show SF Symbol within text
You can show system symbol in line with the text:
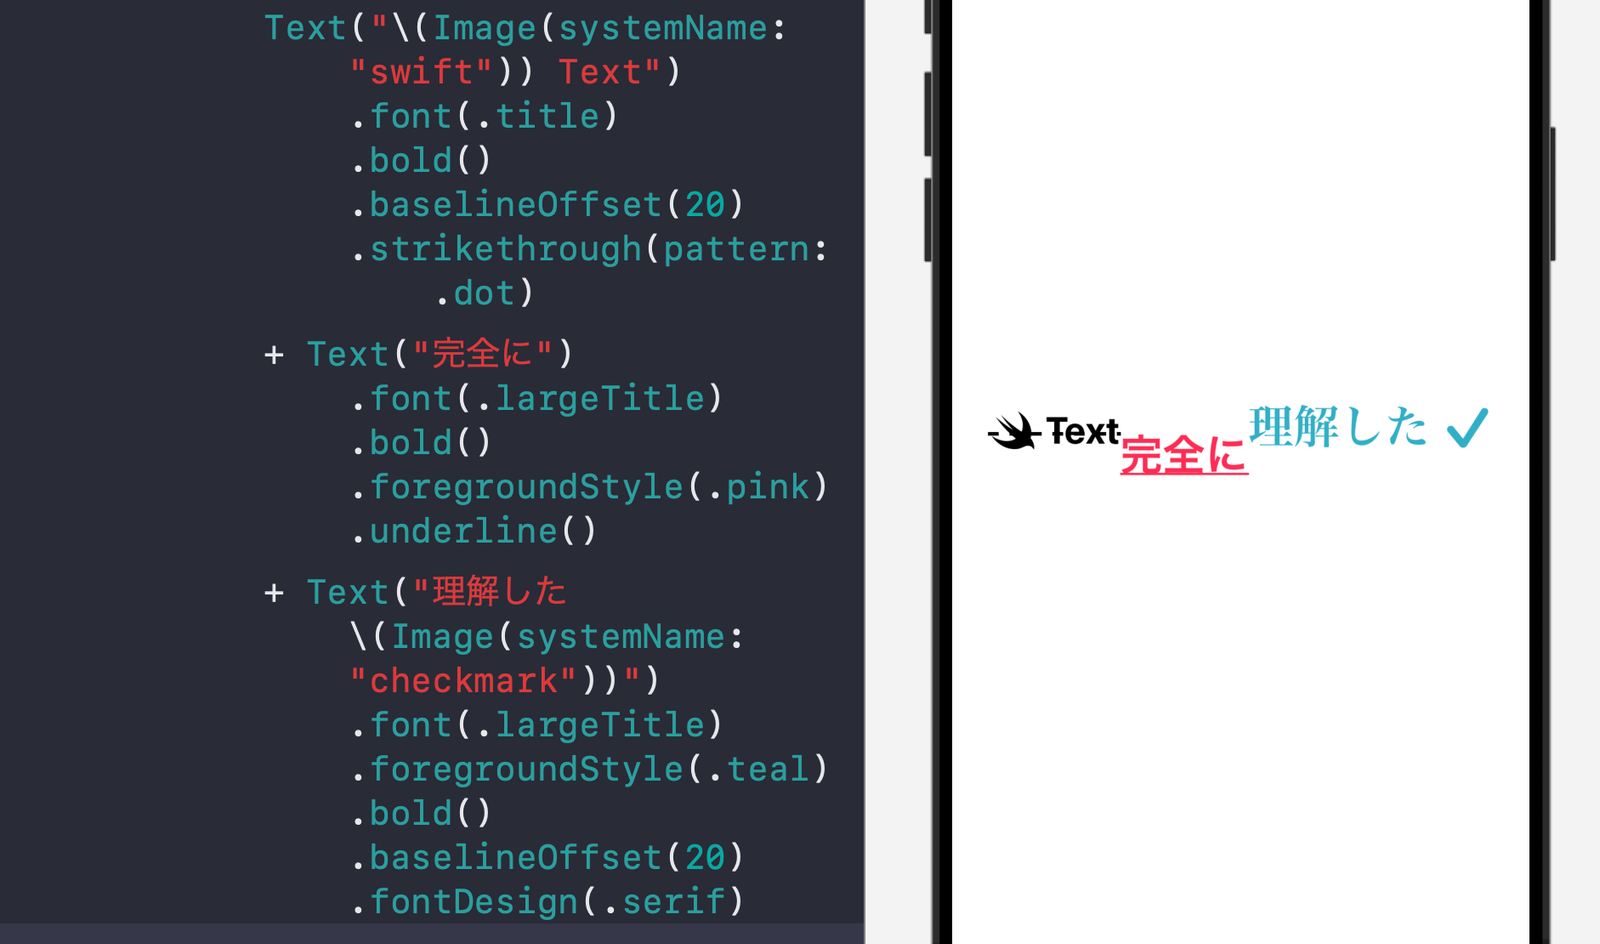
You can also use the \() format to show a variable like a number.
Complete example code:
//
//  TextModifiers.swift
//  WhatsNewIniOS18
//
//  Created by Msz on 8/10/24.
//

import SwiftUI

struct TextModifiers: View {

    var body: some View {

        List {

            Text("I love SwiftUI")
                .font(.system(size: 60))
                .underline()

            Text("I love SwiftUI")
                .font(.system(size: 60))
                .underline(true, pattern: .dash, color: .teal)

            Text("I love SwiftUI")
                .font(.system(size: 60))
                .underline(true, pattern: .dot, color: .orange)

            Text("UIStoryboard")
                .font(.system(size: 60))
                .strikethrough()

            Text("UIStoryboard")
                .font(.system(size: 60))
                .strikethrough(true, pattern: .dash, color: .orange)

            Text("SwiftUI")
                .font(.system(size: 60))
                .kerning(1)

            Text("SwiftUI")
                .font(.system(size: 60))
                .kerning(6)

            Text("SwiftUI")
                .font(.system(size: 60))
                .kerning(12)

            Text("I love ").font(.largeTitle).bold() + Text("SwiftUI").font(.largeTitle).foregroundStyle(.orange).bold()

            Text("\(Image(systemName: "swift")) Text")
                .font(.title)
                .bold()
                .baselineOffset(20)
                .strikethrough(pattern: .dot)
            + Text("完全に")
                .font(.largeTitle)
                .bold()
                .foregroundStyle(.pink)
                .underline()
            + Text("理解した \(Image(systemName: "checkmark"))")
                .font(.largeTitle)
                .foregroundStyle(.teal)
                .bold()
                .baselineOffset(20)
                .fontDesign(.serif)

            Text("This is a super long text that will eventually wrap around the screen okay now how do we control how the text is aligned? left, center, or right. Wait! It is called leading and trailing.")
                .multilineTextAlignment(.trailing)

            Text("SwiftUI")
                .font(.largeTitle)
                .monospaced() //.fontDesign(.monospaced)

            Text("SwiftUI")
                .font(.largeTitle)
                .fontDesign(.rounded)

            Text("SwiftUI")
                .font(.largeTitle)
                .fontDesign(.serif)

        }

    }

}

#Preview {
    TextModifiers()
}